Chicory Coffee

Cleaned and ground chicory roots add a chocolate flavor to traditional coffee. (Photo by Charlotte Ekker Wiggins)

Cleaned and ground chicory roots add a chocolate flavor to traditional coffee. (Photo by Charlotte Ekker Wiggins)

Chicory Coffee 

It was a staple during World War II when coffee beans were not available. I used to assume chicory coffee would be something campers would make when cooking out in the woods. Now chicory coffee is offered in some upscale coffee bars and as a specialty brew.

We can all make chicory coffee at home with a few precautions about where we collect the plants, which are herbs and wonderful pollinator plants.

Chicory Coffee Recipe

Courtesy of Lee Allen Peterson’s  Field Guide to Edible Wild Plants

Harvest chicory from a chemical free area. Wash; dry roots.

Roast in oven until dark brown and brittle. Grind as you would coffee beans. 

Use roughly 1 ½ tsps. ground chicory root for every cup of water.

I had my first taste of chicory coffee when I was in New Orleans where I was told beignets go hand in hand with a cup of chicory coffee.  Who was I to argue?

For more tips on gardening, beekeeping, cooking and easy home decor, subscribe to my weekly Garden Notes.

Charlotte

Ice Storm Chicken and Veggie Rosemary Stew

Fresh rosemary sprigs added at the end are the secret to this delicious chicken veggie stew.

Ice Storm Chicken and Veggie Rosemary Stew

I just had some and, if I don't mind saying it myself, it was SO good. Simple, flavorful...I'm in love with fresh rosemary.

Fresh rosemary, left and right, growing in my indoor herb garden. (Photo by Charlotte Ekker Wiggins)

Luckily I still have fresh rosemary growing in my dining room window so I can easily toss a few sprigs into whatever I’m making. It may be cold and icy outside but anything hot, like this soup, is a warm welcome.

This is the basic soup recipe I use when I want to clean out my crisper. If you want a soup, add more broth, water or wine; I wanted something hardier so I'm calling this a stew.

Ice Storm Chicken and Veggie Rosemary Stew Recipe

2 cans vegetable broth

3 cut up medium carrots

3 diced celery stalks

1 diced medium onion

1 cup water

1 tsp sea salt

Half of a diced green pepper (this was left over from a salad)

Cook on low until the vegetables are cooked, about half an hour or so.

Add I baked chicken breast, cut up into small pieces

3 3-inch fresh rosemary sprigs

Cut up mushrooms - I forgot to add those, will next time. 

Continue cooking on low until chicken is integrated into the vegetable mixture and the rosemary blends in, about 5 minutes. Serve.

Makes 4 hearty servings.

I can imagine this with other vegetables - broccoli, green beans, zucchini leaving the fresh rosemary as the star.

A hedge of native cedars covered in snow and ice January 2022. (Photo by Charlotte Ekker Wiggins)

It's too cold and dangerous to be outside because of the ice storm so I'm enjoying reading a book and playing in the kitchen. I'm lucky to have written this recipe down immediately after making it or I would not have remembered the ingredient amounts later. Friends and family know that's a regular hazard when enjoying meals at my house, they may never enjoy the same one again because I like to experiment.

Oh, I have recipe books. I collect recipe books and have some classics, from my Mother's Betty Crocker cookbook to the American Cooking Encyclopedia. I enjoy reading them. Much more fun to chop, mix and see what I can cook up on my own without a prompt - most of the time.

Ice Storm Chicken and Veggie Rosemary Stew is delicious the next day, too. Regardless of the weather!

Charlotte


Hot Cocoa Mix Recipe

Best homemade hot cocoa for a snowy winter day. (Photo by Charlotte Ekker Wiggins)

Hot Cocoa Mix Recipe

It's cold, really cold. Snow is still falling. Perfect time for a great drink like a cup of homemade hot cocoa.

Look for the Special Dark chocolate, usually available only around the holidays. (Photo by Charlotte Ekker Wiggins)

As in many things in life, the difference is the kind of chocolate you use. I stock up on Hershey’s Unsweetened Dark Chocolate around the holidays, when it’s usually the only time of the year when I can find it.

There are other chocolate options but in general, the better the chocolate the better the hot cocoa.

My first batch of homemade hot cocoa mix being tested. It passed inspection with flying colors.

The first recipe I found was pretty basic and had none of the rich texture one gets from buying hot cocoa mix in fancy containers.

After some research, I found this recipe from Alton Brown that includes a secret ingredient that makes all of the difference - cayenne pepper flakes.

I have now made this recipe a couple of times, once for gifts and the second time to have a supply for myself. 

Homemade Hot Cocoa Mix Ingredients (for 5 cups of dry mix)

  • 2 cups powdered sugar

  • 1 cup cocoa (Dutch-process preferred); Hershey's Special Dark Chocolate is another option.

  • 2 1/2 cups powdered milk

  • 1 teaspoon salt

  • 2 teaspoons cornstarch

  • optional - 1 pinch cayenne pepper, or more to taste

  • optional - add baking chips like butterscotch or mint to the top

To serve, start with 2 tablespoons per 8 ounces of hot water. Mix a couple ounces of hot water in mix first, then add hot water to taste.

To mix well, I will measure the mix and water in a blender and give it a whirl.

You can add other things like toffee bits, candy cane crumbs, honey or candy baking chips to the mix. If you like a little variety, try spices such as cinnamon or pumpkin pie spice.

Simply whisk the ingredients together.

Homemade Hot Cocoa Mix Gift Idea

You can give it as a gift all on its own, or pair it with other yummy treats. Arrange it in a gift basket with a mug all on its own with the recipe. You can also add cookies.

A canning jar is perfect for packaging edible gifts like hot cocoa mix although my preference is interesting glass jars with tight lids. Use a colorful ribbon and a gift tag with instructions.

Although I tend to see these kinds of recipes at Christmas, it's a nice gift idea for Valentine's Day, too and for any fall and winter birthdays. Or as a gift for yourself.

Homemade hot chocolate is perfect for a snowy day with marshmallows. (Photo by Charlotte Ekker Wiggins)

When I get ready for winter snow storms, hot chocolate and marshmallows are a favorite treat!

Charlotte

Winter Hardy Bean Chili

This chili uses ingredients from my garden. Add glass of milk and a cold winter day to appreciate.


Winter Hardy Bean Chili

You can make this recipe either with, or without meat. You can also top this with a variety of delicious additions.

I recently met someone who has quite an array of ingredients she offers as chili toppings, from the standard sour cream, grated cheese and crackers to shredded chocolate, peanuts and crumbled potato chips. My personal favorite was fresh diced red onions but then I love red onions on practically anything, especially the ones I grow myself out of my refrigerator crisper. It’s more like liberating those poor things that tend to sprout before I have a chance to use them in salads.

I have a lot of creative fun with my favorite chili recipe, a derivative from one a friend shared from her days in Washington D.C. Over the years, I have simplified her fancy recipe so that it is ready to eat as soon as it is made, and still flexible if you want to get creative and add other ingredients. It also can be cooked longer by adding liquid - tomato paste, red wine, more tomatoes. For example, if you first saute garlic with onions and green peppers, this will be sweeter. If you put the garlic in with the tomatoes and beans, it will be more salty.

If you should be invaded by a herd of teenagers, or want to just make it with beans, add an extra can of beans to extend the recipe with a dash of extra seasonings. I once only had extra canned tomatoes and added those and that made this into a delicious thick soup. As I said earlier, very versatile.

This makes 6-8 half cup servings if you’re not adding more to it:

Charlotte’s Chili Recipe

1 cut up medium yellow onion

1 cut up medium green pepper

2-4 cloves of garlic to taste

1-2 tbsp extra virgin olive oil

1/2 lbs ground chuck

1 can red pinto beans

12 oz defrosted or canned tomatoes, or 1 can stewed tomatoes

1 tsp chili powder

1/2 tsp salt

Mix red pinto beans and tomatoes in a pot with chili powder; set aside.

Cook onions in extra virgin olive oil until clear; add green peppers, garlic and ground chuck. Cook on low until brown. Strain to remove extra grease. I use a colander inside a mixing bowl and let it drain. Mix with beans and tomatoes until warm. Add salt to taste.

Serve as is or add a few saltine crackers or a handful of oyster crackers. Wait until it cools to dig in.

This is the fourth winter for this pot of parsley to winter over inside. (Photo by Charlotte Ekker Wiggins)

I also get a kick out of harvesting fresh parsley to add as both a garnish and breath freshener when I’m finished with the meal. I have had this pot off parsley for four years now, wintering it over inside. Nothing quite like some fresh herbs to brighten up a plate.

Enjoy!

Charlotte


Sugarless Pancakes

Taste tested, these sugarless pancakes made the cut! (Photo by Charlotte Ekker Wiggins)

Taste tested, these sugarless pancakes made the cut! (Photo by Charlotte Ekker Wiggins)

Sugarless Pancakes

We grew up making pancakes. And not just for breakfast. For several years, they were the staple of Sunday nights with friends. Then when my brothers were in college, I would visit my Mom’s house just in time to whip up several batches for hollow-legged young men staying overnight. The Astronomy club members were a personal favorite, they walked around looking up and missed seeing any messes below.

I was looking for a basic recipe without sugar and found this one. It originally had 1 tablespoon of sugar in the original recipe so I tried it without sugar and liked it.

Easy to make, and even easier to make a second dry ingredient batch in glass jars and save it for later use. Just like the brownie recipe. It’s how to make your own “boxed” ingredients for your own use and for gifts if you remember to add the wet ingredients on a label on the lid.

I’m also a fan of the gifts in bags from homegrown herbs and other plants, there is no substitute buying them from a store.

Basic Sugarless Pancakes

Start with 1 1/2 cups all-purpose flour. If you want to play with this recipe you could substitute half with wheat flour or almond flour.

  • 1 1/2 cups flour

  • 3 1/2 teaspoons baking powder

  • 1 teaspoon salt

  • 1 1/4 cups milk

  • 1 egg

  • 3 tablespoons butter, melted

To make:

In a large bowl, sift together the flour, baking powder, salt and sugar. Make a well in the center and pour in the milk, egg and melted butter; mix until smooth.

Pour globs into a pre-heated, medium high pan with shortening or butter. I use shortening.

Turn when bubbles appear.

Bubbles are the sign to flip the pancakes to cook on the other side. (Photo by Charlotte Ekker Wiggins)

Bubbles are the sign to flip the pancakes to cook on the other side. (Photo by Charlotte Ekker Wiggins)

If the pan is not evenly-heated, the pancakes will initially look uncooked. Once turned, check by making a small cut on the pancake edge to ensure it’s cooked all the way through.

Brown on both sides.

Serve hot with maple syrup or better yet, fresh honey.

Once cooked, keep pancakes on paper towel to absorb cooking oil. (Photo by Charlotte Ekker Wiggins)

Once cooked, keep pancakes on paper towel to absorb cooking oil. (Photo by Charlotte Ekker Wiggins)

When I have extras, I freeze them individually then store in a plastic bag for later re-heating.

These hold up well frozen.

Charlotte


Chicory Coffee

Cleaned and ground chicory roots add a chocolate flavor to traditional coffee. (Photo by Charlotte Ekker Wiggins)

Cleaned and ground chicory roots add a chocolate flavor to traditional coffee. (Photo by Charlotte Ekker Wiggins)

Chicory Coffee 

It was a staple during World War II when coffee beans were not available. I used to assume chicory coffee would be something campers would make when cooking out in the woods. Now chicory coffee is offered in some upscale coffee bars and as a specialty brew.

We can all make chicory coffee at home with a few precautions about where we collect the plants, which are herbs and wonderful pollinator plants.

Chicory Coffee Recipe

Courtesy of Lee Allen Peterson’s  Field Guide to Edible Wild Plants

Harvest chicory from a chemical free area. Wash; dry roots.

Roast in oven until dark brown and brittle. Grind as you would coffee beans. 

Use roughly 1 ½ tsps. ground chicory root for every cup of water.

I had my first taste of chicory coffee when I was in New Orleans where I was told beignets go hand in hand with a cup of chicory coffee.  Who was I to argue?

Charlotte

Double Duty Brownie Mix

One of the extra moist brownies makes a nice simple dessert. (Photo by Charlotte Ekker Wiggins)

One of the extra moist brownies makes a nice simple dessert. (Photo by Charlotte Ekker Wiggins)

Double Duty Brownie Mix Recipe

There are several good reasons to add this little brownie recipe to your recipe collection.

First, in less than 5 minutes you can make several batches of the dry ingredients to store for later use. This is how I used to use this recipe; having pre-made brownie mixes in jars that I could quickly mix up and bake.

Secondly, these also make nice little gifts when you add the wet ingredients on a card or label. I write it on the lid.

Brownie Mix Recipe

Add 2 eggs

1/2 cup vegetable oil

1 tsp vanilla.

Bake at 350F for 20-25 minutes. Remove from oven; allow to cool.

My handwritten label on top of one of my jars of homemade brownie mix. (Photo by Charlotte Ekker Wiggins)

My handwritten label on top of one of my jars of homemade brownie mix. (Photo by Charlotte Ekker Wiggins)

See how pretty this could be with a ribbon and gift card?

Friends who have received this in the past have commented at how easy, and delicious, this was to use.

You can make this with special dark chocolate if you want to ramp it up, this is basically a classic American cuisine recipe.

One homemade brownie mix batch ready for wet ingredients. (Photo by Charlotte Ekker Wiggins)

One homemade brownie mix batch ready for wet ingredients. (Photo by Charlotte Ekker Wiggins)

Now if you took a close look at my hand writing on the label, you will know how I came up with this second version of this recipe. Instead of the original 1/2 cup of vegetable oil, I misread the label and made this with 1 cup of vegetable oil, doubling the original recipe.

If you want to make them into little chocolate pies, use 3/14 cup vegetable oil.

I like to bake brownies in cupcake pans, which makes them easier to have in single servings.

This is how the additional vegetable oil changes the brownies, into extra moist brownies with a depressed center.

These are the brownies made with 3/4 cup vegetable oil. (Photo by Charlotte Ekker Wiggins)

These are the brownies made with 3/4 cup vegetable oil. (Photo by Charlotte Ekker Wiggins)

I ended up with these tiny pie-looking cupcakes where I can add cut up fresh fruit in the center. Strawberries are my favorites but most berries will work; raspberries are another delicious combination. For the photo I added blueberries.

If you don’t have fruit, serve it with whipped topping or vanilla ice cream.

You can also easily freeze these for later use.

It’s an easy little dessert to dress up for a nice treat at the end of your meal and you can make both from the same brownie mix!

Charlotte

Updated Cucumber Onion Salad

Today’s cucumber, red onion and vinegar summer salad. (Photo by Charlotte Ekker Wiggins)

Today’s cucumber, red onion and vinegar summer salad. (Photo by Charlotte Ekker Wiggins)

Updated Cucumber Onion Salad Recipe

Here is the old, traditional cucumber onion salad recipe I found a couple of years ago:

1 cup apple cider vinegar

3/4 cup sugar

1/2 cup water

Mix in a pan and bring to a boil. Allow to cool. Pour over sliced cucumbers and onions; allow to marinade overnight.

New Cucumber Onion Salad Options

Since I shared that recipe, I have tried several configurations, starting with not boiling the mixture and deleting sugar. Now I splash equal parts vinegar and water, enough to cover the cucumber slices and onions, and allow to marinate overnight.

Another option is to cut the sugar amount in half, especially if the cucumbers are more on the sweet side.

This is best the second day.

You can also reuse the vinegar water mixture and make a second batch. It will be not as strong the second time around but when time is short and you still want a fresh summer salad it works well!

And wouldn’t my Bunny Days of the Week Kitchen Towels go well with this salad, especially since I remember my niece Rachel, who loved cucumbers as a child, getting indignant when she found rabbits munching on her favorite vegetables.

Charlotte

Easy Pea Salad Recipe

I added yellow and red onions to this easy pea salad. (Photo by Charlotte Ekker Wiggins)

I added yellow and red onions to this easy pea salad. (Photo by Charlotte Ekker Wiggins)

Easy Pea Salad Recipe

This is one of those quick and easy recipes that should be in the American Cooking Encyclopedia, it comes in handy for a variety of occasions. I have used this is as both a main salad as well as a side dish, both cold and warm. It’s best cold for a summer dish and warm for a winter side dish.

You can alter the ingredients to taste. I tend to add more celery and onions.

I also like that it takes only a small amount of mayonnaise to bring all ingredients together.

If I have a choice, I would let this sit overnight so the flavors marinate.

To mak

1 can drained peas

1 shelled hard boiled egg

1/2 cup chopped fresh celery

1/4 cup chopped yellow and/or red onions

1 tbsp mayonnaise

salt to taste

To make: Mix together. You can add a second egg if you want more egg and a dash of milk if you want more coating on the peas.

Cover and allow to marinate for a couple of hours or overnight for the cold version.

Serve immediately if you want it served warm.

Charlotte

Homemade Hot Cocoa Mix

Best homemade hot cocoa for a snowy winter day. (Photo by Charlotte Ekker Wiggins)

Homemade Hot Cocoa Recipe

It's cold, really cold. Snow is still falling. Perfect time for a great drink like a cup of homemade hot cocoa.

Look for the Special Dark chocolate, usually available only around the holidays. (Photo by Charlotte Ekker Wiggins)

Look for the Special Dark chocolate, usually available only around the holidays. (Photo by Charlotte Ekker Wiggins)

As in many things in life, the difference is the kind of chocolate you use. I stock up on Hershey’s Unsweetened Dark Chocolate around the holidays, when it’s usually the only time of the year when I can find it.

There are other chocolate options but in general, the better the chocolate the better the hot cocoa.

My first batch of homemade hot cocoa mix being tested. It passed inspection with flying colors.

My first batch of homemade hot cocoa mix being tested. It passed inspection with flying colors.

The first recipe I found was pretty basic and had none of the rich texture one gets from buying hot cocoa mix in fancy containers.

After some research, I found this recipe from Alton Brown that includes a secret ingredient that makes all of the difference - cayenne pepper flakes.

I have now made this recipe a couple of times, once for gifts and the second time to have a supply for myself. 

Homemade Hot Cocoa Mix Ingredients (for 5 cups of dry mix)

  • 2 cups powdered sugar

  • 1 cup cocoa (Dutch-process preferred); Hershey's Special Dark Chocolate is another option.

  • 2 1/2 cups powdered milk

  • 1 teaspoon salt

  • 2 teaspoons cornstarch

  • optional - 1 pinch cayenne pepper, or more to taste

  • optional - add baking chips like butterscotch or mint to the top

To serve, start with 2 tablespoons per 8 ounces of hot water. Mix a couple ounces of hot water in mix first, then add hot water to taste.

To mix well, I will measure the mix and water in a blender and give it a whirl.

IMG_8287.JPG

You can add other things like toffee bits, candy cane crumbs, honey or candy baking chips to the mix. If you like a little variety, try spices such as cinnamon or pumpkin pie spice.

Simply whisk the ingredients together.

Homemade Hot Cocoa Mix Gift Idea

You can give it as a gift all on its own, or pair it with other yummy treats. Arrange it in a gift basket with a mug all on its own with the recipe. You can also add cookies.

A canning jar is perfect for packaging edible gifts like hot cocoa mix although my preference is interesting glass jars with tight lids. Use a colorful ribbon and a gift tag with instructions.

Although I tend to see these kinds of recipes at Christmas, it's a nice gift idea for Valentine's Day, too and for any fall and winter birthdays. Or as a gift for yourself.

Homemade hot chocolate is perfect for a snowy day with marshmallows. (Photo by Charlotte Ekker Wiggins)

When I get ready for winter snow storms, hot chocolate and marshmallows are a favorite treat!

Charlotte

Sweet Potato Recipes

Select relatively straight sweet potatoes to preserve your fingers when cutting into strips.

Select relatively straight sweet potatoes to preserve your fingers when cutting into strips.

Sweet Potato Recipes

The argument started innocently enough. We tend to end up in the kitchen when any two of us are together and at this family reunion, it was hard to know who was responsible for cooking what dishes. As one of my brothers was rummaging through the pantry, he yelled out who had the yams.

My Uncle Tony, from Louisiana, was enjoying a cup of coffee at the end of the kitchen island and took exception to the orange tubers my other brother tossed over him. “Those are not yams,” he said, his charming southern accent at odds with how emphatically he made the diagnosis.

Yams are native to Africa and Asia, with the majority of the crop coming from Africa. They are related to lilies, and can be as small as a regular potato or grow five feet long. Yams have a cylindrical shape with blackish or brown, bark-like skin and white, purple or reddish flesh. Compared to sweet potatoes, yams are starchier and drier.

Part of the confusion comes from how USDA classifies sweet potatoes – “firm” and “soft.” The firm variety was the first to be produced in the U.S., so when "soft" sweet potatoes began to be produced commercially, there was a need to differentiate it. Since the "soft" sweet potatoes slightly resembled true yams, they picked up the name and became what you see labeled as "yams" in most U.S. grocery stores. Those are the sweet potatoes most used in sweet potato casseroles.

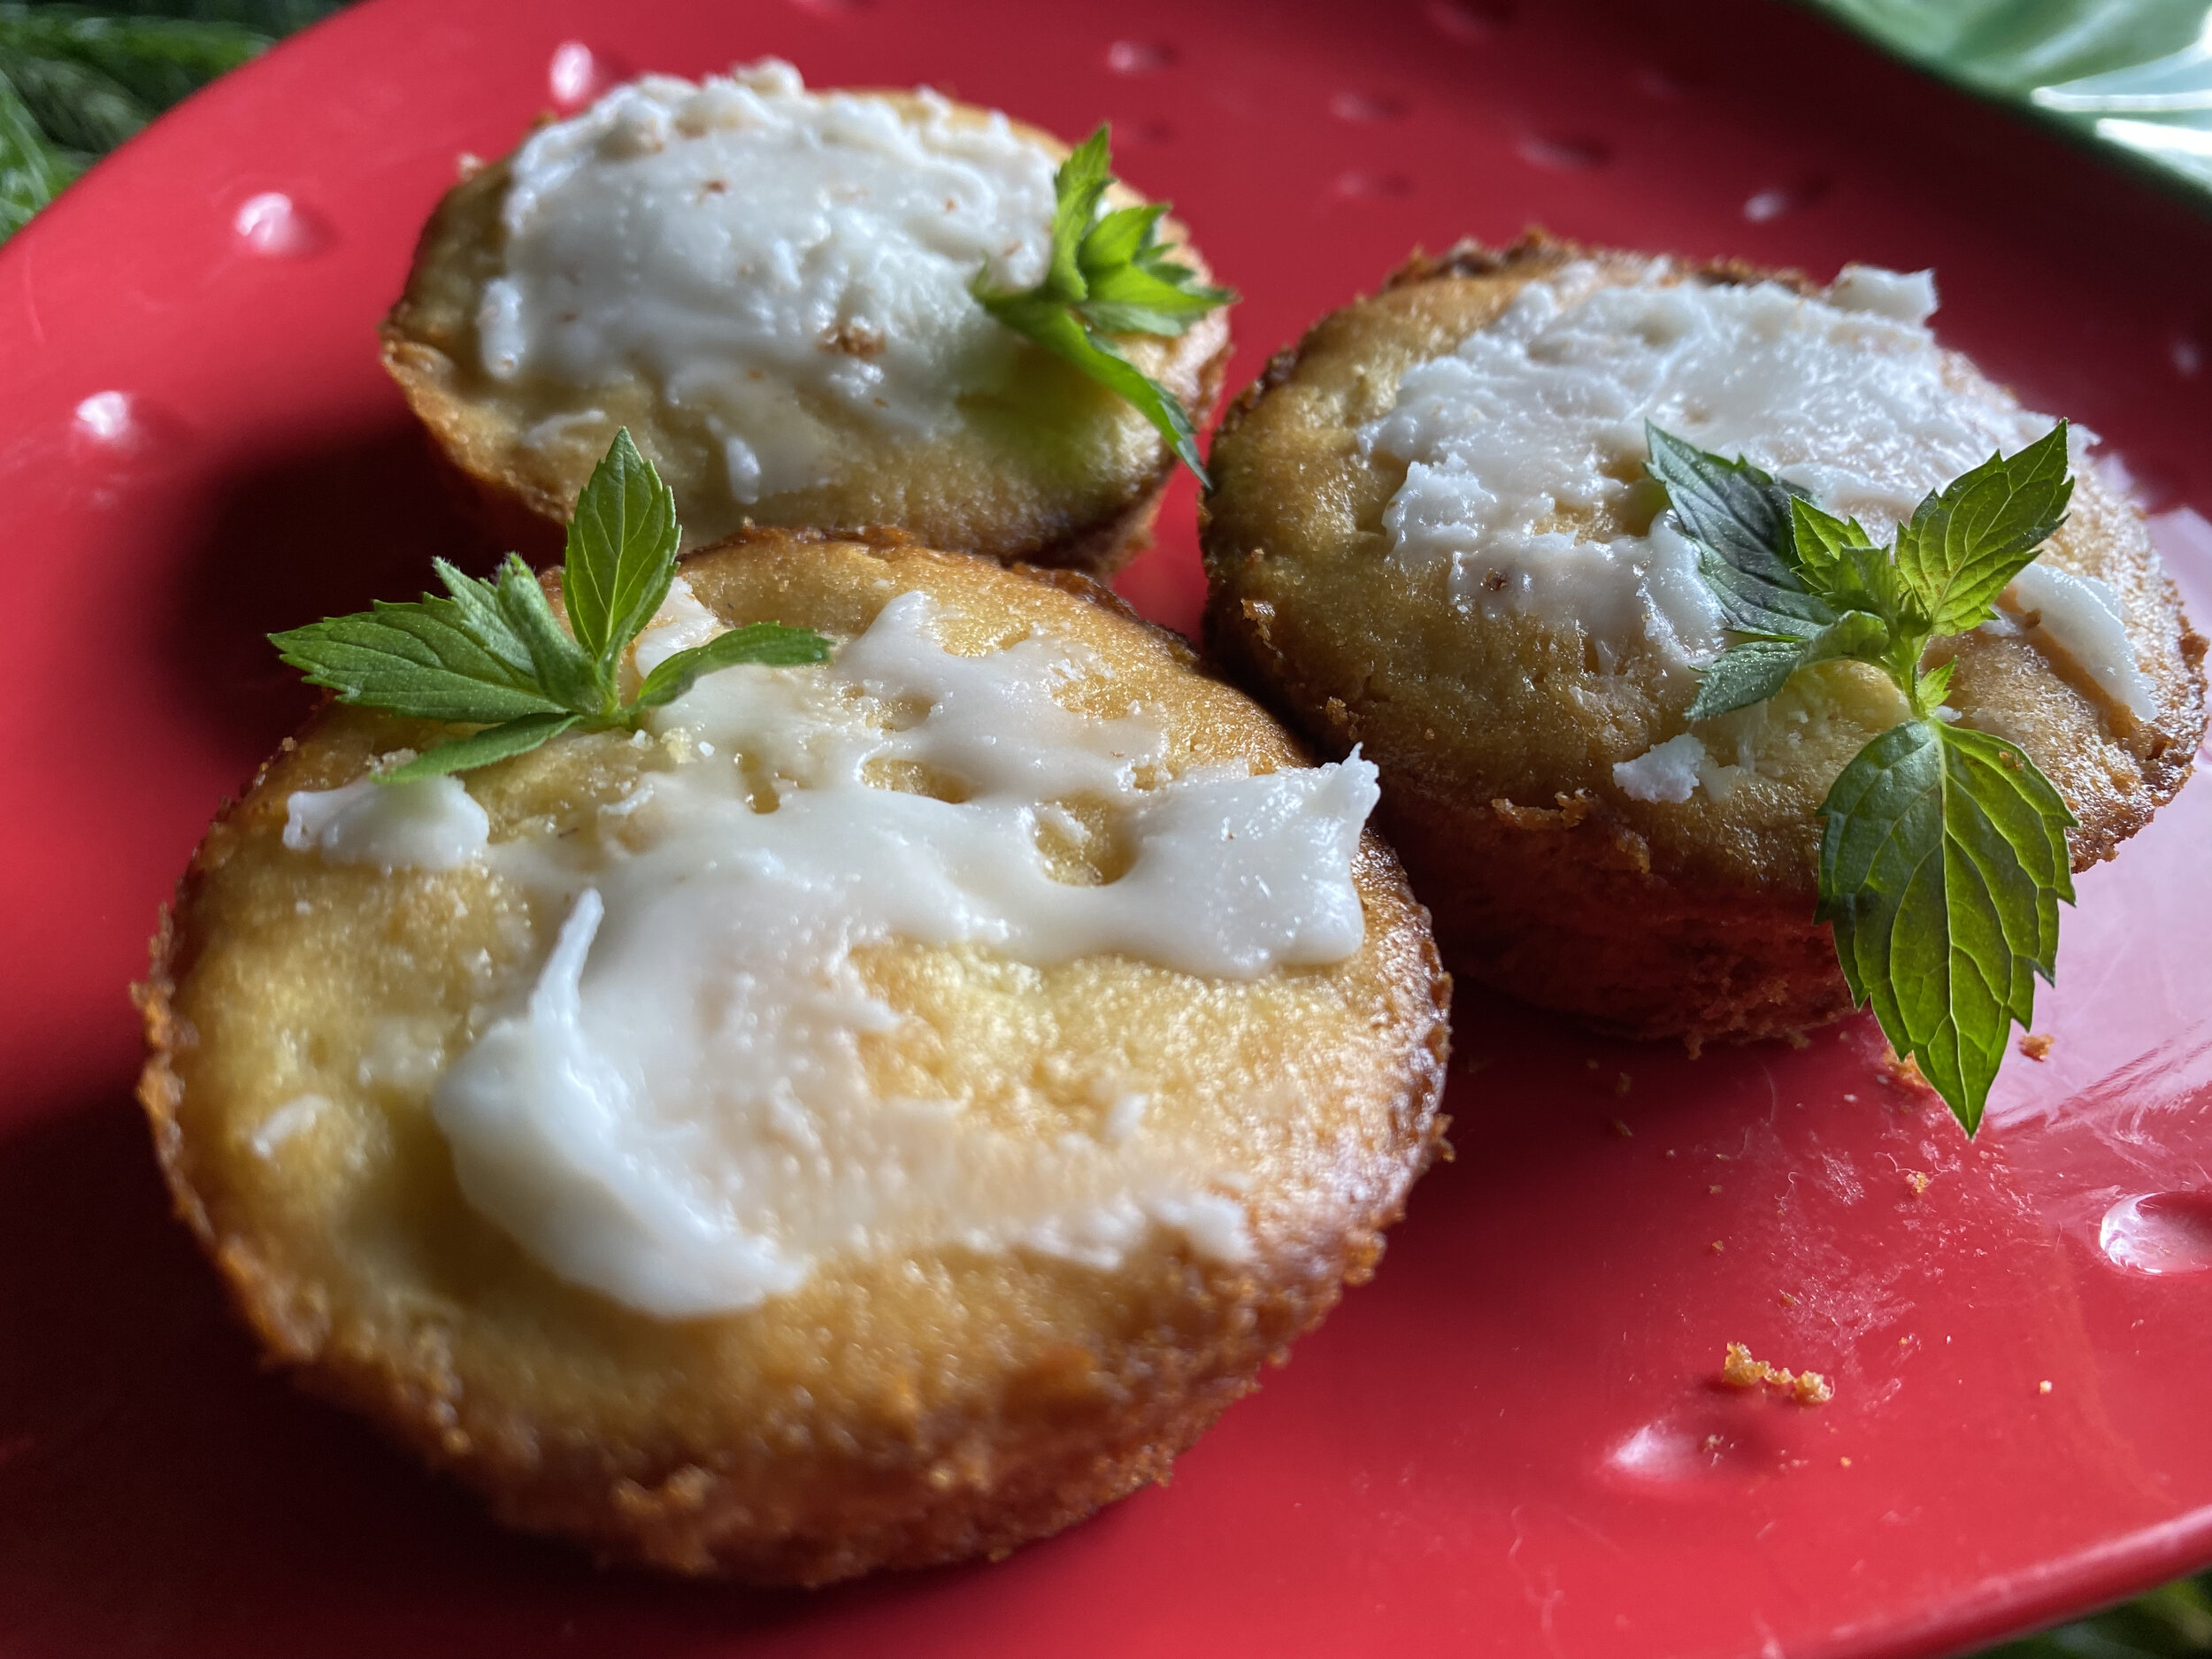
Baked Sweet Potatoes

I love to have those soft sweet potatoes around for snacks and to add to salads, nothing more, just a well-baked sweet potato. Pick the same sized- tubers so they all finish baking around the same time.

After washing and towel drying, cut an x in the center before placing in a 350F oven for about half an hour or until done.

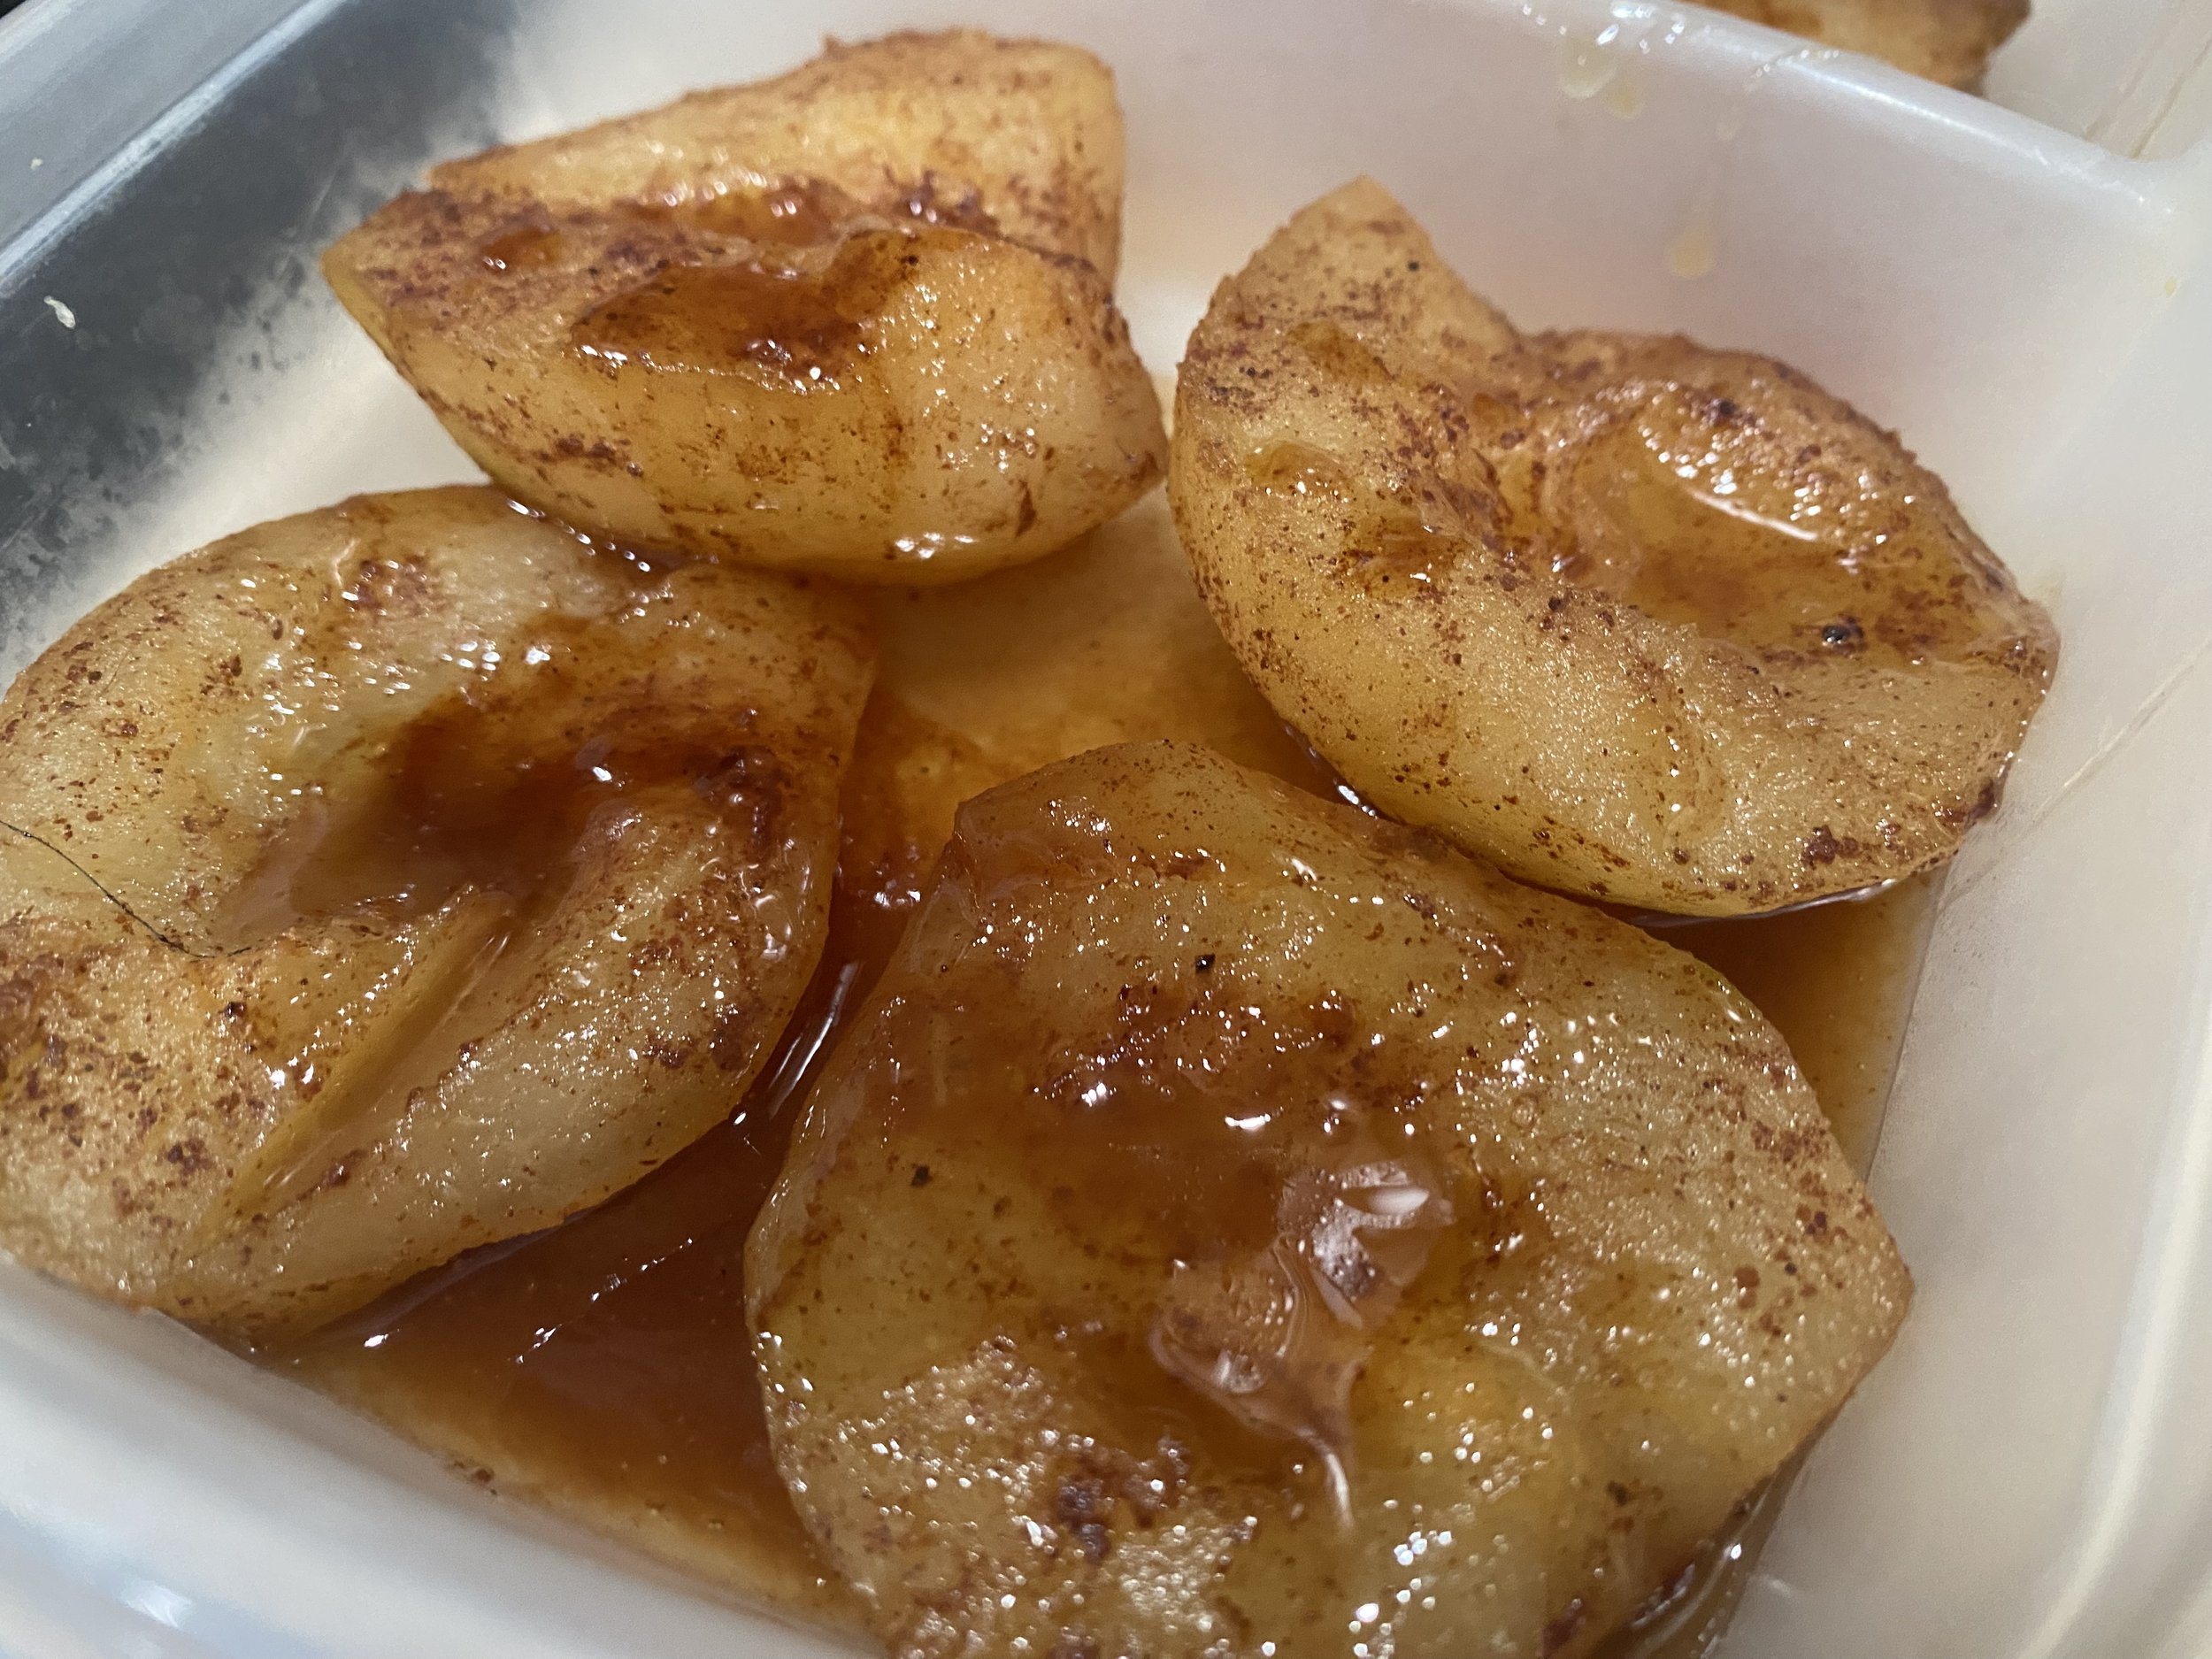
Baked sweet potatoes are a traditional American fall recipe. However, I have a new favorite way to eat sweet potatoes-baked sweet potato fries.

Baked Sweet Potato Fries

You will need: Extra virgin olive oil, salt, black pepper, garlic powder and paprika. Parchment paper. Don’t forget the sweet potatoes!

To make: Select relatively straight-growing sweet potatoes for easy cutting. Remove peel. Cut into slices, then cut again into ¼ inch wide strips.

Preheat oven to 450 degrees F.

Line a sheet tray with parchment. In a large bowl, toss sweet potatoes with just enough oil to coat. Sprinkle with three shakes each of seasonings and paprika. Spread sweet potatoes in single layer on prepared baking sheet, being sure not to overcrowd. Bake until sweet potatoes are tender and golden brown, turning occasionally, about 20 minutes. Let cool 5 to 10 minutes before serving.

If you want to make larger portions, for 5 sweet potatoes use 1 tablespoon of a combination of 1 cup salt, ¼ cup black pepper, ¼ cup garlic powder and ½ teaspoon paprika.

Baked sweet botato fries are best served about 5 minutes after they come out of oven and cool.

Baked sweet botato fries are best served about 5 minutes after they come out of oven and cool.

As far as what my two engineer brothers made with those sweet potatoes they thought were yams, let’s just say it’s best that some recipes are not preserved for posterity.

Charlotte

Chocolate Mice Recipe

Hershey kisses form the face of chocolate-dipped maraschino cherries with stems.

Hershey kisses form the face of chocolate-dipped maraschino cherries with stems.

Chocolate Mice Recipe

My bee buddy David turned 70 years old this year. To celebrate, his sons joined him for a weekend of fine dining, theatre and catching up on family stories, including a chocolate birthday cake with white icing decorated with, what else – bees.

There’s another passion in David’s life, besides his lovely wife. Three cats have found refuge at David’s house, each with a story sadder than the next one until you see them today, coats shiny as they happily lounge on the grass outside David’s basement office.

There is Shirley, a one-eyed calico suspected of being at least 18 years old who is the self-designated house greeter. Chatty Shirley will let you know it’s time to pick her up when she rolls over after telling you all about her day.

Then there is black Henry with yellow eyes, who hides from most people but who talks to me, especially when he wants inside the house. One time he led me to all house doors to see if I could let him inside. Unfortunately I didn’t happen to have a key and he let me know what he thought of my shortcomings by dashing off.

Finally, there is black and white Smokey, who played hard to get for 3 years and now won’t let David, or Henry, out of his sight. I, on the other hand, Smokey can easily do without and tries to, every time he sees me.

When I heard about David’s landmark birthday, I knew the furry family had to contribute – actually Shirley asked me, she has a lot to say every time she sees me – so I made one of my favorite gift treats, chocolate mice.

Chocolate Mice Recipe

You need:

Unwrapped Hershey milk chocolate kisses

Maraschino cherries with stems

Dark almond bark

Almond slivers

Storage container

Tin gift can

Wax paper

Paper Towel

Chocolate mice close up include Almond slivers for ears.

Chocolate mice close up include Almond slivers for ears.

To Make Chocolate Mice

Drain cherries and place on paper towel.

Unwrap Hershey kisses.

Melt dark almond bark in microwave for 1 ½ minutes until melted. Dip cherries in chocolate until covered; place on wax paper to dry.

Add dab of melted chocolate to flat Hershey kiss; add 2 Almond slivers. Press against cherry. Allow to dry.

Store in air tight container.

Photo 2:  Package chocolate mice in a tin container to keep the almond ears from breaking and add toy mice on top instead of a ribbon for a feline treat. (Photos by Charlotte Ekker Wiggins)

Photo 2:  Package chocolate mice in a tin container to keep the almond ears from breaking and add toy mice on top instead of a ribbon for a feline treat. (Photos by Charlotte Ekker Wiggins)

How to Package Chocolate Mice

To make these even more special, I packaged them in a tin container. Make sure the tin is tall enough not to break the almond sliver ears. If you want to make sure they don’t move, you can use a tiny dab of chocolate to “glue” the mice to a cardboard bottom.

For fun, I added three catnip mice to the tin instead of a ribbon. The gift card was “signed” with the three cats footprints, a cat foot print stamp my cats have been known to use for their gift-giving. I added names just in case David couldn’t distinguish between one set of prints against another one but he seemed to know who had contributed to the birthday sentiments.

These also make wonderful Halloween and Christmas treats.

Charlotte

Baked Pears in Honey Recipe

Ripe bartlett pears from my garden ready to bake after I drizzle fresh honey over them.

Ripe bartlett pears from my garden ready to bake after I drizzle fresh honey over them.

Baked Pears in Honey Recipe

The first batch of freshly picked Bartlett pears have safely arrived at their destination and have been rated “yumm” by one of my brothers. It has become an annual family tradition when I have fresh Bartlett pears to share. After seasoning them to start ripening, I carefully wrap each one in newspaper and bubble wrap and ship them off, timing them to arrive with at least a couple of them ripe enough to eat right out of the box. I know my brothers, they aren’t going to wait to have them cooked.

These are not just any Bartlett pears. These are pears not from a farm but from the semi-dwarf pear tree I planted by my driveway in 1983. I completely forgot I even had the tree until 2010, when the first crop of pears covered my driveway. Wasps had pollinated the tree that spring. That was also the year I added two bee hives to my garden, which looking back now appears redundant. Between the bees and wasps, the Stark Brothers pear tree has provided varying crops of pears every year. In 2012, the year of a drought, it was just one but it was quite a large pear. Now I know to pinch off some of the flowers to encourage yearly fruiting.

The squirrels in my garden have developed a taste for pears so it’s a race between who will get more pears by the time they are ready to pick. Squirrels, I have learned, don’t mind eating very green pears so they have a head start on the count. By the time the fruit was ready to pick this year, I used a light bulb changer and removed every single remaining fruit. They are now sitting in baskets in my cold utility room to get the ripening process started. Pears ripen from the inside, not on the tree.

This year, I also added a small container of honey to the pear packages so my brothers and their families could enjoy baked pears in honey. The recipe is easy and delicious.

Here are the instructions that went with the pears, including the recipe:

Bluebird Gardens Bartlett Pears 2017

These pears have survived daily squirrel assaults to be a treat on your table.

After getting picked, they were seasoned in 60F temperature for a week to start the ripening process. Pears ripen from the inside.

Once you receive yours, place a couple in the enclosed brown bag with an apple so the apple ethylene gases will complete the ripening. A pear is ripe when you gently press the top with a thumb and find it soft to the touch.

Bartlett pears with honey baked, cooled and ready to taste. 

Bartlett pears with honey baked, cooled and ready to taste. 

Baked Pears with Honey Recipe

Cut the pears in half and place on a baking sheet (I cut a sliver off the other end so they sat upright).  Leave the skin on.

Using a measuring spoon or melon baller, scoop out the seeds.

Sprinkle with cinnamon and drizzle 1/2 teaspoon honey over each one. You can also add walnuts in the scooped out center.

Bake in the oven 30 minutes.  Enjoy!

Charlotte

Hot Toddy Recipe

Basic hot toddy ingredients including honey from my bee hives. (Photo by Charlotte Ekker Wiggins)

Basic hot toddy ingredients including honey from my bee hives. (Photo by Charlotte Ekker Wiggins)

Hot Toddy Recipe

It had been raining for several days. Our team was stuck in a building in Southhampton, UK waiting for the rented van to take us back to the hotel. A snafu in scheduling had left our group on call for 17 hours straight working the 50th Anniversary of the D-Day World War II Invasion media center. We were tired, dreaming of hot showers. I had laryngitis from talking so much.

When the van finally arrived, I had to stand out in the rain for half an hour while details were sorted out, staff were shuttled and out of other vehicles and others were briefed on what they had to to. By the time we got to the hotel, I was chilled to the bone.

After changing into dry clothes, I met our team to go over the next day’s schedule and my Navy team greeted me with a hot toddy. Maybe it was the lack of sleep; maybe it was UK whiskey or my laryngitis but I remember that drink being the most delicious I had ever had.

Now just a note for those of you who don’t drink whiskey, you can make this without it and get the same benefit of honey soothing your sore throat.

My bee buddy David has told me this will also work well to help one sleep.

Hot Toddy Ingredients

  • 2 ounces whiskey

  • 1 tablespoon honey

  • 4 ounces water (hot from the tap)

  • 1 teaspoon lemon juice (we use the stuff in the plastic lemon)

  • 1 slice fresh lemon (if we don't have this we don't use it) (optional)

DIRECTIONS

  1. Place the whisky in a large microwave safe mug.

  2. Add the honey.

  3. Pour the hot water into the mug over the spoon you used for the honey to get off the last little drops.

  4. Add the lemon juice and stir well.

  5. Place the mug in the microwave for 1 minute or until it is piping hot, but not boiling.

  6. Add the lemon slice and serve.

Even if it doesn't work on your cold, it should help you sleep so you don't care about the cold!

Charlotte

Ice Storm Chicken and Veggie Rosemary Stew

Fresh rosemary sprigs added at the end are the secret to this delicious chicken veggie stew.

Fresh rosemary sprigs added at the end are the secret to this delicious chicken veggie stew.

Ice Storm Chicken and Veggie Rosemary Stew

I just had some and, if I don't mind saying it myself, it was SO good. Simple, flavorful...I'm in love with fresh rosemary.

In the past, I have mixed my herbs but I decided to just use fresh rosemary I have been growing in a pot in my dining room. It's cold and icy outside; this potted herb is still happily growing so it was time to use some of it in winter cooking.

This is the basic soup recipe I use when I want to clean out my crisper. If you want a soup, add more broth, water or wine; I wanted something hardier so I'm calling this a stew.

Ice Storm Chicken and Veggie Rosemary Stew Recipe

2 cans vegetable broth

3 cut up medium carrots

3 diced celery stalks

1 diced medium onion

1 cup water

1 tsp sea salt

Half of a diced green pepper (this was left over from a salad)

Cook on low until the vegetables are cooked, about half an hour or so.

Add I baked chicken breast, cut up into small pieces

3 3-inch fresh rosemary sprigs

Cut up mushrooms - I forgot to add those, will next time. 

Continue cooking on low until chicken is integrated into the vegetable mixture and the rosemary blends in, about 5 minutes. Serve.

Makes 4 hearty servings.

I can imagine this with other vegetables - broccoli, green beans, zucchini leaving the fresh rosemary as the star. I'm loosing weight so now carbs - no peas, potatoes, pasta, rice - although those could be added if you wanted something with higher levels of energy.

Ice-covered redbud tree January 14, 2017 in my garden, which is why I'm playing in my kitchen.

Ice-covered redbud tree January 14, 2017 in my garden, which is why I'm playing in my kitchen.

It's too cold and dangerous to be outside because of the ice storm so I'm enjoying reading a book and playing in the kitchen. I'm lucky to have written this recipe down immediately after making it or I would not have remembered the ingredient amounts later. Friends and family know that's a regular hazard when enjoying meals at my house, they may never enjoy the same one again because I like to experiment.

Oh, I have recipe books. I collect recipe books and have some classics, from my Mother's Betty Crocker cookbook to the American Cooking Encyclopedia. I enjoy reading them. Much more fun to chop, mix and see what I can cook up on my own without a prompt - most of the time.

Ice Storm Chicken and Veggie Rosemary Stew is delicious the next day, too.

Charlotte


Winter Hardy Chili

This chili uses ingredients from my garden. Add glass of milk and a cold winter day to appreciate.

This chili uses ingredients from my garden. Add glass of milk and a cold winter day to appreciate.

Winter Hardy Chili

Do you have a favorite, secret chili recipe?

There are people who do, even places that hold chili cook-offs where winning dishes have top secret ingredients such as chocolate, beer, peanut butter or – well, if I told you it wouldn’t be a secret any more.

I recently met someone who also has quite an array of ingredients she offers as chili toppings, from the standard sour cream, grated cheese and crackers to shredded chocolate, peanuts and crumbled potato chips. My personal favorite, which I haven’t tried yet, was fresh diced red onions but then I love red onions on practically anything, especially the ones I grow myself out of my refrigerator crisper. It’s more like liberating those poor things that tend to sprout before I have a chance to use them in salads.

I have a lot of creative fun with my favorite chili recipe, a derivative from one a friend shared from her days in Washington D.C. Over the years, I have simplified her fancy recipe so that it is ready to eat as soon as it is made, and still flexible if you want to get creative and add other ingredients. It also can be cooked longer by adding liquid - tomato paste, red wine, more tomatoes. For example, if you first saute garlic with onions and green peppers, this will be sweeter. If you put the garlic in with the tomatoes and beans, it will be more salty.

If you should be invaded by a herd of teenagers, add an extra can of beans to extend the recipe with a dash of extra seasonings. I once only had extra canned tomatoes and added those and that made this into a delicious thick soup. As I said earlier, very versatile.

This makes 6-8 half cup servings if you’re not adding more to it:

Charlotte’s Chili Recipe

1 cut up medium yellow onion

1 cut up medium green pepper

2-4 cloves of garlic to taste

1-2 tbsp extra virgin olive oil

1/2 lbs ground chuck

1 can red pinto beans

12 oz defrosted or canned tomatoes, or 1 can stewed tomatoes

1 tsp chili powder

1/2 tsp salt

Mix red pinto beans and tomatoes in a pot with chili powder; set aside.

Cook onions in extra virgin olive oil until clear; add green peppers, garlic and ground chuck. Cook on low until brown. Strain to remove extra grease. I use a colander inside a mixing bowl and let it drain. Mix with beans and tomatoes until warm. Add salt to taste.

Serve as is or add a few saltine crackers or a handful of oyster crackers. Wait until it cools to dig in.

Charlotte


Honey Garlic Butter Salmon Recipe

This is even better the following day, after the juices have settled in. Good cold, too!

This is even better the following day, after the juices have settled in. Good cold, too!

Honey Garlic Butter Salmon Recipe

I'm back from 10 days in Italy, inspired to do something more than just grill my salmon in garlic salt and douse with lemon juice. Don't get too excited, I am not aspiring to be a chef, I just want to try my hand at giving my food a little easy, extra flavor.

This recipe is very simple and delicious. Honey Garlic Butter Salmon is ready in under 20 minutes, then broiled, or grilled, for that extra golden, crispy and caramelized finish. Most of the time it is cooking so there is plenty of time to set the table and toss a salad while you wait to place it under the broiler for a couple of minutes before serving.

This recipe is for 2 1/2 pounds of fresh salmon, Since I only purchased one pound, I made the sauce in a microwave dish by estimating smaller ingredient amounts. Heat up on low or defrost, not on high or you may get a lot of smoke. Trust me.

Honey Garlic Butter salmon calls for basic ingredients we all should already have.

Honey Garlic Butter salmon calls for basic ingredients we all should already have.

Honey Garlic Butter Salmon Recipe Ingredients (for 2.5 lbs of salmon)

  • ¼ cup butter
  • ⅓ cup honey
  • 4 large cloves garlic, crushed
  • 2 tablespoons fresh lemon juice (juice of ½ a lemon)
  • 1.2kg | 2½ pounds side of salmon
  • Sea salt, to taste
  • Cracked pepper, to taste (optional)
  • Lemon slices (to serve)
  • 2 tablespoons fresh chopped parsley
So easy, add your salmon to aluminum foil that can cover the whole slab.

So easy, add your salmon to aluminum foil that can cover the whole slab.

INSTRUCTIONS

  1. Position a rack in the middle of the oven. Preheat oven to 375°F | 190°C. Line a baking tray or baking sheet with a large piece of foil, big enough to fold over and seal to create a packet or 2 long pieces of foil over lapping each other lengthways to create your salmon packet, depending on the width of you fillet.
  2. If your fillet is uneven, slice it to even-width pieces so it will all cook evenly.
  3. In a small saucepan, melt the butter over low-medium heat. Add the honey, garlic and lemon, and whisk until the honey has melted through the butter and the mixture is well combined.
Add the butter, honey and garlic mixture to the salmon and make sure it's well coated.

Add the butter, honey and garlic mixture to the salmon and make sure it's well coated.

4. Place the salmon onto lined baking tray and cookie sheet. Pour the butter and honey mixture over the salmon, and using a pastry brush or spoon, spread evenly over the salmon. Sprinkle with a good amount of salt, about 2 teaspoons, and cracked pepper. Fold the sides of the foil over the salmon to cover and completely seal the packet closed so the butter does not leak.

Fold the salmon and mixture tightly-sealed in the aluminum foil to seal in flavor as it bakes.

Fold the salmon and mixture tightly-sealed in the aluminum foil to seal in flavor as it bakes.

5. Bake until cooked through, about 15-18 minutes, depending on the thickness of your fish and your preference of doneness.

6. Open the foil, being careful of any escaping steam, and grill or broil for 2-3 minutes on medium heat to caramelize the top.

7. Garnish with fresh parsley and serve immediately with lemon slices. Excellent served warm or cold or for any of the four seasons in the year. Really yummy!

Another great excuse for using my fresh parsley from my pot garden.

Another great excuse for using my fresh parsley from my pot garden.

Don't forget to pick your fresh parsley for the garnish!

Charlotte

Simple Chocolate Ice Cream Recipe

Simple Chocolate Ice Cream Recipe

Every kitchen should have as standard issue an ice cream maker. Not the old-fashioned kind with a hand crank that requires adding ice, it should be one with an electric motor that produces ice cream in 20 minutes so one can finish another chapter of that great book. Don’t look at me, those are my niece Rachel’s requirements for an excellent home ice cream maker.

Since I was given one as a gift, I haven’t had to go shopping for one but I have felt grateful the machine passed Rachel’s standards. This is our favorite chocolate ice cream recipe and yes, we have tested several, all of course in the interests of achieving a higher culinary standard.

You’re welcome. 

Simple Chocolate Ice Cream Recipe

 Ingredients:

*¾ cup sifted cocoa powder

½ cup sugar

**1/3 cup packed dark brown sugar

A pinch of salt

***1 cup whole milk (or skim or powdered milk)

2 cups heavy whipping cream

½ teaspoon pure vanilla extract

Other Possible Recipe Alterations

Miniature chocolate chips

Spearmint flavoring

Fresh strawberries

Fresh bing cherries

This special dark Hershey blend is usually only available in summer so get an extra one for Christmas time baking. (Photo by Charlotte Ekker Wiggins)

This special dark Hershey blend is usually only available in summer so get an extra one for Christmas time baking. (Photo by Charlotte Ekker Wiggins)

*Rachel and I have experimented with a variety of cocoa powders, our favorite is Hershey Special Dark Chocolate, “a blend of natural and Dutched cocoas.” It has a paper red ribbon towards the bottom of the container, usually only available at a big box grocery store.

**You can also use either dark or light brown sugar; the darker brown sugar gives the ice cream a richer flavor.

***We experimented with cutting calories with the milk, substituting skim milk and prepared powdered milk. The lighter milks made the ice cream not as rich, which was fine with me. I preferred something lighter for at least summer.

Other Possible Flavor Alterations

 In terms of alterations, we have also tested adding miniature chocolate chips and substituting a spearmint flavor for the vanilla to make a mint chocolate chip ice cream. I was told by Rachel’s father that it was delicious, I never made it to the tasting step.

I did, however, taste test adding chopped Bing cherries in one batch and cut up fresh strawberries in another batch and would recommend those combinations.

My niece Rachel refreshing her ice cream-making skills whipping up a chocolate ice cream batch.

My niece Rachel refreshing her ice cream-making skills whipping up a chocolate ice cream batch.

How To Make Simple Chocolate Ice Cream 

In a medium bowl, sift together the cocoa, sugars and salt. Add the milk and ,using a hand mixer on low speed, or a whisk, beat to combine until dry ingredients are dissolved.  

Stir in the heavy cream and vanilla, or add another flavoring at this point.

Cover and refrigerate 1-2 hours or overnight.

Turn ice cream maker on; pour the mixture into the frozen freezer bowl and let mix until thickened, 15-20 minutes. The ice cream will have a soft, creamy texture.

Chocolate ice cream is ready when it starts shaping into mounds.

Chocolate ice cream is ready when it starts shaping into mounds.

Add chocolate chips in the last minute or so. If you are adding fresh fruit, add that by hand and mix with a wooden spoon.

If you want a firmer consistency, transfer ice cream into an airtight container and place in freezer for a couple of hours. Remove from freezer about 15 minutes before serving.

 Makes about 5 cups (10 ½ cup servings) 268 calories per ½ cup serving, not counting anything else you may add.

Oh, don't worry, you will!

Charlotte

Easy Corn Bread

Bluebird Gardens honey on freshly-baked corn bread - yumm! 

Bluebird Gardens honey on freshly-baked corn bread - yumm!


Easy Corn Bread Recipe

It was one of those Missouri spring days, warm at midday but cold by evening, reminding me there could still be a frost. I had painted all day – bee hives, bird houses, inadvertently even my neighbor’s two dogs. Hard to miss them now, they both are wearing hot pink tails after brushing against my paint projects.

A hot cup of canned New England Clam Chowder and homegrown salad was on the menu but something was missing. I brushed off my recipe box and found my dog-eared, all-time favorite corn bread recipe.

When I travelled for work, it was fun to try the variety of textures and flavors of corn bread from different regions. I thought of myself as a bit of a connoisseur, not that it was worth a hill of corn to anyone but me. Two criteria determined that the corn bread was not up to standard: some crumbled when cut open; others were far too dry.

After maybe far too much testing, I have decided I prefer mine simple yet flavorful, something with the right combination of corn taste and moisture. No gravy or jam, I still wonder at the cook who slathered a spicy cheese on a square of corn bread in Washington D. C., then broiled it. It wasn’t bad with the salad but I have always wondered what the cook was trying to hide. In my world, the corn bread has to taste good on its own before I enjoy it with my favorite additive, drizzled with honey, preferably freshly-harvested.

Here is my favorite corn bread recipe. You can substitute just water if you don’t have milk, and using eggs whites instead of a whole egg makes them just a tad lighter. Stay true to the ingredient amounts to get the right texture and moisture. If you add a smidge more of flour than the recipe calls for will make the corn bread dry. Also watch the timing, you don’t want to over bake.

Charlotte’s Easy Corn Bread Recipe

Ingredients:

1 ? cup flour

? cup corn meal

? cup sugar

2 teaspoons baking powder

? teaspoon salt (optional)

1 cup skim milk

? cup vegetable oil

2 egg whites of 1 egg beaten

To make, heat oven to 400F. Prepare baking pans; I like to bake in cupcake pans. This recipe will make 12.

Combine dry ingredients. Stir in milk, oil and egg, mixing dry ingredients until moist.

Pour into baking pan. Bake 20-25 minutes until light golden brown and wooden toothpick inserted in center comes out clean. Serve warm.

You can also freeze these. I place them on a cooling rack in freezer until frozen, then store in a plastic bag so I can remove individual servings when I need them.

Charlotte