Leftover Fruit Salad

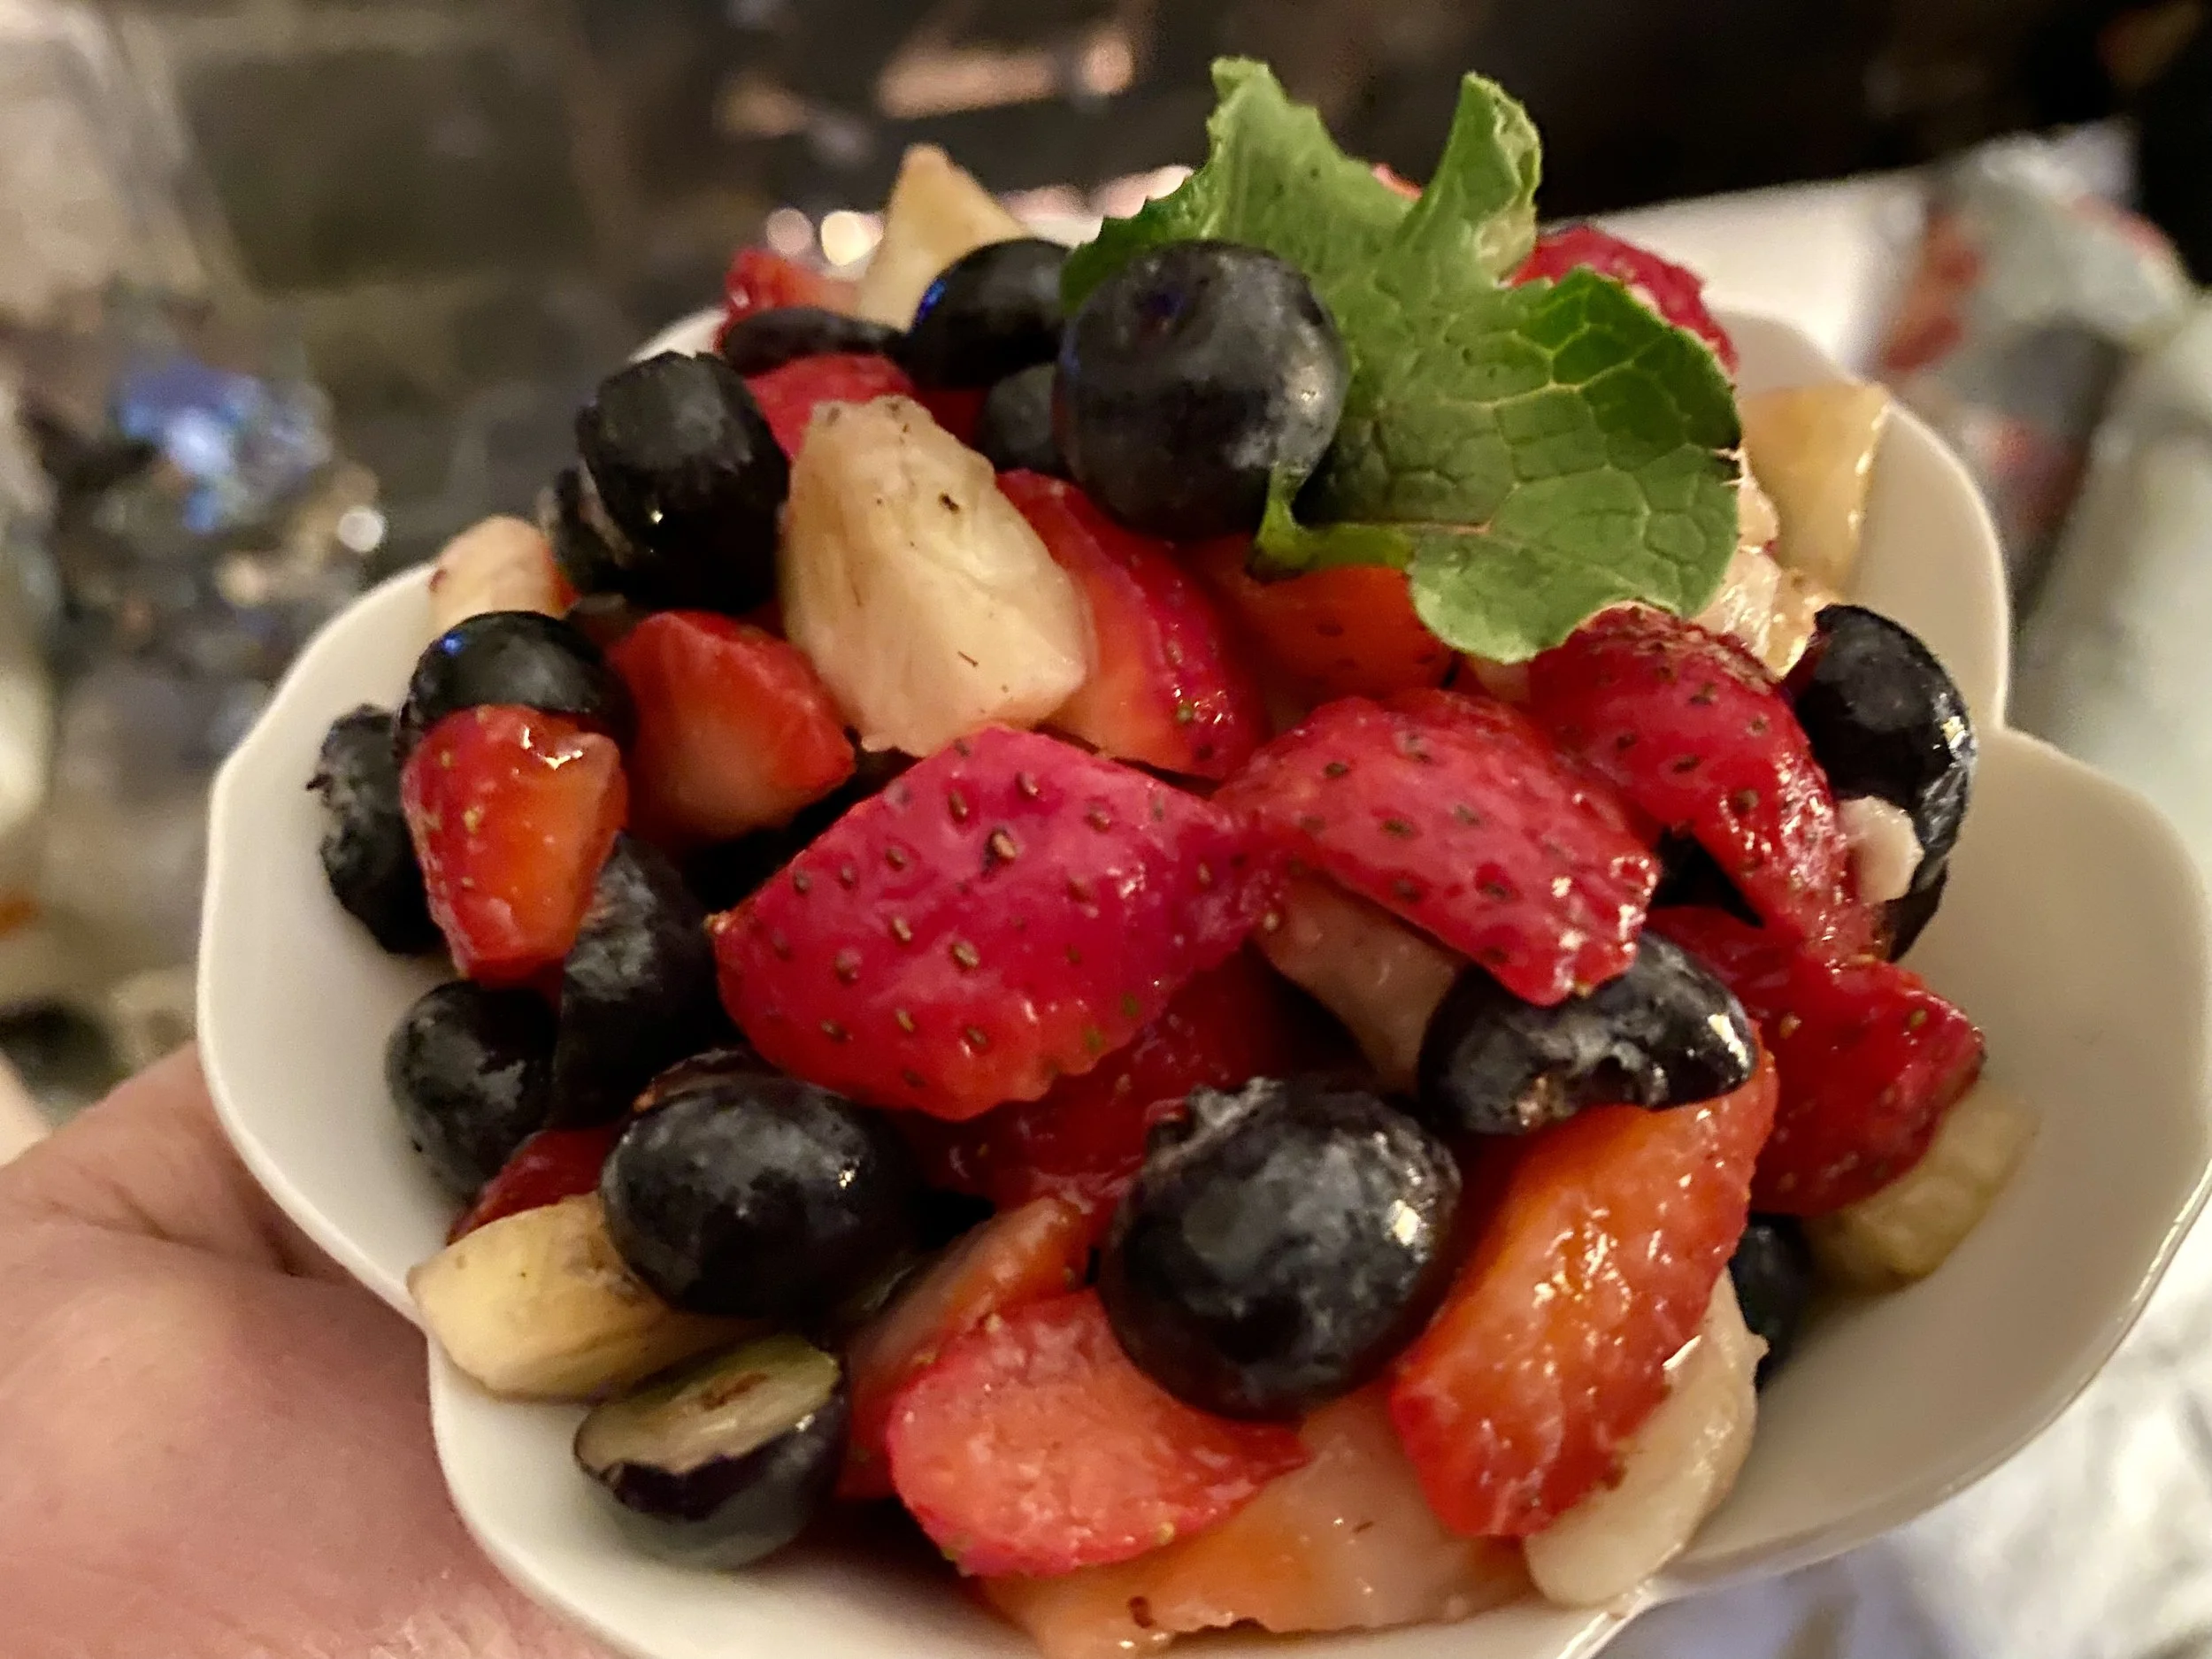
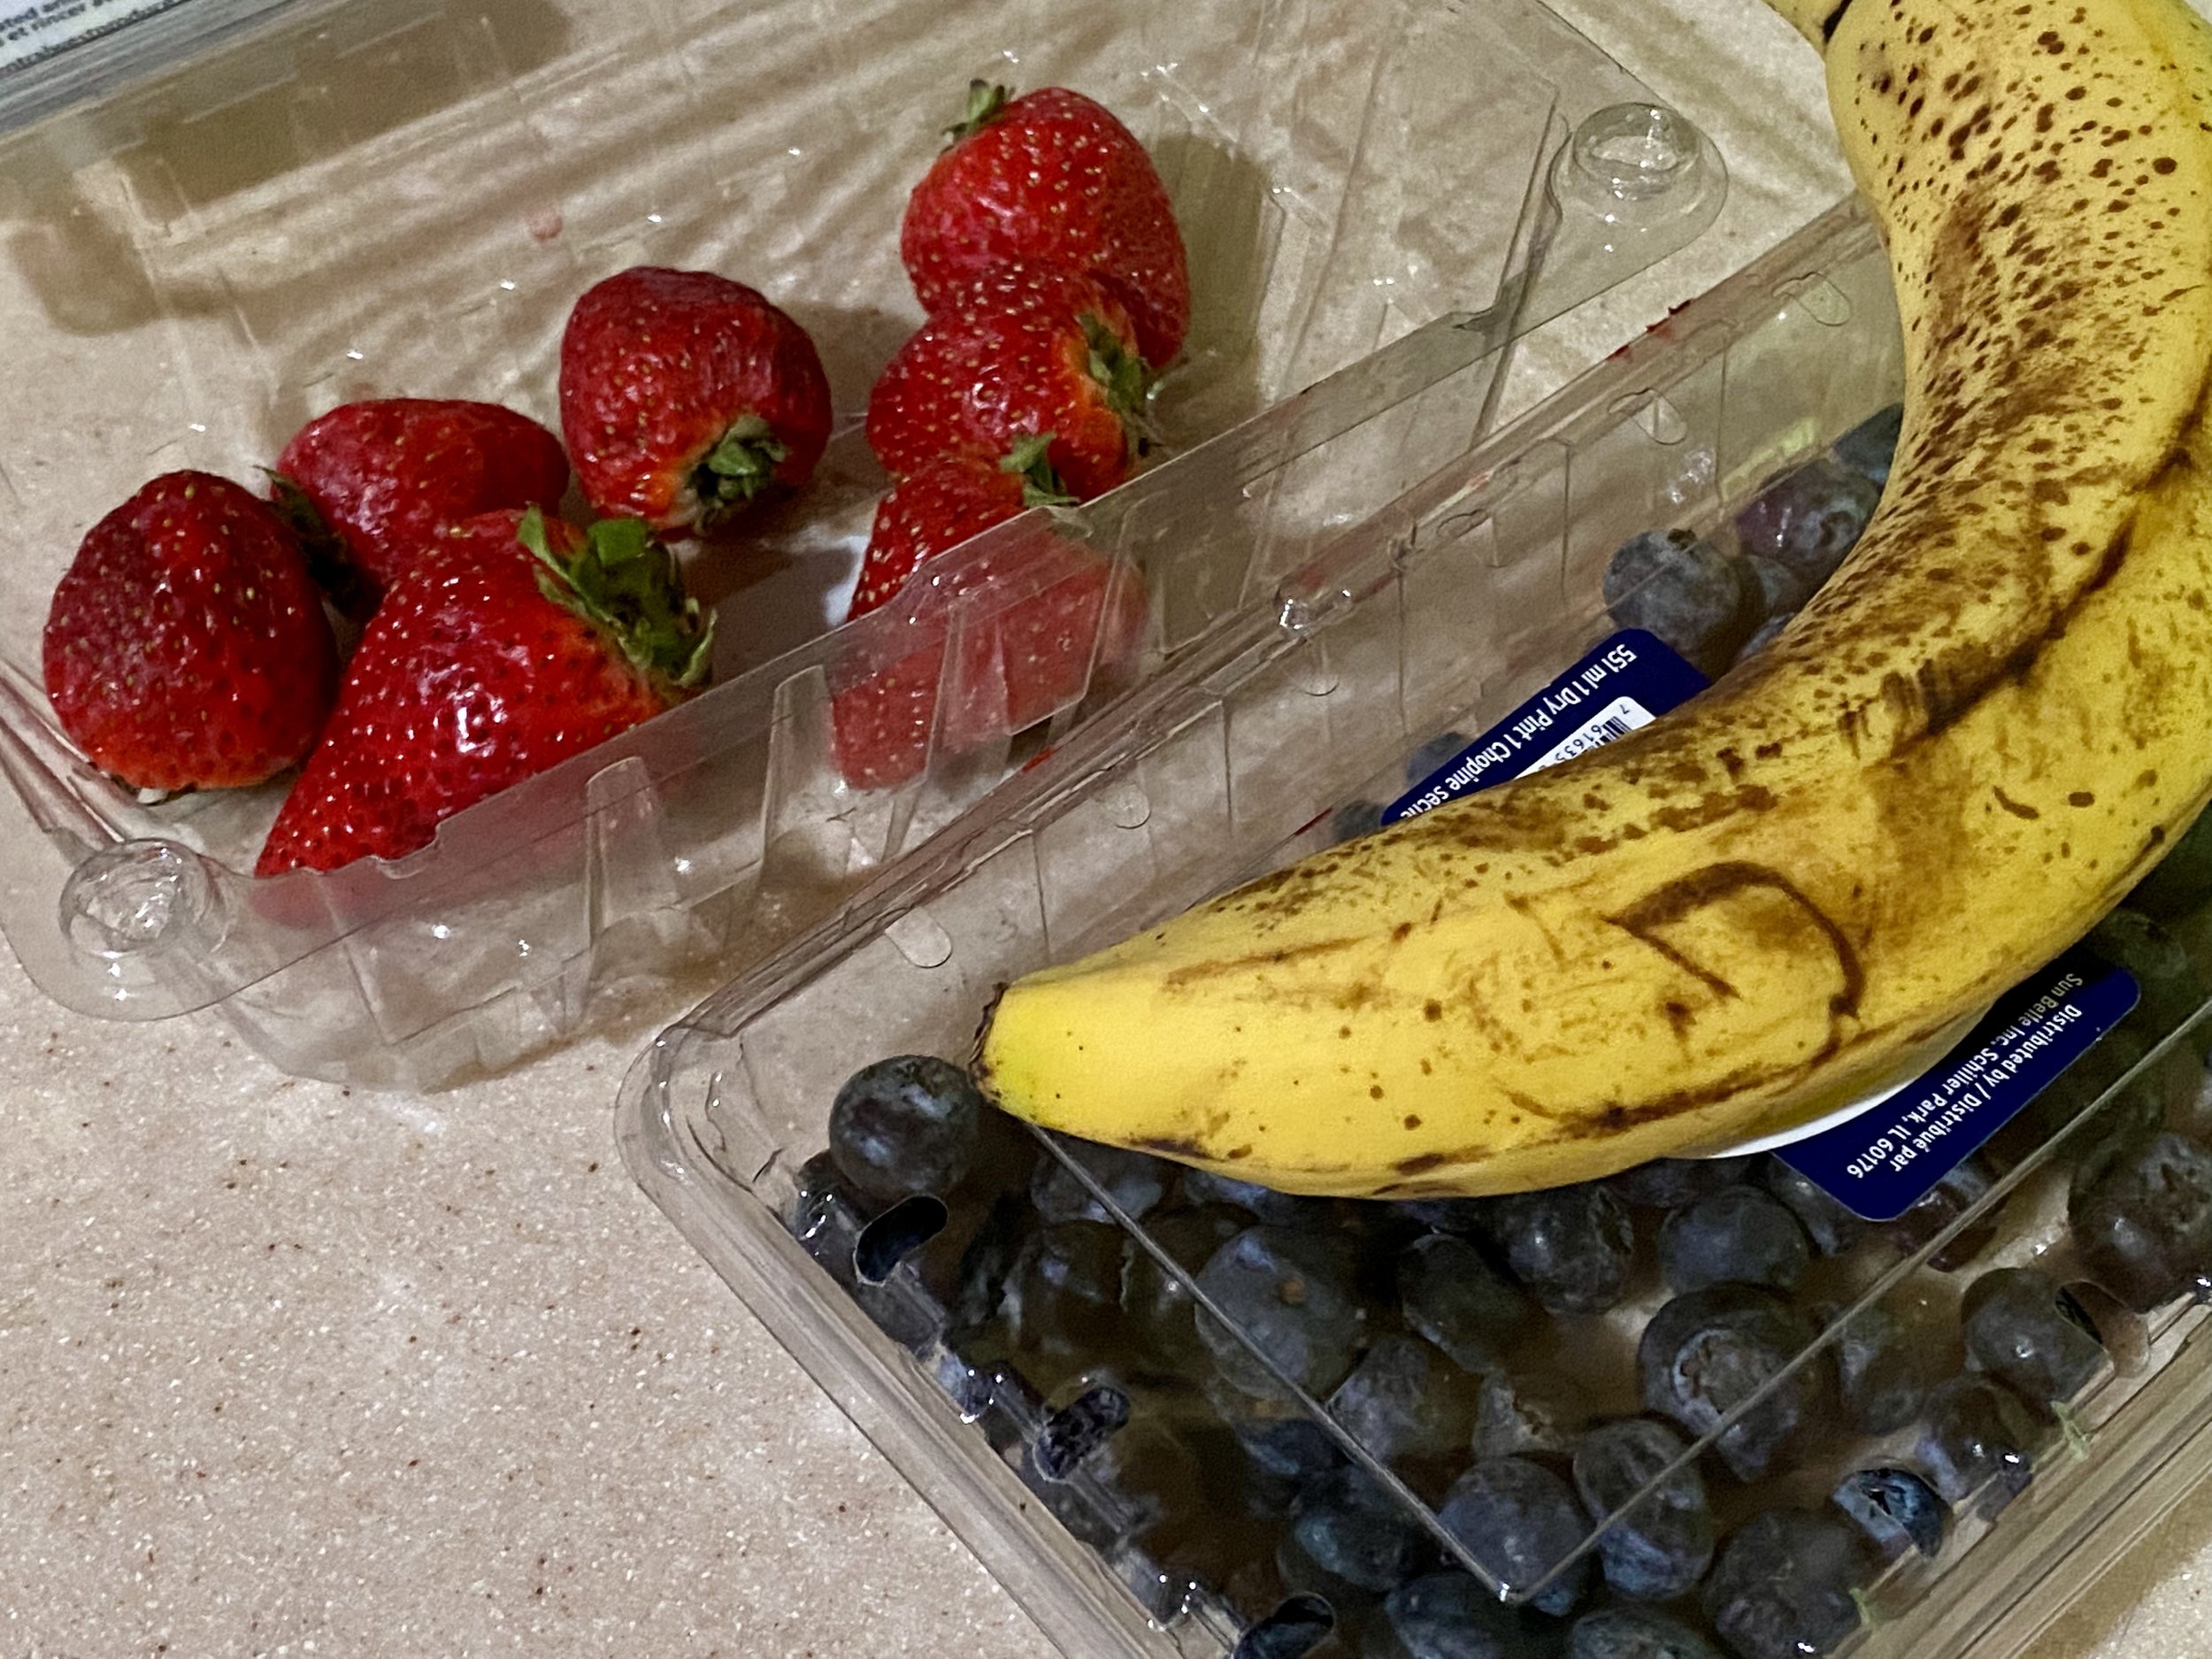
Leftover blueberries, strawberries and bananas. (Photo by Charlotte Ekker Wiggins)

Leftover Fruit Salad

As food prices continue to go up, we may be inspired to appreciate leftovers and use up the little dregs of produce we have remaining in the refrigerator. That’s what I do with remaining fresh fruit, especially berries.

Although I think about making a fruit salad, I tend to wait until the bananas start looking over ripe or fruit choices narrow down to just a few pieces each.

Don’t toss the leftover fruit, remix into a salad. (Photo by Charlotte Ekker Wiggins)

My favorite mix is strawberries with bananas sprinkled with black pepper. The key is to cut them into small pieces including quartering the banana so you can easily compost the parts that are brown.

For this week’s fruit salad, I had a few strawberries, a ripening banana and some blueberries. The green garnish at the top is a tiny piece of lettuce from a salad I made earlier.

Make the leftover fruit salad right before your meal to keep the bananas from browning. I’ve also made the salad the night before and kept in the refrigerator for consumption the next day. The bananas and strawberries marinate overnight, nicely mixing flavors.

To bring out the flavors, experiment with sprinkling with salt or black pepper.

Other Ways to Use Leftover Fruit

Another way to use up leftover fruit is to add it, again cut up in to small pieces, into homemade muffins. One of my favorite combinations is a salad with a side muffin. You will find recipes for muffins and other classic dishes in the 2007 American Illustrated Cooking Encyclopedia. Great gift idea for that new wedded couple and college graduate.

Finally add leftover fruit to that second day salad. The combination will give both leftovers a new lease on a meal.

Cooking at home is a great way to save money, too!

Charlotte

Garlic Bread

Homemade garlic bread smells delicious, too. (Photo by Charlotte Ekker Wiggins)

Garlic Bread

Adding homemade garlic bread is a quick and easy way to upgrade any meal. Soups and salads, as well as pasta, all feel, and taste, better with a piece of garlic bread.

There are a number of online recipes using fresh garlic but not everyone has access to homegrown, or even fresh, garlic cloves.

You certainly can also buy ready made garlic bread but it’s just as easy, and a lot less expensive, to make your own.

Basic Garlic Bread Recipe

You will need:

A loaf of French or Italian bread

3/4 tsp garlic salt

1 tsp. Italian seasoning

1/2 cup butter

Parmesan cheese (optional)

Fresh parsley (optional)

Use room temperature butter to easily mix with spices. (Photo by Charlotte Ekker Wiggins)

To make:

Slice the bread loaf in diagonal pieces.

Mix the room-soft butter with the Italian Seasoning and garlic salt.

Spread the mix on the cut bread pieces.

Make sure each bread piece is covered with the butter mixture. (Photo by Charlotte Ekker Wiggins)

Sprinkle with parmesan cheese. Optional.

Wrap in aluminum foil until ready to bake.

Heat oven to 350F. Warm bread for 10-15 minutes or until the butter mixture is melted.

Remove. Sprinkle with fresh parsley.

You can easily adjust the amount of garlic salt and Italian seasoning to taste.

Mom’s Garlic Bread Recipe

Now I would call this the “fancy” homemade garlic bread recipe. When we were growing up, my Mom made a much easier version using sliced French bread.

She would spread butter on the cut bread pieces, sprinkle with garlic salt, wrap in aluminum foil and warm in the 350F oven.

You can freeze both these recipes either before warming, or afterwards.

If you’re just starting to cook, try the Illustrated American Encyclopedia of Cooking, an excellent reference book with tried and true basic recipes.

Either way, I have a soft spot for homemade garlic bread. Did I mention it’s also excellent with spaghetti?

Homemade garlic bread adds a special touch to spaghetti. (Photo by Charlotte Ekker Wiggins)

Picking Bartlett Pears

Several Bartlett pears from my semi-dwarf pear tree. Which should you pick? (Photo by Charlotte Ekker Wiggins)

Several Bartlett pears from my semi-dwarf pear tree. Which should you pick? (Photo by Charlotte Ekker Wiggins)

Picking Bartlett Pears

It’s that time of year in my garden; actually it’s a little overdue and that’s picking Bartlett pears from my 37 year old Stark Brother’s pear tree.

I planted the tree close to my deck with the vision of sitting on the deck and plucking fresh fruit out of the tree. I can still do that but the timing is the important part. Besides pears ripening from the inside I have to beat the squirrels to the pears. Sometimes I will find very young pears on the ground from where someone had breakfast. These Dog in the Garden kitchen towels also remind me of my neighbors labs who liked to stop by and take a pear or two home.

To get a good ripe pear, they have to be picked when they still appear green. One trick a friend showed me was to gently bend the pear at a 45 degree angle. If the stem breaks, then it’s time to pick. If not, leave it on the tree and try another day.

Old cake stand makes a handy spot to ripen pears and tomatillos. (Photo by Charlotte Ekker Wiggins)

Old cake stand makes a handy spot to ripen pears and tomatillos. (Photo by Charlotte Ekker Wiggins)

Those green Bartlett pears go into the kitchen and into either a brown bag with an apple or banana. This year I also have them under glass in an old cake stand keeping company with apples and ripening tomatillos. The ethylene gas from the apples will help ripen the pears and tomatillos and I like seeing the pears displayed in that glass stand.

A pear that is ripening will also start to yellow, although it can be hard to tell unless that pear is close other, less ripe pears.

To check if they are ripe, gently press the top near the stem. If it’s soft the pear is ready to eat.

I have removed several yellow pears to find they were already someone’s meal. The pear gets washed and those parts get cut off and composted while I enjoy what remains. I don’t use any chemicals on my trees so I don’t have to worry about what has been sprayed.

I gave a friend two pears a week ago and she left them on her counter for the week. When I stopped by 7 days later, the pears had turned yellow and were soft around the stem, perfect for snacking.

If you want to save them for a specific day, store them in the refrigerator to slow down the ripening process.

One other trick. If you want to enjoy a pear before its ripe, you can cut it up and microwave it for a minute or so. I dust it with cinnamon or, after cooking, a drizzle of honey.

However you enjoy pears, there is something very special about picking your own homegrown pears.

Charlotte


Homemade Sun Tea

My little half a gallon jug steeping green tea bags for sun tea. (Photo by Charlotte Ekker Wiggins)

My little half a gallon jug steeping green tea bags for sun tea. (Photo by Charlotte Ekker Wiggins)

Homemade Sun Tea

If you’ve never made sun tea, this is the summer you should try it. It is not only easy to make but a nice refreshing change to ice tea made out of tea bags steeped in hot water.

When it comes to making tea, it doesn’t matter if the water is hot or cold. Hot water steeps the tea; cold water makes it an infusion. Either way, wet tea brings out the flavor.

What makes sun tea different, in my book, is that it is slow steeped, bringing out the tea flavor.

A friend of mine who had not tried sun tea was telling me it takes too long so she prefers to steep her tea in hot water. Hot water does release tea flavor quickly but I can get a similar reaction letting the sun heat up my tea water and I’m not heating up my kitchen in the middle of a record hot summer.

Homemade Sun Tea Recipe

You Will Need:

Glass container with a lid (gallon or half-gallon)

Tea bags or loose tea with a tea infuser to taste

Fresh honey

Mint springs or lemon slices (optional)

My tea making glass jar and three tea bags just placed in the sun to steep. (Photo by Charlotte Ekker Wiggins)

My tea making glass jar and three tea bags just placed in the sun to steep. (Photo by Charlotte Ekker Wiggins)

To Make:

I like my tea on the lighter side so I use 3-4 green tea bags per half-gallon. You may need to try a few combinations to find your tea strength preference.

You can mix tea bags, too, it’s a great opportunity to clean out your random stash of tea bags and try different combinations. A green tea with a fruity tea would be a nice first choice to try.

I fill my glass container with cold water, then add the tea bags with the tags hanging over the side. Cover.

Place the glass jar in a south-facing window away from traffic and curious little hands and paws.

Now the magic.

Depending on how strong you like your tea, it can be ready in an hour or steep for a day, it’s up to your personal preference on strength and color.

Once it’s the tea strength you want, add honey to sweeten if you like a sweeter tea. I add a teaspoon per 16 oz. glass or drink as is so adjust the sweetness to your taste.

Fresh spearmint spring straight out of my garden. (Photo by Charlotte Ekker Wiggins)

Fresh spearmint spring straight out of my garden. (Photo by Charlotte Ekker Wiggins)

Pour over ice cubes.

Serve with a slice of lemon or a sprig of fresh spearmint straight out of your garden.

Sun tea, the sure taste of summer! (Photo by Charlotte Ekker Wiggins)

Sun tea, the sure taste of summer! (Photo by Charlotte Ekker Wiggins)

If you enjoy making drinks, pick up our reprinted 1946 vintage Trader Vic’s Food and Drink book. Bet you will find some interesting drink recipes there, too!

Charlotte

Artichokes

IMG_3226.jpeg

Artichokes

Every time I pick up a couple of artichokes someone asks me what “to do” with them so here’s my suggestion on how to eat artichokes.

Artichokes are basically a large thistle. The vegetable you find at the market’s is the flower bud before they have bloomed. They grow in farms in California, where I suspect my mother picked up her taste for artichokes since she grew up there.

You will be eating the soft spot at the bottom of each leaf and the artichoke “heart.”

To eat, first boil the artichoke until you can get a fork in the bottom section between the stem and the artichoke bottom. Allow to cool.

Dab leaf base with mayonnaise then scrape the soft part off gently with your teeth. (Photo by Charlotte Ekker Wiggins)

Dab leaf base with mayonnaise then scrape the soft part off gently with your teeth. (Photo by Charlotte Ekker Wiggins)

You can dip the bottom of each leaf in melted butter or mayonnaise, just enough to coat it. Then gently scrape the bottom part with your teeth as you pull it through.

Once de-leafed, you will be left with the artichoke heart and paper-thin leaves. Remove the paper thin leaves before cutting up the heart and eating with a dab off your dip of preference.

The artichoke heart usually serves 6 to 8 bites. (Photo by Charlotte Ekker Wiggins)

The artichoke heart usually serves 6 to 8 bites. (Photo by Charlotte Ekker Wiggins)

Mom used to joke that artichokes were no calorie meals because it took more energy to eat them than consumed. That’s right, we used to make one meal out of an artichoke although some recommend it more as an appetizer.

They can also be pickled although I haven’t tried to do so.

Charlotte

Yellow Mix Lemon Cake

Optional powdered sugar finishes off this yellow lemon cake. (Photo by Charlotte Ekker Wiggins)

Optional powdered sugar finishes off this yellow lemon cake. (Photo by Charlotte Ekker Wiggins)

Yellow Mix Lemon Cake

It’s almost summer and this is a good quick desert option for those picnics and family get togethers. Most of us keep a yellow cake mix in our pantry, or at least I do. It’s my “emergency” go to when I need to quickly whip up a treat for a special occasion or to make an occasion special. Yellow cake mixes can be versatile depending on what small changes are made.

In this case, I am turning a yellow cake mix into a summer fresh Yellow Lemon Cake with thoughts of drizzling fresh honey over it.

Yellow Lemon Cake Recipe

You will need:

1 yellow cake mix

4 eggs

1/2 cup lemon juice

1/2 cup vegetable oil

1/3 cup water or milk

1 tsp vanilla

lemon zest of half a fresh lemon

powdered sugar (optional)

To make:

Mix all ingredients in a bowl on low. Beat on high for 2 minutes.

Pre-heat oven. Glass and aluminum pans cook at 350F; the darker baking containers should cook at 325F for about 30 minutes. Cool.

Turn onto a plate to cool. Optional but a good time to dust with powdered sugar.

Perfect combination of honey and yellow lemon cake. (Photo by Charlotte Ekker Wiggins)

Perfect combination of honey and yellow lemon cake. (Photo by Charlotte Ekker Wiggins)

This cake will be nicely dense so that it can hold up to mashed strawberries, a drizzle of honey and whipped cream.

For a lighter desert, try whipped topping instead of honey. (Photo by Charlotte Ekker Wiggins)

For a lighter desert, try whipped topping instead of honey. (Photo by Charlotte Ekker Wiggins)

It will also freeze quite nicely. After cutting, place the pieces in the freezer until firm so they cam be stored in a freezer bag.

Defrost prior to serving or reheat in microwave for 15-20 seconds.

Perfect to serve with a cup of hot, or cold, tea.

This cake will have a decidedly lemon taste. If you want less lemon, cut the lemon juice to 1/4 cup and increase the amount of water or milk.

Charlotte


Creeping Charlie Tea

Creeping Charlie makes a tea high in Vitamin C with a light mint taste. (Photo by Charlotte Ekker Wiggins)

Creeping Charlie makes a tea high in Vitamin C with a light mint taste. (Photo by Charlotte Ekker Wiggins)

Creeping Charlie Tea

Creeping Charlie (Glechoma hederacea) is a mint that can provide spring nectar to pollinators including bees. It’s also often considered an invasive weed because it can easily take over an area, which to me is a bonus. Gardening on a Missouri limestone hillside means I need help, and if a plant can retain soil, provide food for bees and be beneficial for me, it’s a win all around.

Creeping Charlie, also called Ground Ivy,  growing in my north apiary. (Photo by Charlotte Ekker Wiggins)

Creeping Charlie, also called Ground Ivy, growing in my north apiary. (Photo by Charlotte Ekker Wiggins)

Besides a spring nectar source for bees, Creeping Charlie is high in Vitamin C. As a mint, it can be made into a tea. The leaves can also be consumed in a salad; it has a spinach-like flavor.

Creeping Charlie from my garden ready for salads and tea. (Photo by Charlotte Ekker Wiggins)

Creeping Charlie from my garden ready for salads and tea. (Photo by Charlotte Ekker Wiggins)

European settlers intentionally brought Creeping Charlie to North America. Along with some of its other “weedy” predecessors like dandelions. Creeping Charlie used to be valued for its culinary and medicinal uses, primarily as a tonic. High in Vitamin C, it was often made into a tea to prevent scurvy.

All parts of the plant can be used; it was often made into a tea, tincture and poultice.


How to Make Creeping Charlie Tea

Because this mint plant runs so rampant, one way to embrace and use Creeping Charlie is to make it into a tea. It has a pleasantly subtle mint-like flavor.

Before you start, make sure you are collecting plants from an area that hasn’t been treated by chemicals.

A quart jar repeatedly infused with hot water makes 3-4 servings of Creeping Charlie tea. (Photo by Charlotte Ekker Wiggins)

A quart jar repeatedly infused with hot water makes 3-4 servings of Creeping Charlie tea. (Photo by Charlotte Ekker Wiggins)

Pick enough plant material to loosely fill a quart jar.

  1. Thoroughly wash the Creeping Charlie.

  2. Place the plant material in a quart jar.

  3. Fill to top with boiling water.

  4. Cover jar and steep for one hour.

  5. Remove plant material and drink either hot or cold or pour tea into a separate container and refill with hot water to steep again.

  6. Add a teaspoon of honey. You can also add lemon or lime slices with a sprig of fresh mint.

Quart jar full of Creeping Charlie from my garden filled with hot water. (Photo by Charlotte Ekker Wiggins)

Quart jar full of Creeping Charlie from my garden filled with hot water. (Photo by Charlotte Ekker Wiggins)

There is a lengthy list of medicinal claims for this tea according to the Lamb Shoppe Wellness Center, Since I”m not a medical professional I will leave those claims and assertions to someone else.

Charlotte

Reuse Coffee Pods

IMG_1370.jpeg

Reuse Coffee Pods

I’m not a coffee drinker any more but I still appreciate all of the gadgets that come with that beverage. The coffee pods in particular are now something I am trying to use as seed starting pots.

Coffee pods have an outside shell lined with a coffee filter that allows water to pass through and exit through a hole in the bottom.

The coffee pods make excellent seed starting pots, better than cut toilet paper rolls because the outside shell keeps the coffee liner from coming apart.

You can either transplant starts into the pods or plant seeds directly into them.

I use an egg carton to keep them upright and to ensure that they get watered enough to keep the soil in the pods wet.

Once the seedlings are ready to plant, I will pop them out of the coffee pods and see if I can use them again.

Charlotte

Open Can Cover

Repurpose empty tuna cans to make an easy cat food topper. (Photo by Charlotte Ekker Wiggins)

Open Can Cover

I’ve tried them all. From the rubber ones that you can buy to fit short round cans to the silicone ones that just sit on top. None of them have worked for me. They either fall off in the refrigerator or I have to pry them back open, if I’m lucky.

Until I found this nice little hack. A tuna can, cleaned out and turned upside down on top of an open can of cat food.

If I need another dish for feeding, it’s right there until I can find a new permanent one.

The tuna can nicely keeps the open cat food can sealed and I can easily remove it when i need to access the contents. And if cats try to get to the cat food before I do, it’s not easy for them to remove it.

What about those little rubber can tops they sell?

The typical little rubber can tops can be heard to seal. (Photo by Charlotte Ekke rWiggins)

The typical little rubber can tops can be heard to seal. (Photo by Charlotte Ekke rWiggins)

This is an ancient one, it’s been sitting unused in a drawer. It is going to get a good run through the dishwasher and become the bottom for a small flower pot.

Charlotte

Picking Pears

Lift the pear horizontally until it breaks off the stem. (Photo by Charlotte Ekker Wiggins)

Lift the pear horizontally until it breaks off the stem. (Photo by Charlotte Ekker Wiggins)

Picking Pears

I wasn’t sure my squirrels would leave me any Bartlett pears this year. For the past few years, they have ransacked my semi-dwarf pear tree growing right off my house deck. I planted it there in 1985 dreaming of reaching over my deck and picking a fresh pear.

It took a good 30 years before the pear tree produced its first pears. It was the same year I added honey bees to my garden although the bees weren’t responsible for the pollination, wasps were. Since then I keep extra birdhouses in my limestone hillside so paper wasps have a safe place to nest. Wasps are excellent fruit pollinators.

I also keep a variety of potted flowers on my deck to encourage pollinators. They don’t help the pear trees but they help nearby potted herbs and vegetables.

My semi-dwarf Bartlett pear tree almost leans over into my deck. (Photo by Charlotte Ekker Wiggins)

My semi-dwarf Bartlett pear tree almost leans over into my deck. (Photo by Charlotte Ekker Wiggins)

My first year of fruit I had more than 300 pears. Since then, I seem to have one good year interspersed with a lean year. In 2012 when we had a terrible drought, the tree gave me one very huge pear - the fruit was close to the size of a small cantaloupe.

According to Stark Brothers, I need to pinch some of the early pears so that the tree will produce fruit every year. I did that this spring, gently removing tiny pear starts so a branch was hosting only one or two pears instead of several trying to grow in one bunch.

Next year I need to remove one of these pears earlier. (Photo by Charlotte Ekker Wiggins)

Next year I need to remove one of these pears earlier. (Photo by Charlotte Ekker Wiggins)

Late August I start checking my pear tree for fruit. I was pleasantly surprised the squirrels left me a few.

A few Bartlett pears waiting for me to pick them before squirrels get to them. (Photo by Charlotte Ekker Wiggins)

A few Bartlett pears waiting for me to pick them before squirrels get to them. (Photo by Charlotte Ekker Wiggins)

Pears ripen from the inside out. By the time they feel soft on the outside they are deteriorating inside.

The way to select a pear is to press gently on the top where the stem is located. If that area is soft, the pear is ripe.

If the pear is still green, place it inside a brown bag with an apple or banana to capture ethylene gas that will help the pear to ripen. I also leave a couple of pears in my counter fruit basket and check them daily. They usually ripen nicely after a few days.

The extra pears I have I store in the refrigerator until I need them.

When I get too many pears, I share with family and close friends, usually with a little jar of honey.

Enjoying my first homegrown Bartlett pear of the season! (Photo by Charlotte Ekker Wiggins)

Enjoying my first homegrown Bartlett pear of the season! (Photo by Charlotte Ekker Wiggins)

Pears are delicious fresh or diced in salads. You can also bake them sprinkled with cinnamon and drizzled with honey, a perfect winter treat.

And the squirrels?

I just keep planting more dwarf pear trees, surely there will be enough to go around!

Charlotte

Versatile Glass Charms

These wine glass cat charms make great additions to punch cups.

These wine glass cat charms make great additions to punch cups.

Versatile Glass Charms

It was time to give my little collection of glass charms a good workout!

The first time I rolled out my glass charm collection, it was a holiday neighborhood drop-in, kept simple and informal so we could spend time with each other and celebrate the Christmas season. As part of the event, I made a Christmas punch and dusted off my little glass punch glasses.

Glass charms are an easy way to keep track of one’s glass. Having run out of glasses during drop ins in the past, I thought the charms might keep me from breaking out the paper ones.

For those who might enjoy a glass of wine, I also had a few wine glasses ready, all dressed in their little cat glass charms so people wouldn't loose their glasses.

The glass cat charms ended up on the punch bowl glass handles, all 20 of the little glass cats busily keeping glasses and drinkers connected through the four-hour party.

Now that we are all spending more time at home and sharing meals together, glass charms are a fun way to keep track of glasses and cut down on washing extra ones.

You can find glass charms at hobby stores and sometimes home decor sections of big box stores. I found my first set at a thrift store and kept an eye out for more. One of the sets I picked up at a hobby shop.

A friend of mine made herself a set of glass charms with key rings and favorite cartoon characters. These would make a great homemade holiday gift!

Charlotte

Sun Tea

Green tea with lemon sun tea with apple mint and a strawberry. (Photo by Charlotte Ekker Wiggins)

Green tea with lemon sun tea with apple mint and a strawberry. (Photo by Charlotte Ekker Wiggins)

Sun Tea

Do you remember making sun tea in the 1970s? It was a very popular drink back then. Suppliers offered large gallon glass jugs with spigots built in so the tea could be enjoyed straight out of the glass container. Some of the concoctions were even offered through Trader Vic’s, a series of restaurants and tiki bars that dotted the US countryside.

I never bought one of those large glass jugs, we just made the sun tea in large glass containers. After all, the important part was being able to place the container in the sun where someone would not knock it over.

This year I am making green tea in the sun in a good sized jar that fits nicely in a window.

A plain jar with a lid works well for making sun tea. (Photo by Charlotte Ekker Wiggins)

A plain jar with a lid works well for making sun tea. (Photo by Charlotte Ekker Wiggins)

Now how many tea bags to add depends on how strong you like your tea. I prefer mine more light than dark so I started with two bags per jar.

Since I also have a nice supply of apple mint growing, I collected some I am keeping in a flower vase until I’m ready to add it to the tea.

This batch of green tea will get apple mint added. (Photo by Charlotte Ekker Wiggins)

This batch of green tea will get apple mint added. (Photo by Charlotte Ekker Wiggins)

Sun tea has a different taste than a tea made out of hot water. I also tend to think it’s a smoother-tasting tea.

If you prefer your tea sweeter, add sugar or honey when you are getting ready to store it in the refrigerator.

Here’s to summer!

Charlotte

Homemade Taco Seasoning

My essential homemade taco seasoning in repurposed seasoning jar. (Photo by Charlotte Ekker Wiggins)

My essential homemade taco seasoning in repurposed seasoning jar. (Photo by Charlotte Ekker Wiggins)

Homemade Taco Seasoning

I can’t imagine my kitchen without it. I even shared a small jar with a friend who said she couldn’t imagine making her own. And yet there she was, making a taco salad with homemade taco seasoning.

Making seasonings at home is not difficult and has the added benefit of being less expensive.

If you have a nice stash of seasonings already, you shouldn’t be saving them for years, it’s best to use them to keep them fresh and full of flavor.

I make my taco salad without a shell using lettuce as the vessel that holds all ingredients in one place. And the best part, taco seasoning.

When I toss the homemade taco seasoning together, I triple the recipe. That’s how much fits in the recycled glass seasoning jar. I suppose I could make more but the last couple of times I was out of one or another ingredient.

If I ever get everything I need in hand, I will easily make a generous helping and store it in an air tight jar.

Use up your stash of seasonings and turn them into taco seasoning. (Photo by Charlotte Ekker Wiggins)

Use up your stash of seasonings and turn them into taco seasoning. (Photo by Charlotte Ekker Wiggins)

Homemade Taco Seasoning Recipe

1 Tablespoon chili powder

1.5 teaspoon ground cumin

1 teaspoon sea salt (or regular salt if that’s what you have)

1 teaspoon black pepper

1/2 teaspoon paprika

1/4 teaspoon garlic powder

1/4 teaspoon onion powder

1/4 teaspoon dried oregano

If you want a little more heat, add 1/4 teaspoon red pepper flakes. I sometimes make this without the red pepper flakes since spicy doesn’t agree with me.

Mix. I use a plastic container with a corner so I can easily pour the mixture into a glass jar.

Using Homemade Taco Seasoning

If using to season 1 pound of browned ground hamburger, use 1/4 cup of taco seasoning. Cook on low with 1/2 cup of water for about 10 minutes. That’s what you usually get in a packet of pre-made taco seasoning.

Cool enough to use in taco shells or on a taco salad.

If you are just starting to learn how to cook, pick up a good basic reference book like the Encyclopedia of American Cooking. Once you get the basics down, you will enjoy coming up with your own dishes!

Charlotte

Portable Tea

This portable tea caddy keeps my tea from being knocked over. (Photo by Charlotte Ekker Wiggins)

This portable tea caddy keeps my tea from being knocked over. (Photo by Charlotte Ekker Wiggins)

Portable Tea

A few years back a friend and I were talking about the challenges of having tea. Maybe because we both had stories of dropping teapots, or cups. Nevertheless, at one point she said she wished she could figure out a way to safely have a cup of tea.

I finally did repurposing items I already had around the house.

First, I like to carry my tea to a comfortable spot, maybe one of my chairs facing the garden. Or a quiet corner with a sofa and blanket I can curl up in with a book. This black wire basket without the handle works quite well as a tea tray. The sides are tall enough to prevent anything from tipping over and it’s small enough I can still easily move it around.

Secondly, I repurposed a red hot pad on the bottom. The hot pad helps to keep the teacup warm once it has tea in it.

I also found an old silver spoon with a flat end to stir the honey I sometimes add. Not that you have to have a special teaspoon but I find keeping this set together makes it much easier to have a cup of tea whenever I feel like having one. My back up are my Bluebird spoons.

I also keep a cloth napkin handy in the white cat ceramic napkin ring. Sometimes I throw another one in but at least this way I have one if I happen to forget to add one

A pot holder on the base keeps the tea in the bottom cup warm. (Photo by Charlotte Ekker Wiggins)

A pot holder on the base keeps the tea in the bottom cup warm. (Photo by Charlotte Ekker Wiggins)

Finally, the teacup itself. The one I have is a clever combination of teapot and teacup that sits under the ceramic pot. I found this one brand new at a local thrift store. It’s very handy to be able to steep the teabag in the top portion, then pour the tea into the bottom cup.

Sort through your kitchen and see what you already have. You can use a tea ball to steep tea in a favorite cup. And find a lid to add to the top of a coffee cup to keep your team warm. Whatever it takes to make getting a break with a cup of tea easy to do.

Would you like a cup of tea? ({Photo by Charlotte Ekker Wiggins)

Would you like a cup of tea? ({Photo by Charlotte Ekker Wiggins)

Having a cup of tea is a very relaxing thing to do. By having your tea-making items handy, chances are you are going to enjoy this routine more open, Enjoy!

Charlotte

Steam Vegetables

Steamed broccoli is one of my personal favorites. (Photo by Charlotte Ekker Wiggins)

Steamed broccoli is one of my personal favorites. (Photo by Charlotte Ekker Wiggins)

Steam Vegetables

This may come as a shock to you but steamed vegetables are very easy to make. The biggest challenge is knowing how long each vegetable takes to cook. Broccoli, for example, takes more time than cauliflower.

Once steamed, these vegetables can also be spread on a cookie sheet; frozen and then stored for later use. You may never look at a bag of frozen vegetables the same way again.

Steamer baskets make steaming vegetables easy work. (Photo by Charlotte Ekker Wiggins)

Steamer baskets make steaming vegetables easy work. (Photo by Charlotte Ekker Wiggins)

To steam you need a simple steamer basket. If you don’t have one, you can make one with a simple basket that fits inside your cooking pot.

To steam, wash the vegetables. Cut up into smaller pieces. Add water to your pot; I usually add 3 inches of water and keep more handy in case it evaporates before the vegetables are steamed. Add cut up vegetable s to your steamer basket.

Set the timer for 5 minutes and check the vegetables with a fork. If the vegetables are done, the fork will easily go in.

Remove from heat. Drain. Spread on a cookie sheet. Freeze. Store in plastic bag in freezer.

Cut up cauliflower ready to be steamed. Some vegetables take longer than others. (Photo by Charlotte Ekker Wiggins)

Cut up cauliflower ready to be steamed. Some vegetables take longer than others. (Photo by Charlotte Ekker Wiggins)

I steam the vegetables separately and then store a few in bags by themselves, others in a mixed bag.

To serve, remove from freezer. Allow to come to room temperature or microwave for a minute.

I don’t put anything on my steamed vegetables. Some people like a little butter, salad dressing or olive oil so season to taste.

That’s it!

Charlotte

Sourdough Bread Starter

Using my cute bee bowl, a gift from my brother. Let’s do this! (Photo by Charlotte Ekker Wiggins)

Using my cute bee bowl, a gift from my brother. Let’s do this! (Photo by Charlotte Ekker Wiggins)

Sourdough Bread Starter

It’s been on my bucket list for awhile now and here’s my chance, making sourdough bread starter.

I met my first sourdough bread in San Francisco as a kid. It’s been a personal and family favorite for years and the one item I used to carry back from my visits with my Aunt and Uncle who lived there.

Not sure this will match the flavor memories but I have to find out. It’s my understanding the longer the starter “lives,” the better it gets.

You can find these kinds of basic recipes in cookbooks like the American Encyclopaedia of Cooking and my personal favorite, my mother’s Betty Crocker cookbook.

Sourdough Bread Starter Recipe

You will need:

A glass or non-metalic bowl

1 Packet of active yeast

2 cups flour

2 cups warm water

Patience!

Moved up to a larger bowl to prevent bubbling over. (Photo by Charlotte Ekker Wiggins)

Moved up to a larger bowl to prevent bubbling over. (Photo by Charlotte Ekker Wiggins)

To make:

Add the yeast packet to warm water. Add flour. Make sure the container is large so that will collect any spill over.

Best place to wait, on top of my kitchen stove. (Photo by Charlotte Ekker Wiggins)

Best place to wait, on top of my kitchen stove. (Photo by Charlotte Ekker Wiggins)

Place in a warm spot, which in my kitchen is on my stove.

Cover lightly.

Wait 4-8 days allowing the yeast to bubble.

When mixture is bubbly and has a pleasant sour smell, it is ready to use. If mixture has a pink, orange, or any other strange color tinge to it, THROW IT OUT! and start over. Keep it in the refrigerator, covered until ready to bake.

When you use starter to bake, always replace with equal amounts of a flour and water mixture with a pinch of sugar. So, if you remove 1 cup starter, replace with 1 cup water and 1 cup flour. Mix well and leave out on the counter until bubbly again, then refrigerate. If a clear to light brown liquid has accumulated on top, don't worry, this is an alcohol base liquid that occurs with fermentation. Just stir this back into the starter, the alcohol bakes off and that wonderful sourdough flavor remains! Sourdough starters improve with age.

Recipe from allrecipes.com.

What to do next? Make sourdough bread, of course!

Charlotte

Messy Omelet

Part scrambled eggs, part omelet, this is an easy to make practical combo. (Photo by Charlotte Ekker Wiggins)

Part scrambled eggs, part omelet, this is an easy to make practical combo. (Photo by Charlotte Ekker Wiggins)

Messy Omelet

My brothers are to blame for the inspiration. I used to try to make the traditional, recipe-book specified flat omelet. Now I skip that part and go straight to what would be more elegantly called a deconstructed omelet. I call it the “Messy Omelet.”

Think of it as well-dressed scrambled eggs only the additional ingredients have to be added in a certain order. That’s how it started. But that only works if you are paying attention to what you are doing and not talking to someone. Or distracted by a plant that doesn’t look so well. Or listening to a fascinating radio show.

See, you have it messy before you even start.

I check the refrigerator first for possible ingredients: chopped green peppers, onions - either yellow or red - and mushrooms are favorites. Tomatoes to add color are a good addition, too but not the winter, store bought ones without flavor. If I am still ripening the last tomatoes of the season in a brown bag with an apple I will toss one of those into the chopping stack.

Cooked chicken and ham - choose one, not both, can be added but not necessary. I was less than thrilled with the salmon I added last time.

Finally a dash of garlic powder and 1/2 inch of sharp cheddar cheese, cut up into small pieces.

Cut up the rest into small pieces as well. I leave mushrooms in larger pieces so I can see them.

Once you have all of the additions cut up, break 6 eggs into a bowl. Add the ingredients.

Heat a frying pan with extra virgin olive oil. Add the mixture just before your pan starts to protest about not having enough olive oil.

Now the waiting begins. I let the sides form a solid once inch band, then scoop and mix. Another wait, and the same. You don’t want to mix too much or you will make it mushy. I watch the cheese. When it disappears, one more scoop around the pan edge and it’s ready.

A mixture with six eggs makes 4 servings.

Nice way to get some protein and clean your refrigerator out of leftovers. It’s also good practice for cutting up vegetables, where my brothers come in. We used to spend Friday nights in our home kitchen cutting up everything we could find and cooking it. I remember those days as I chop away at whatever I have on my kitchen cutting board. It was a small miracle no one lost any fingers.

This is a great recipe for those cold snow days when everyone is at home because schools are closed. You will have extra staff to help with the chopping.

Charlotte

Baking Baking Pumpkin

Cooled baking pumpkin drizzled with Bluebird Gardens honey, so delicious! (Photo by Charlotte Ekker Wiggins)

Cooled baking pumpkin drizzled with Bluebird Gardens honey, so delicious! (Photo by Charlotte Ekker Wiggins)

Baking Baking Pumpkin

Maybe it was the overnight turn in temperatures but today was the day to bake my little cute baking pumpkin.

It’s been sitting on my den coffee table, my idea of easy fall decorating. About the size of a small basketball, baking pumpkins are different than the larger Jack O’Lantern pumpkins also popular for fall decorating. The baking pumpkin flesh is more dense and easier to use in cooking.

Interestingly enough, baking pumpkins are available in October but try to find one around Thanksgiving and you will be out of luck so stock up now if you want to bake one to make a Thanksgiving pie.

A baking pumpkin has sat on my den coffee table for a couple of weeks. Fall decorating. (Photo by Charlotte Ekker Wiggins)

A baking pumpkin has sat on my den coffee table for a couple of weeks. Fall decorating. (Photo by Charlotte Ekker Wiggins)

To bake this, or other pumpkins, wash the outside with water. Remove the top notch. Cut down the center.

I remove the seeds and give them to my outside residents but you can also roast them for a snack.

I also don’t sweat the fibers that hold in the seeds, they will bake quite nicely.

My baking pumpkin cut open so I can remove the seeds. (Photo by Charlotte Ekker Wiggins)

My baking pumpkin cut open so I can remove the seeds. (Photo by Charlotte Ekker Wiggins)

Fill each of the baking pumpkin halves with water and place on a cookie sheet.

Warm over to 350F. Place the pumpkin halves in the oven and bake 45 minutes or until you can press a fork into the sides.

One of the baking pumpkin halves cooked and ready to slice. (Photo by Charlotte Ekker Wiggins)

One of the baking pumpkin halves cooked and ready to slice. (Photo by Charlotte Ekker Wiggins)

Once cool, peel and cut off the outside, some will easy peel now that it is cooked. Cut up into small chunks.

Now here is my favorite part, drizzle with local honey. According to historians, this is closer to how the European settlers first consumed pumpkins with Native Americans on those first Thanksgivings.

You can bake a Jack O’Lantern pumpkin and any of the other pumpkins the same way. Once cool, remove the center pulp; blend. Use the blended pumpkin in your recipe instead of canned pumpkin. And yes, they are quite different. Once you try a real pumpkin you may not go back to the canned variety, which is really a blend of pumpkins and squash.

I have about 8 half cup servings of baked pumpkin out of this one, and I enjoyed two of them. The rest are in the freezer for later use. Guess I need to pick up another baking pumpkin if I’m going to make a pie!

Charlotte

Pick and Store Basil

Cut the basil above the growing nodes to keep it bushy. (Photo by Charlotte Ekker Wiggins)

Cut the basil above the growing nodes to keep it bushy. (Photo by Charlotte Ekker Wiggins)

Pick and Store Basil

Of all of the summer herbs, basil has to be one of the US favorites, I see it offered for sale at most farmer’s markets and growing in friends gardens.

I love the herb myself so I have my own supply growing where it can do double duty, potted in with my tomato plants. Basil plants (Ocimum basilicum) can help tomato plants overcome insects and disease and can improve tomato growth rate and flavor.

Basil is wonderful both fresh in salads and added to a variety of recipes from soups to breads.

I don’t necessarily remember to keep my growing basil pinched so that it grows bushy but that’s one way to extend the life of the herbs.

Plant basil with tomatoes to enhance tomatoes. (Photo by Charlotte Ekker Wiggins)

Plant basil with tomatoes to enhance tomatoes. (Photo by Charlotte Ekker Wiggins)

Pinch off the basil above the growing nodes to encourage more bushy growth.

Once cut, wash with spray water and place in vase with water and allow to dry.

Once cut, keep basil in water in a vase. (Photo by Charlotte Ekker Wiggins)

Once cut, keep basil in water in a vase. (Photo by Charlotte Ekker Wiggins)

Pop the cuts into a plastic bag and place the vase with basil in a plastic bag into the refrigerator.

Once covered with plastic, store in refrigerator to keep fresh. (Photo by Charlotte Ekker Wggins)

Once covered with plastic, store in refrigerator to keep fresh. (Photo by Charlotte Ekker Wggins)

The basil will remain fresh and accessible for your use.

Charlotte

Easy Pie Filing Desert

A sprig of fresh spearmint finishes off this serving of key lime pie filling. (Photo by Charlotte Ekker Wiggins)

A sprig of fresh spearmint finishes off this serving of key lime pie filling. (Photo by Charlotte Ekker Wiggins)

Easy Pie Filing Desert

Over the years, I have worked with some amazing cooks especially pie makers. I learned quite early not to even try to match their pie crusts.

One year, I took the plunge and made a pie filing without a pie crust, serving it as a desert. The hack stuck and now I make most of my favorite pie filings for desert without a crust.

Key Lime pie, for example, makes a lovely summer desert. Bake it in a bread pan and double the meringue - 4 eggs whites with 1/2 cup of sugar beaten until the egg white peaks are stiff. Spread over the cooked pie filing.

Bake in oven at 350F for 7-10 minutes until meringue is light brown.

A glass bread pan nicely holds the pie filing to bake the meringue. (Photo by Charlotte Ekker Wiggins)

A glass bread pan nicely holds the pie filing to bake the meringue. (Photo by Charlotte Ekker Wiggins)

After removing from the oven, let cool before serving. Don’t even try to snatch a taste, the filing will be quite hot. If you need to speed up the cooling process, you can place the glass bread pan in the refrigerator.

You can also bake these in individual ramekins to have ready to serve portions.

Other good pie filings to make include lemon meringue, chocolate and yes, even apple and cherry pies. I wouldn’t add meringue to the berry pies but whipped topping is handy to have when they cool off.

Charlotte