Baking Blue Pumpkin

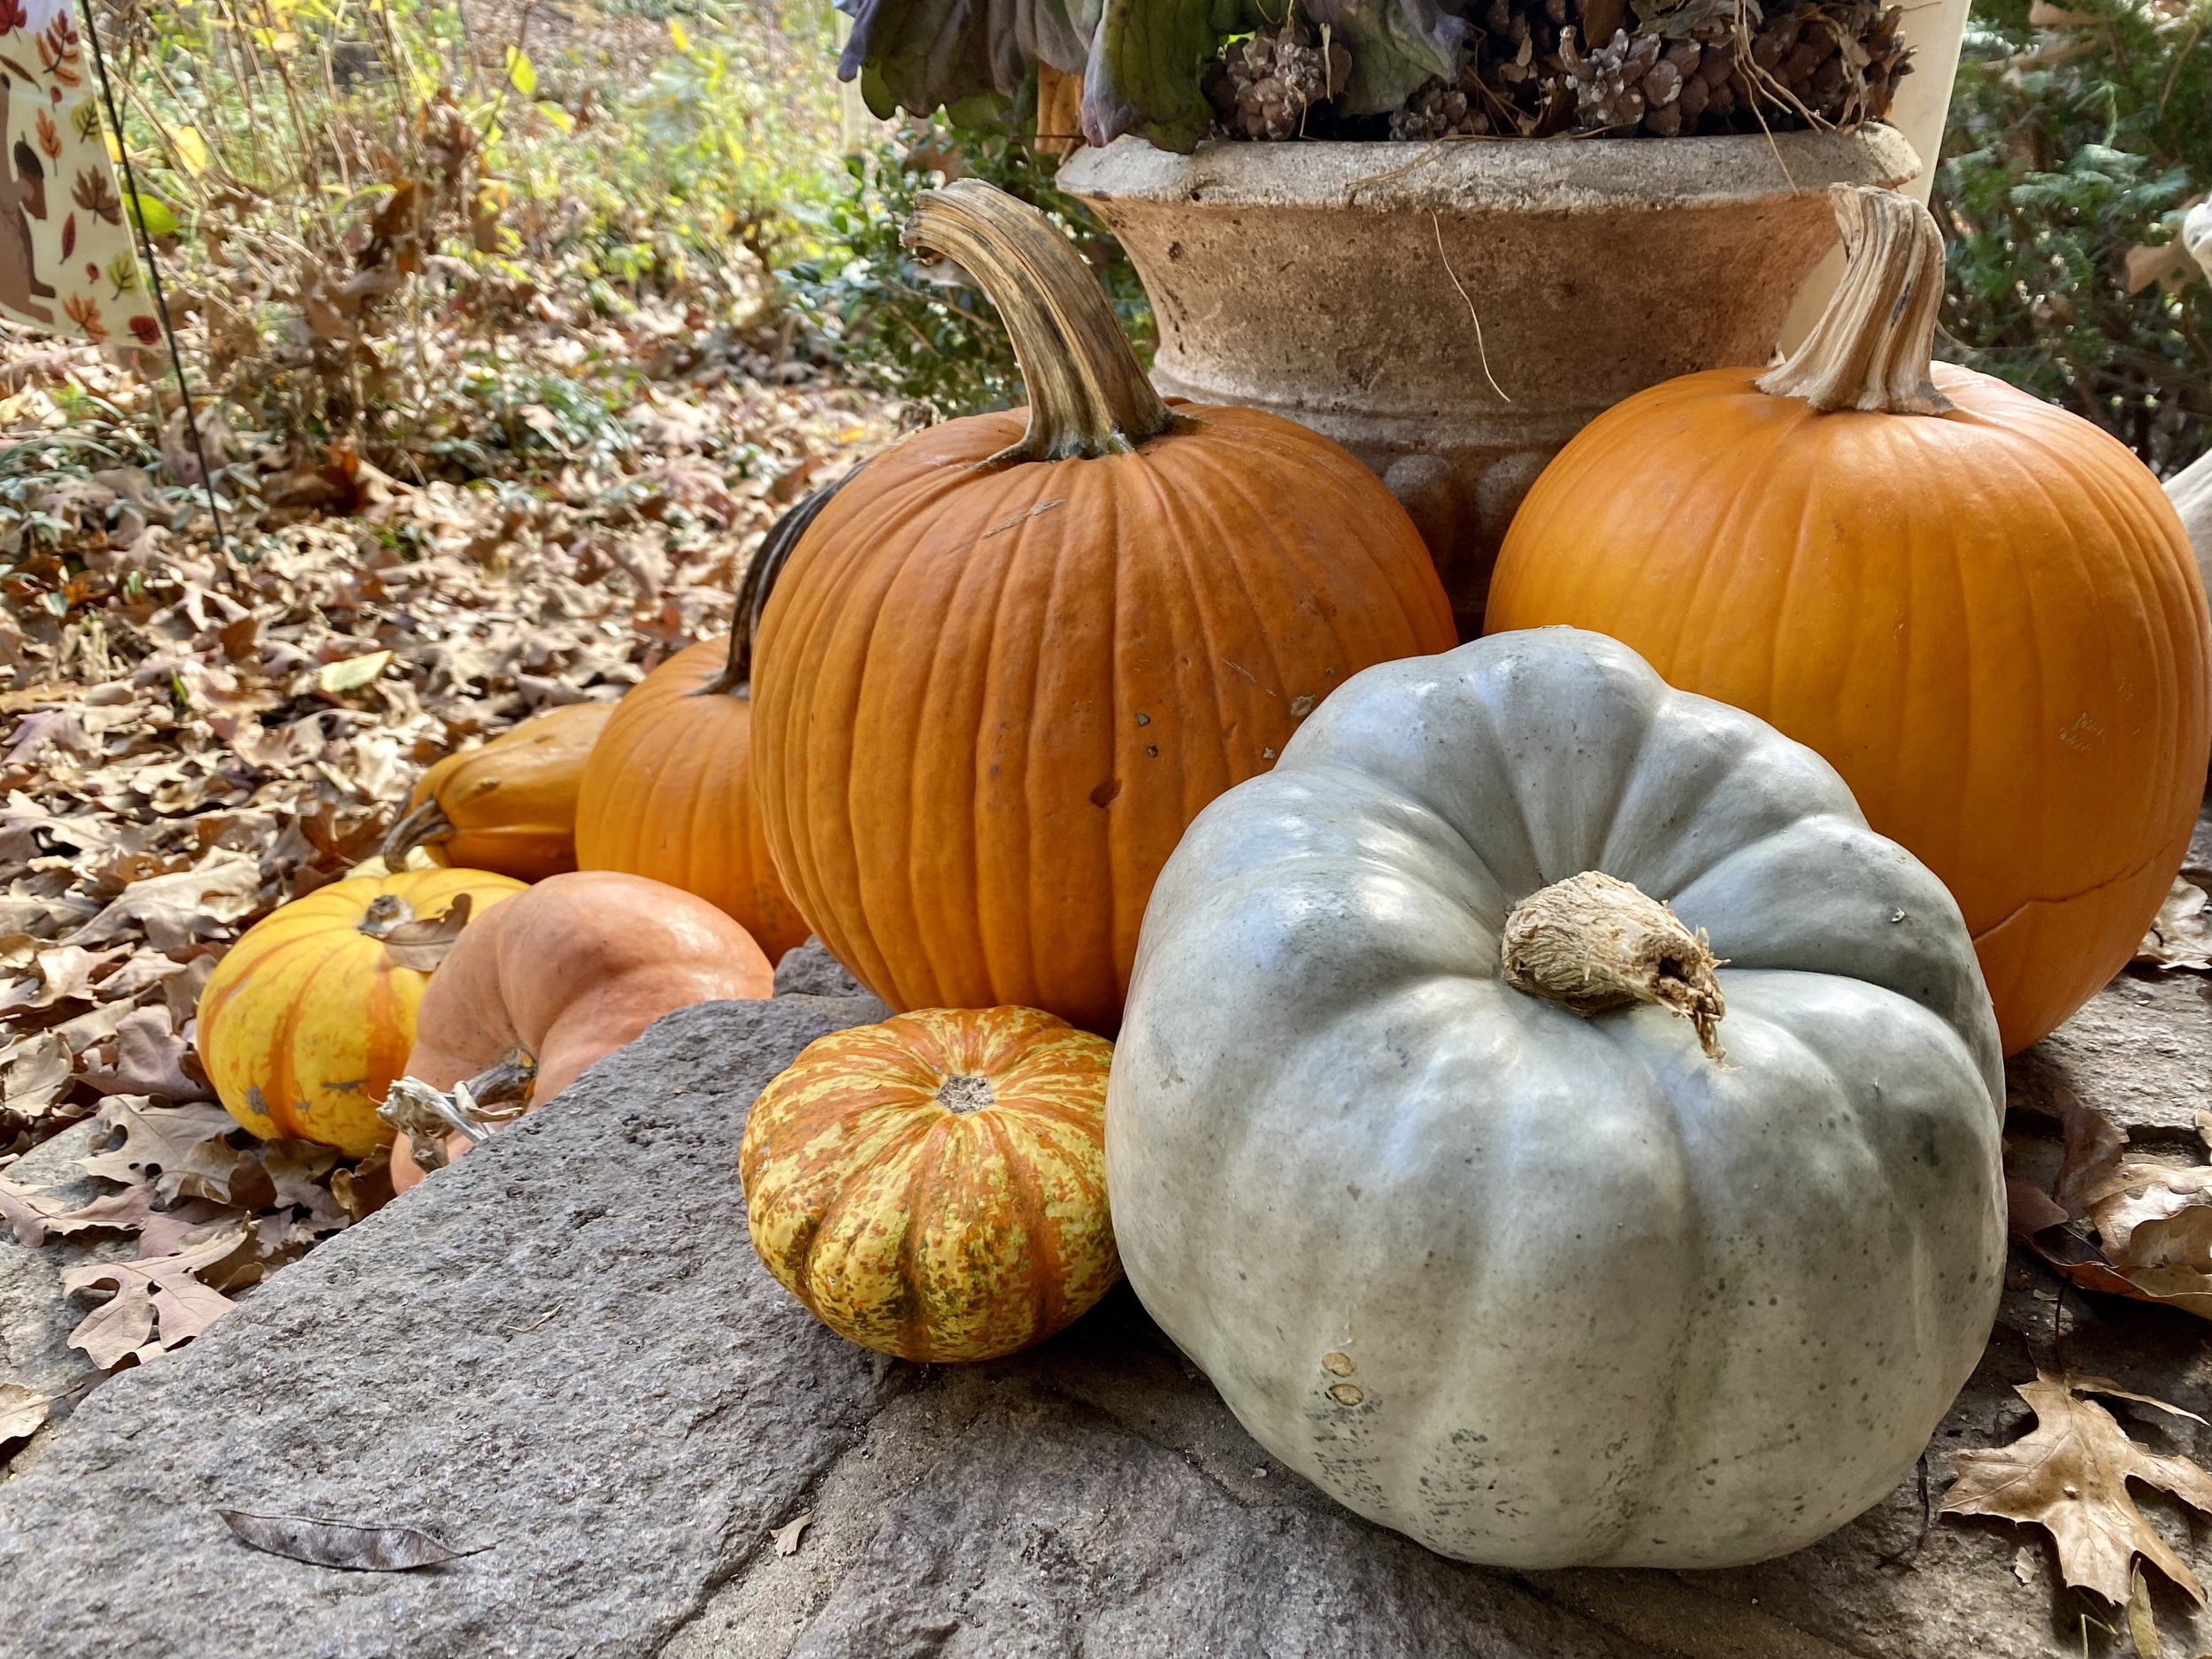
Queensland Blue Pumpkins are favorite fall decor. (Photo by Charlotte Ekker Wiggins)

Baking Blue Pumpkin

I’ve seen these blue pumpkins around for a number of years, usually offered as fall decor along with Jack O Lantern and baking pumpkins. These blue pumpkins are Queensland Blue pumpkins, an old Australian heirloom blue-skinned pumpkin ideal for growing in the subtropics.  The year that Queensland Blue pumpkins were first grown in Australia is unknown but they predate when they were first grown overseas in 1932.

A friend who is a great cook said I will be surprised when I try this baked pumpkin and I was. Queensland Blue is a versatile pumpkin variety that is great roasted, chopped in curries or blended into soups.

I kept my first try of this lovely pumpkin simple, I baked it in a water covered dish in 350F oven until the center was soft enough to be pricked with a fork, about half an hour.

For comparison, I also baked a small yellow baking pumpkin, visible in the back.

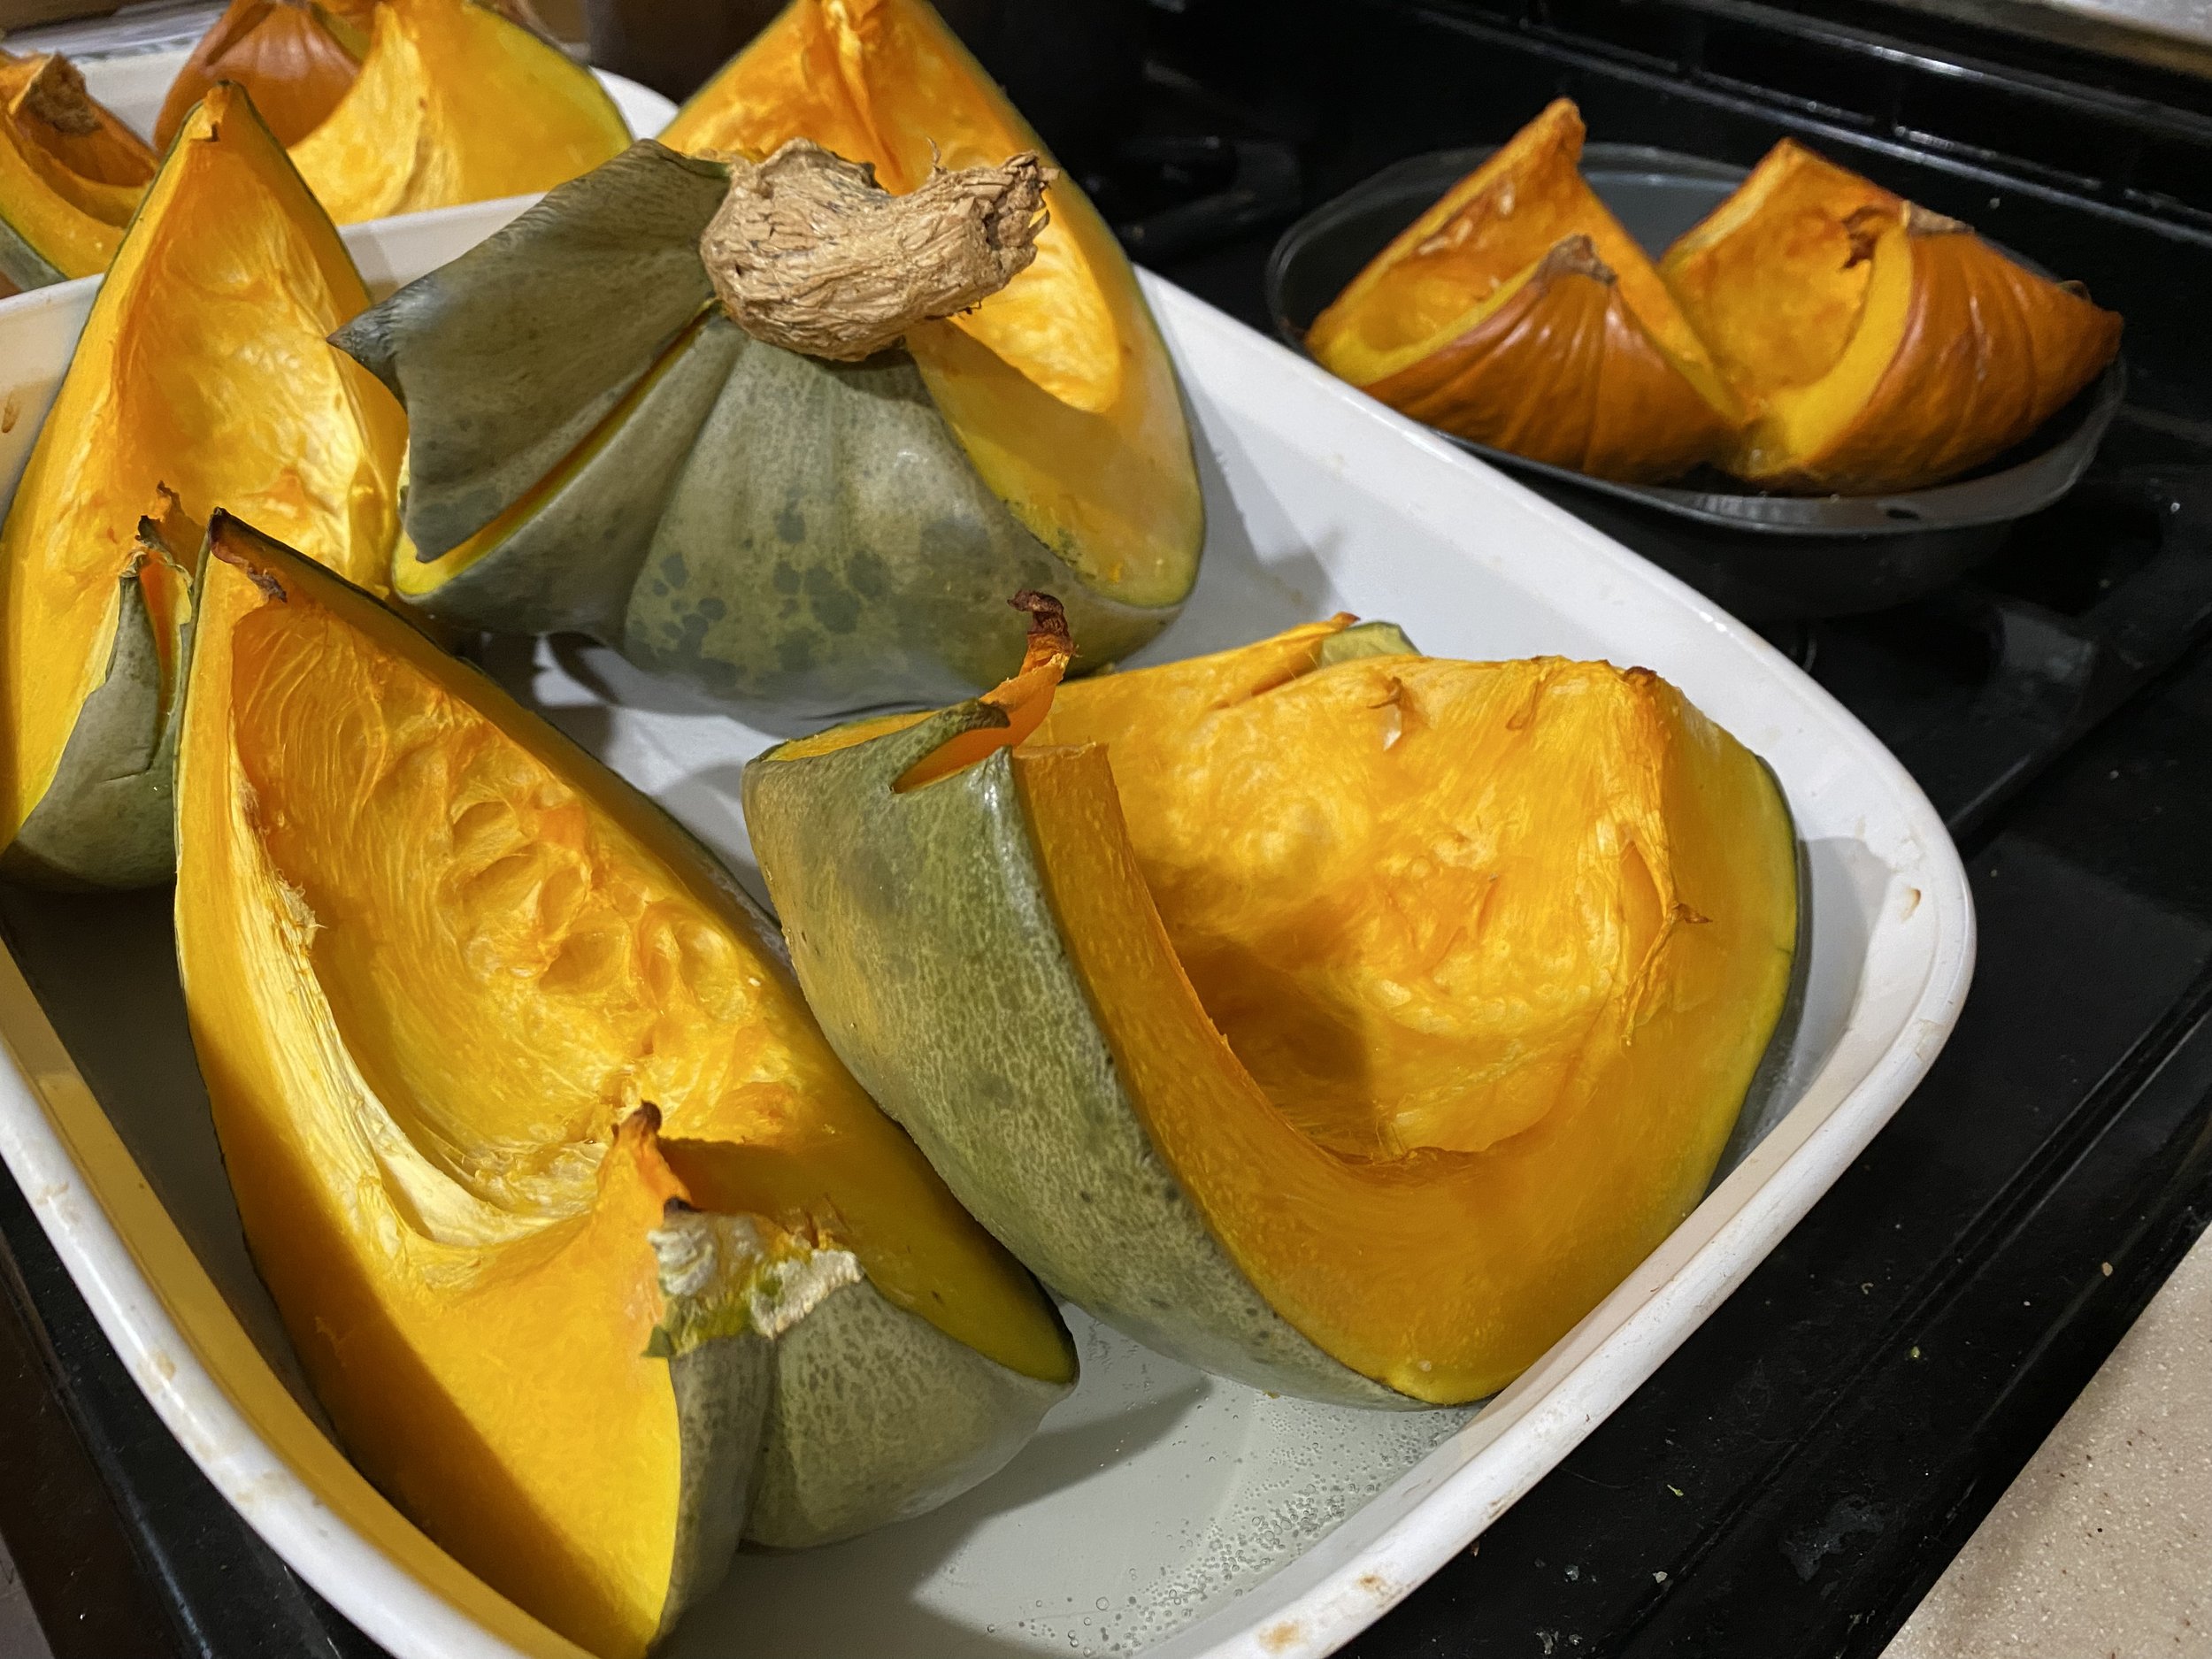
Queensland Blue Pumpkin baked and out of the oven against baking pumpkin in back. (Photo by Charlotte Ekker Wiggins)

First, the Queensland blue pumpkin had a much thicker inside flesh.

The seeds were easy to remove, without the thick fibers that hold baking pumpkin seeds.

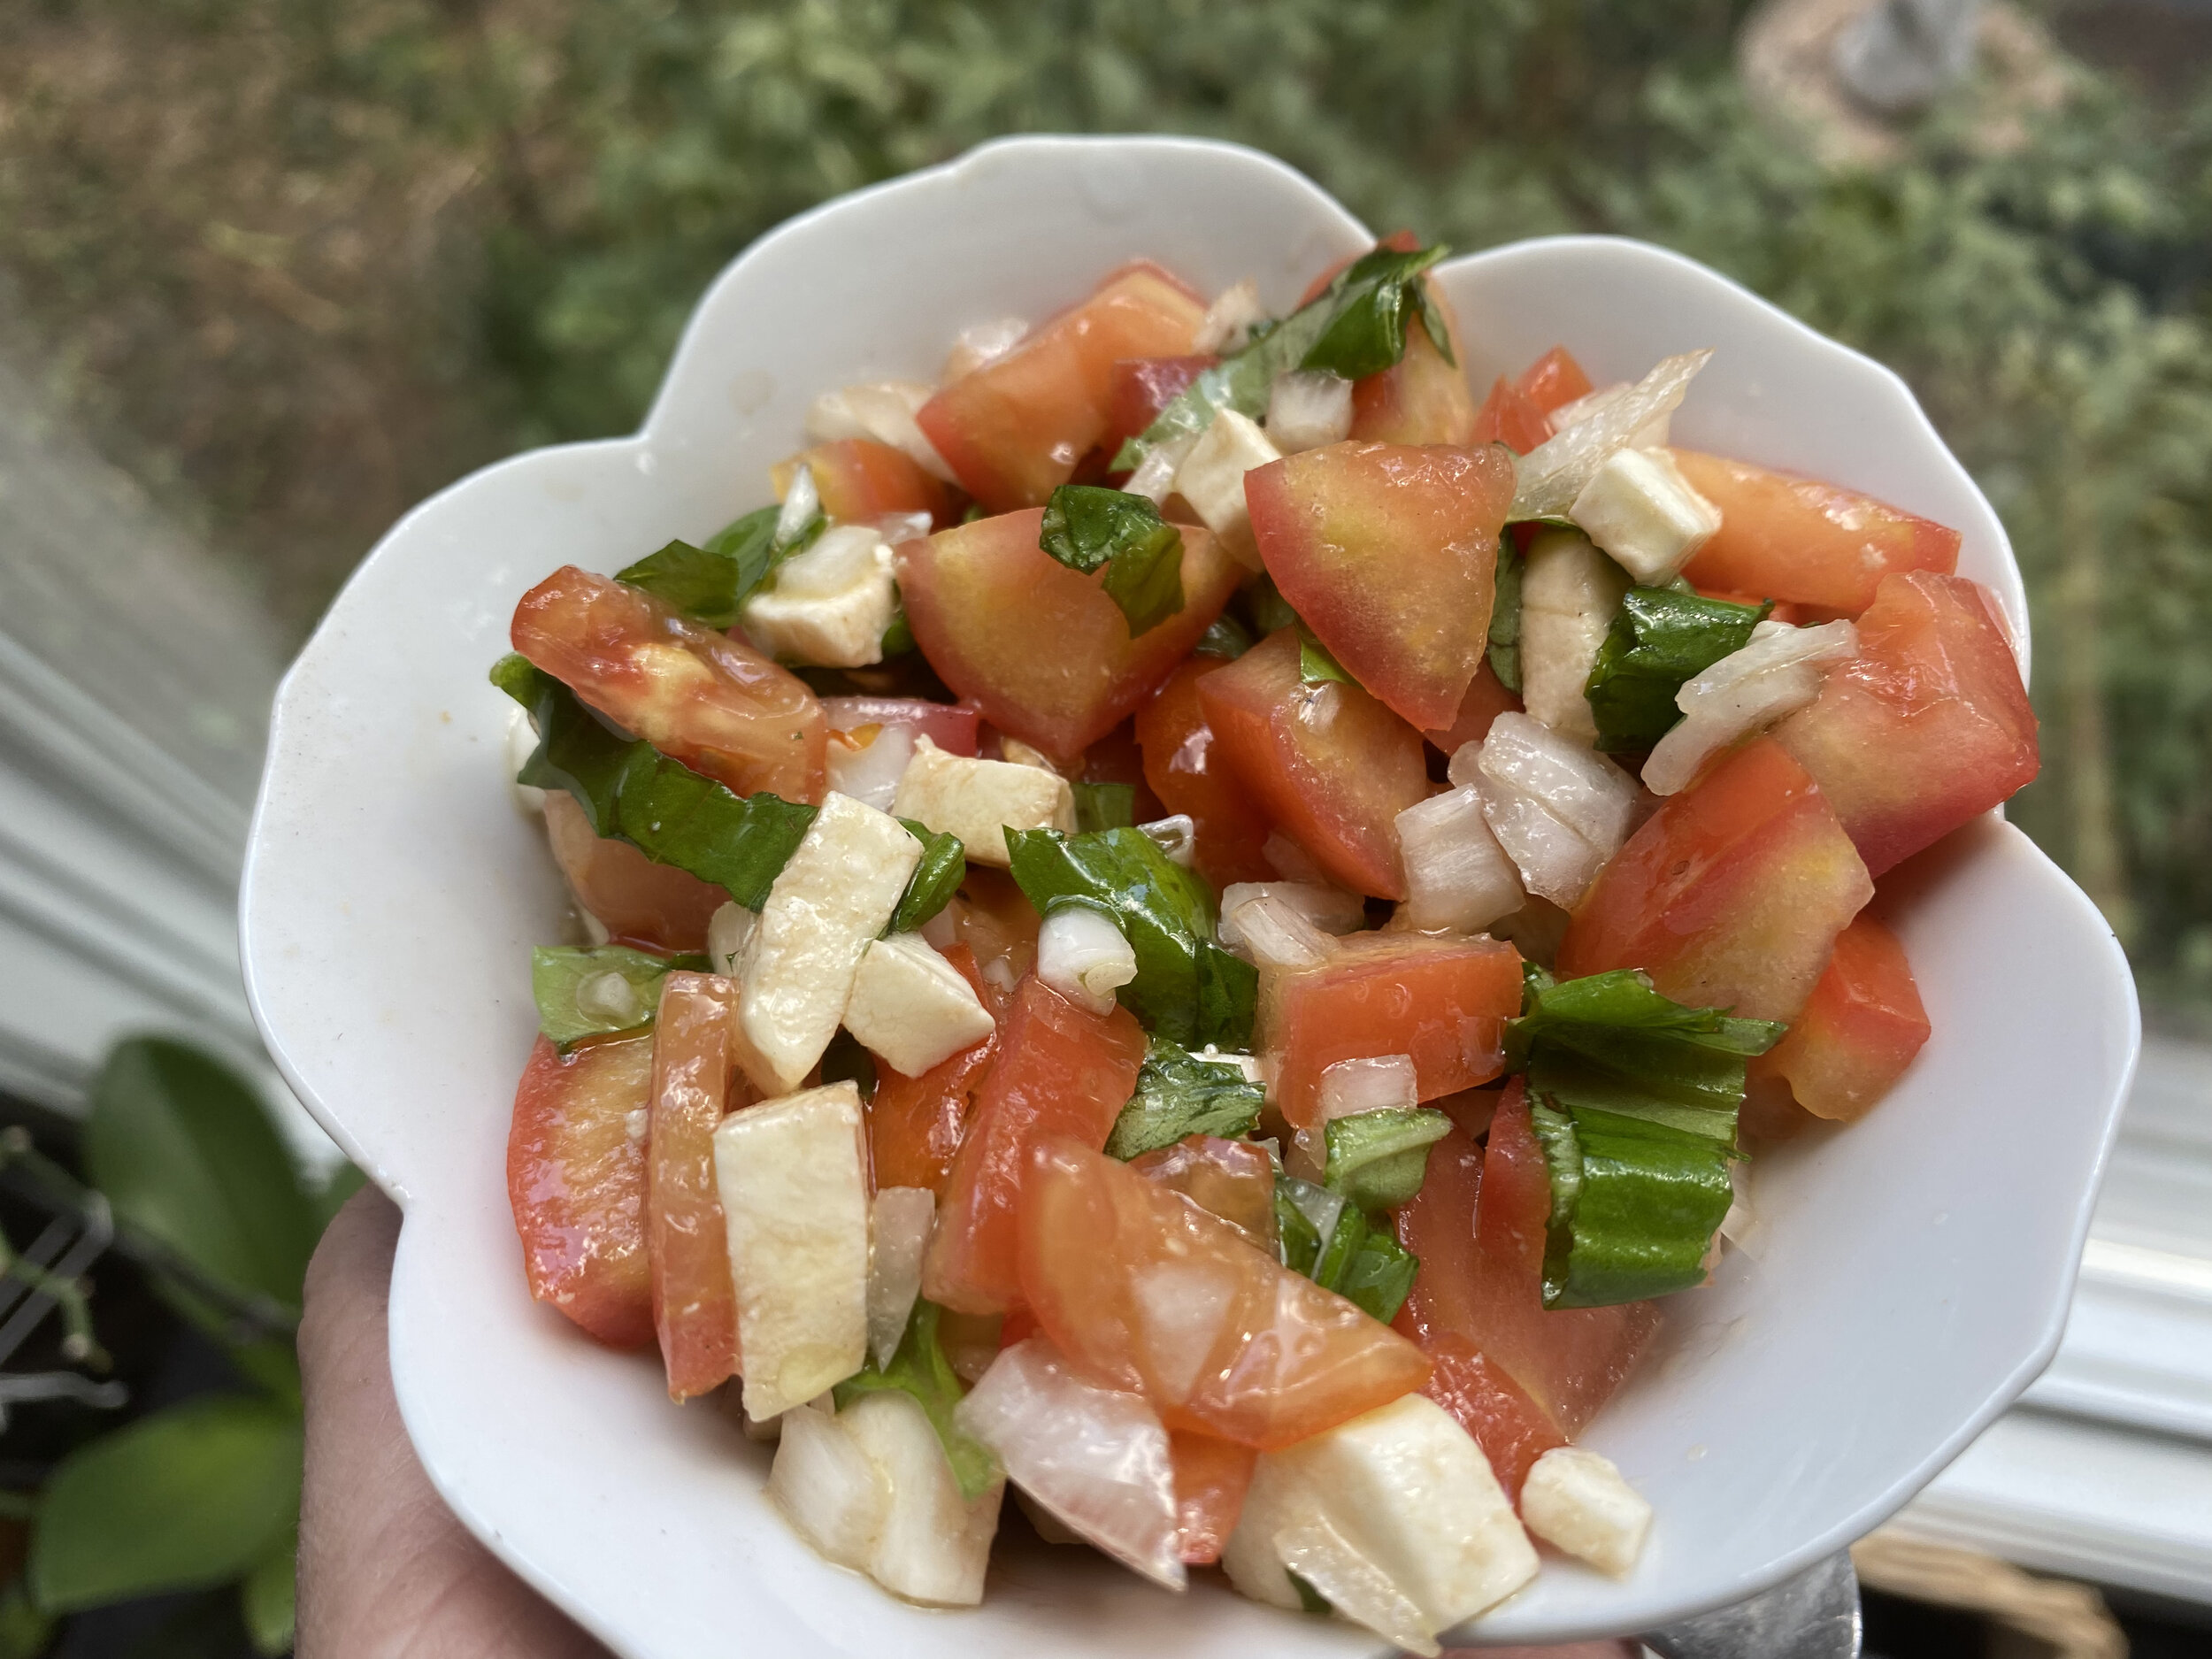
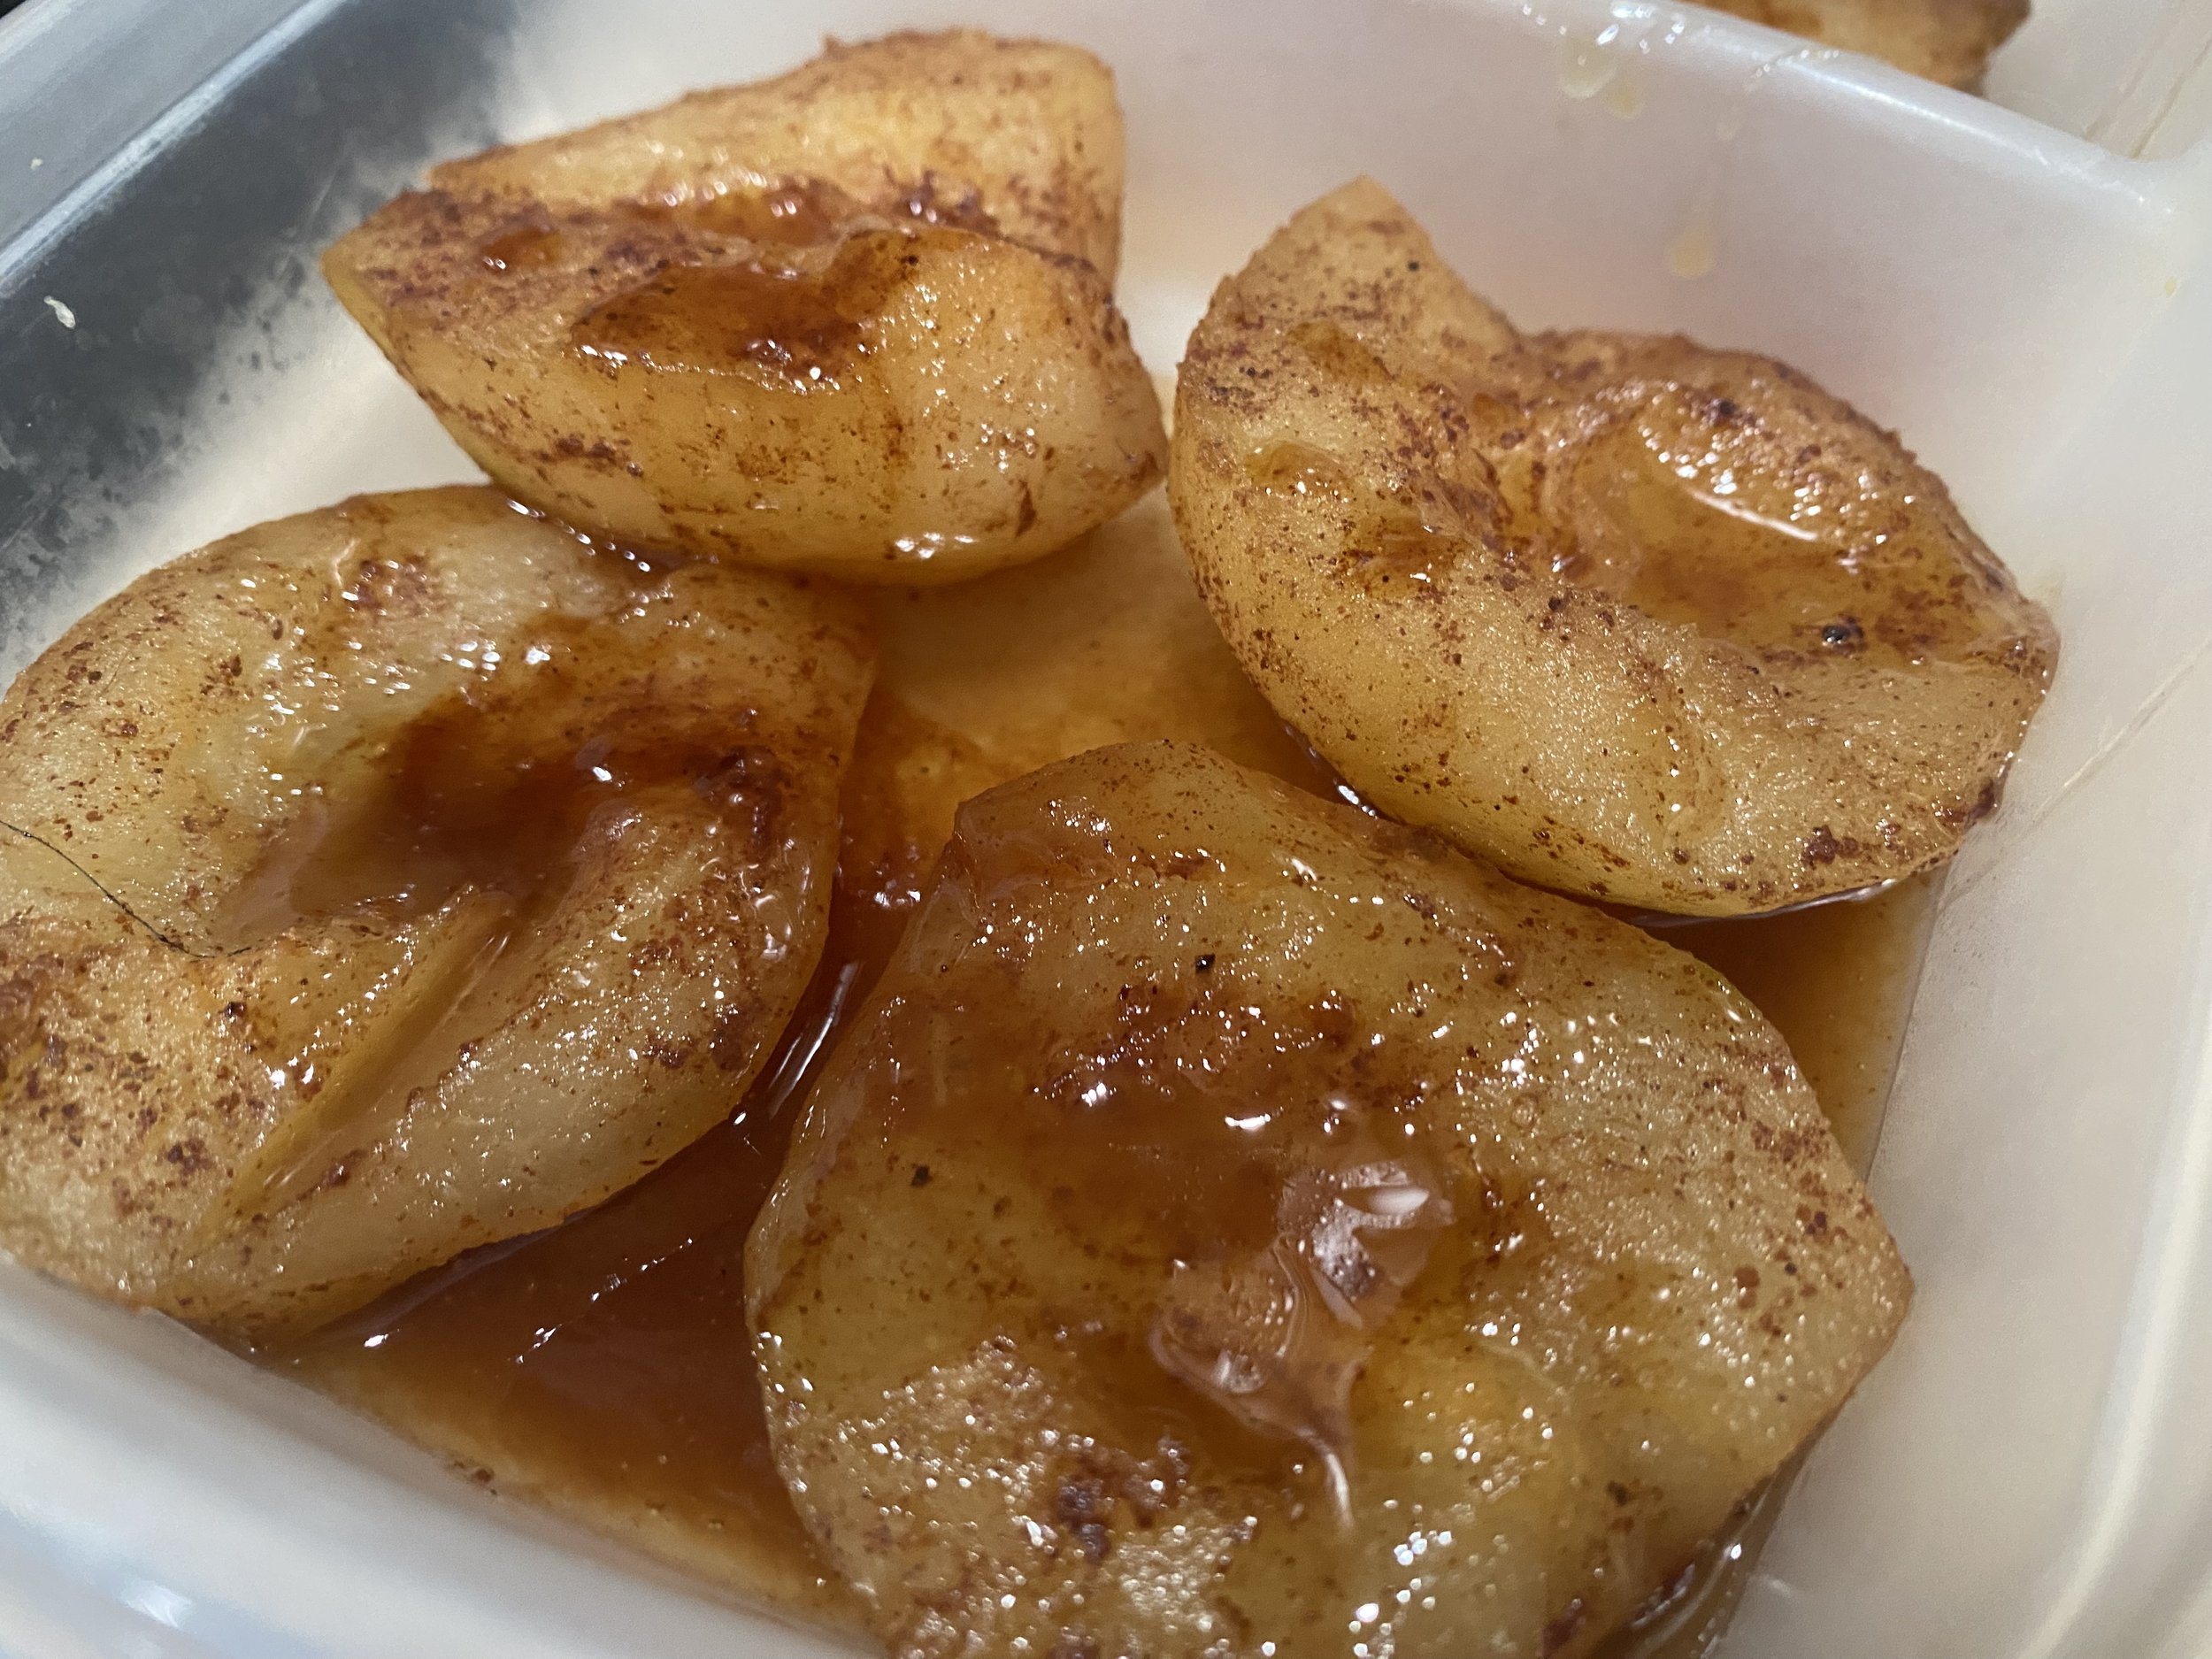
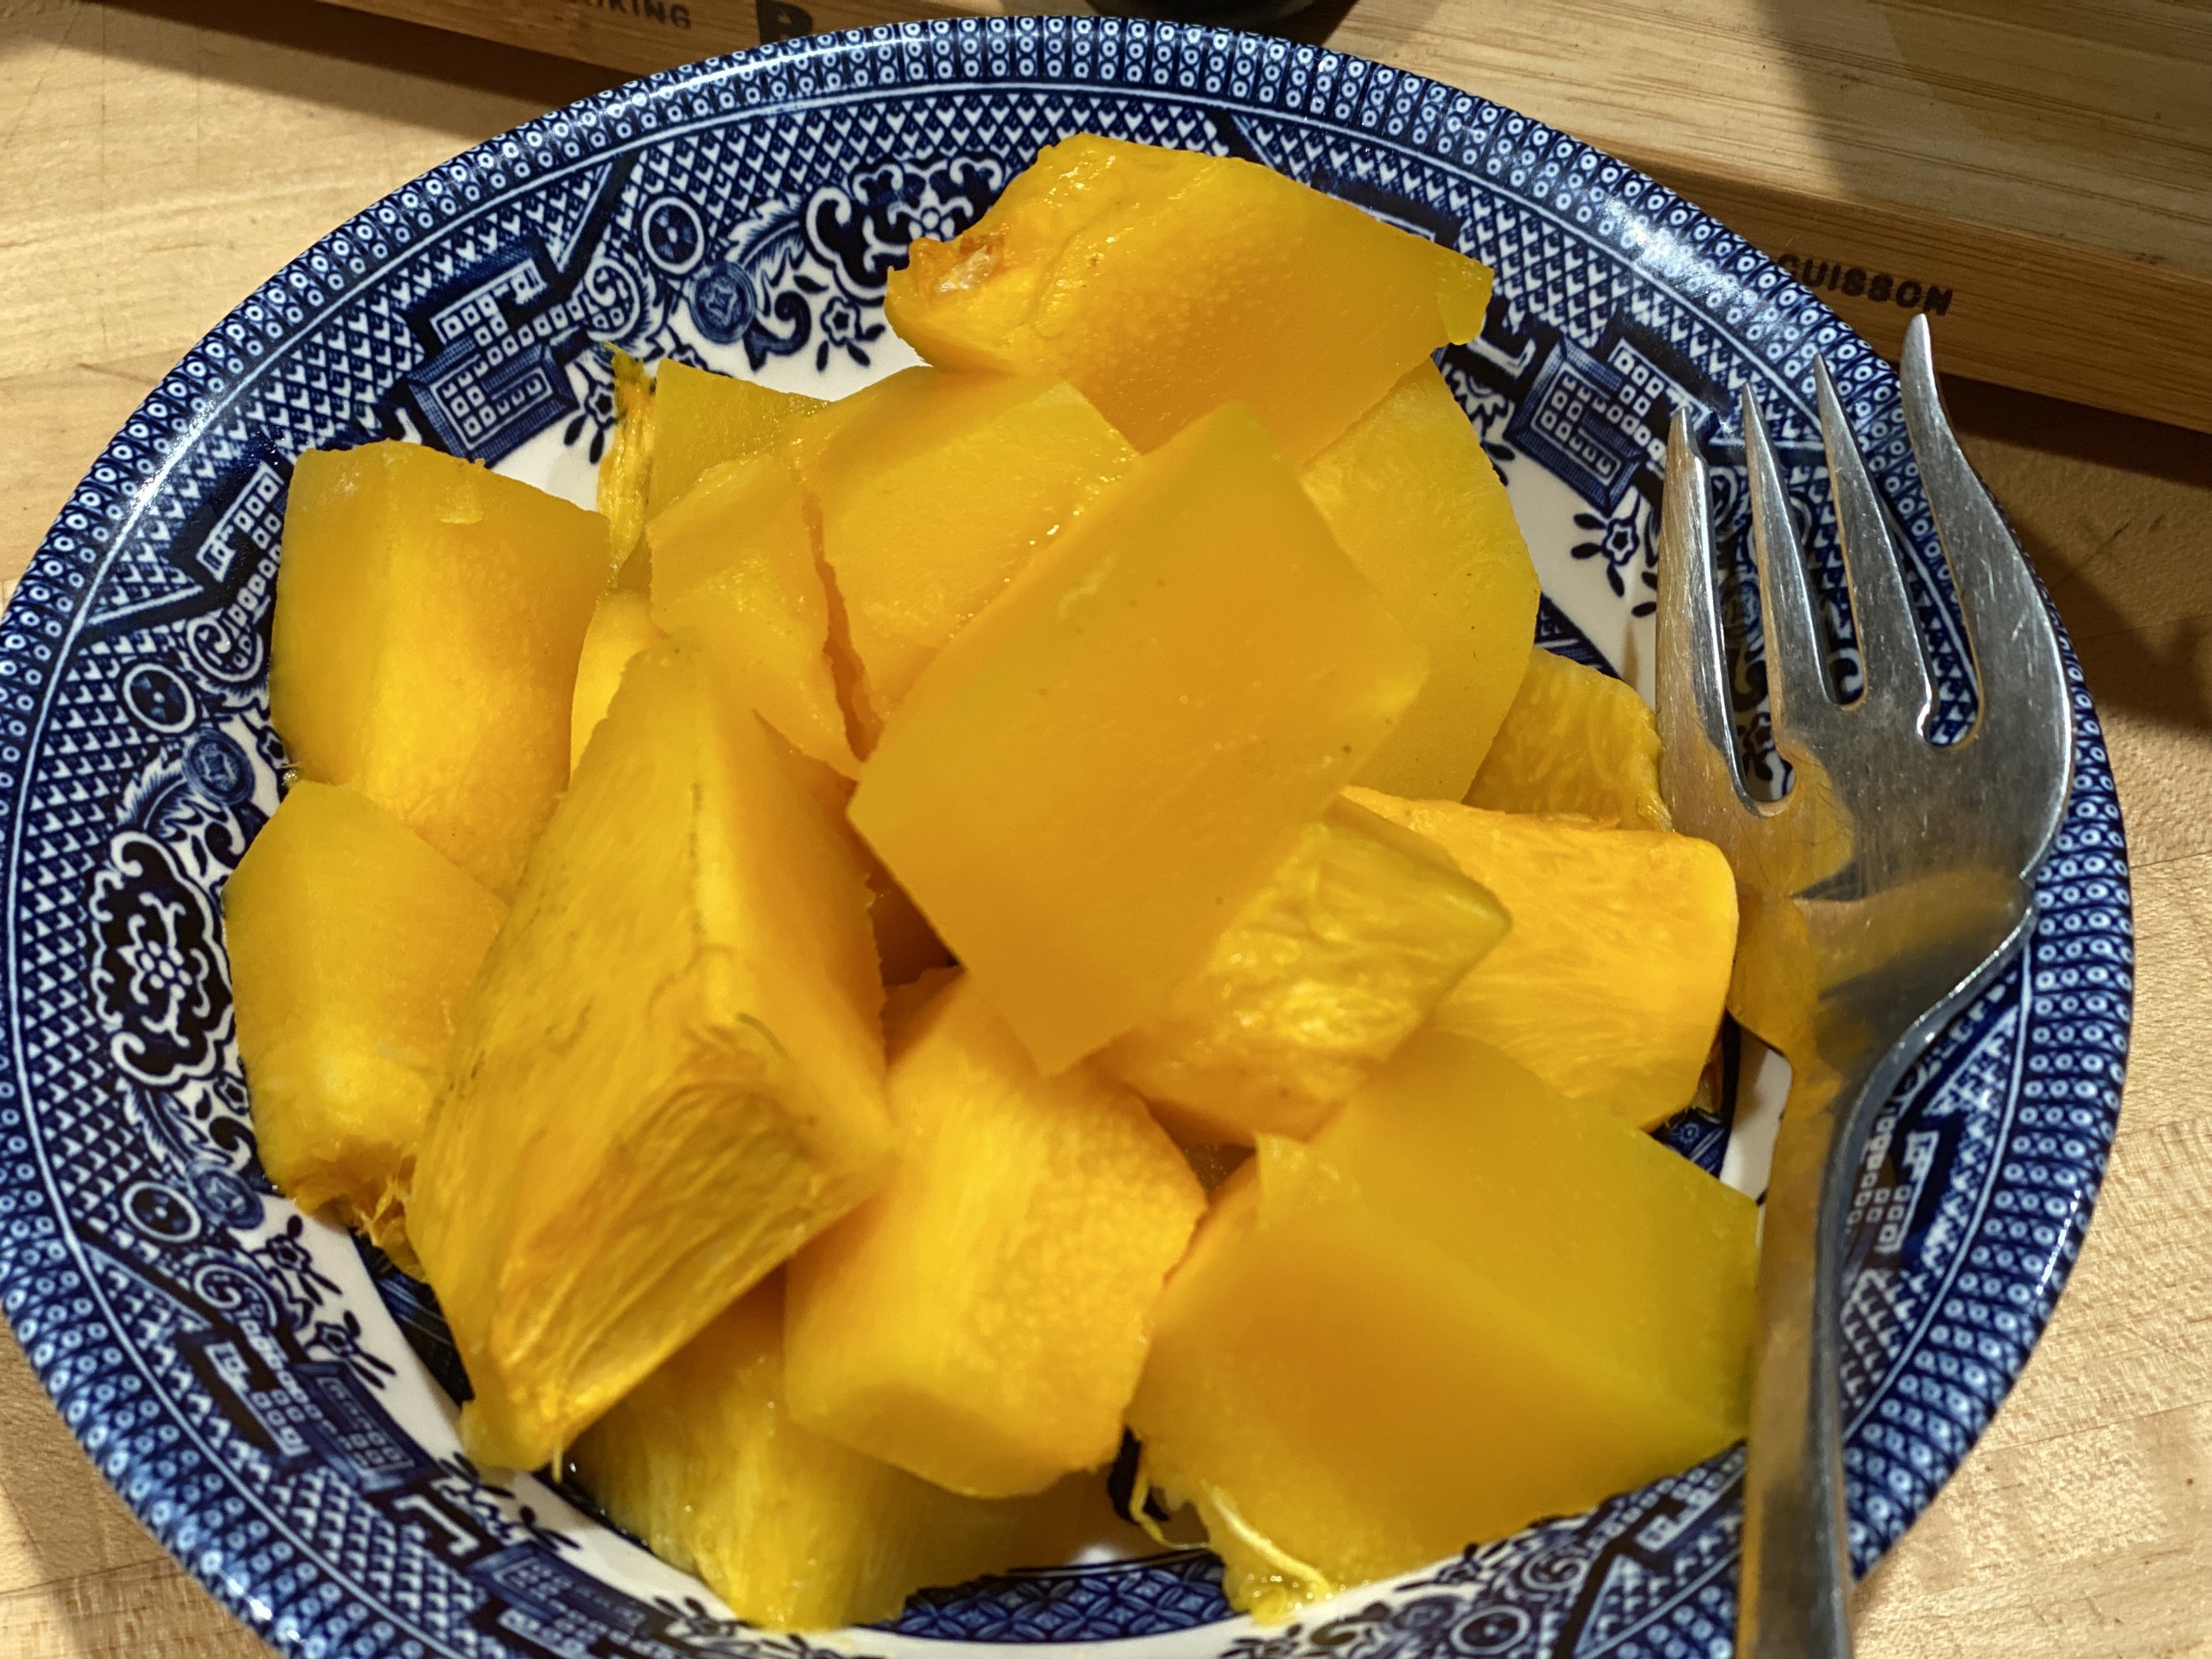
Once I removed the blue peel, I cut the sections into small pieces, sprinkled with extra virgin olive oil and a dash of salt.

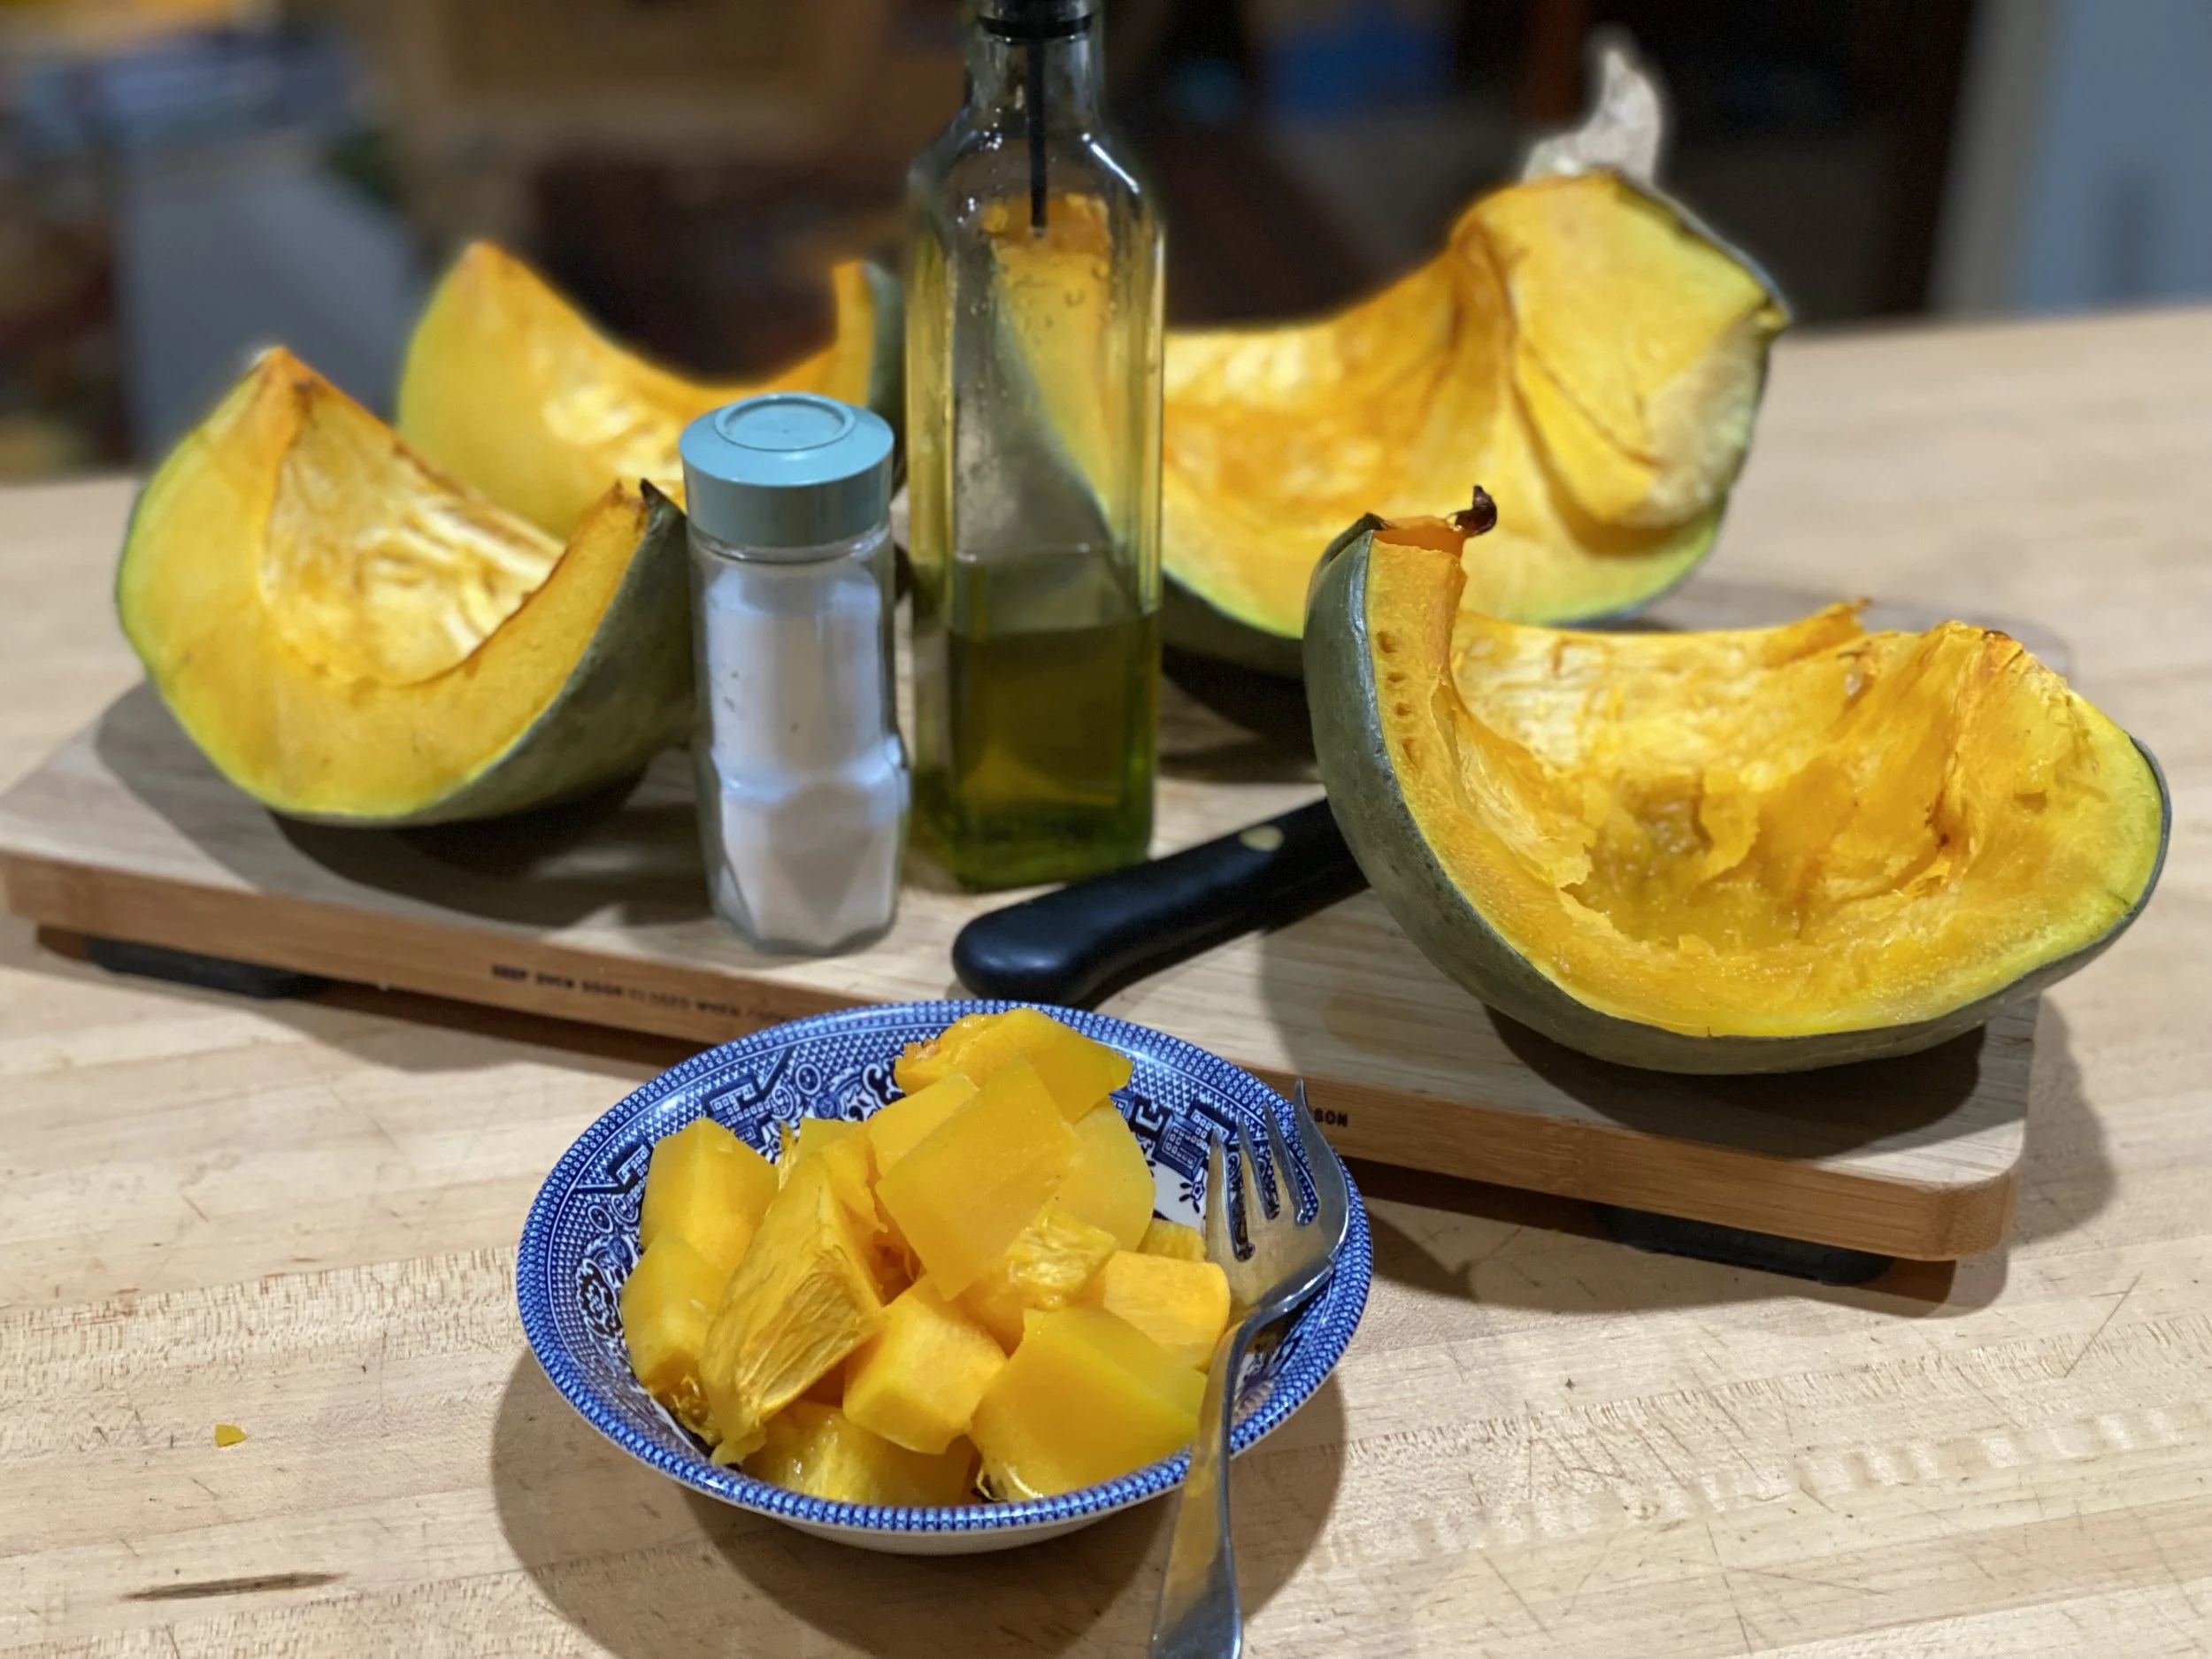
Delicious sprinkled with extra virgin olive oil and a dash of salt. (Photo by Charlotte Ekker Wiggins)

Oh, my was this good, I even appreciated the flavor without oiive oil.

My new favorite side dish, baked Queensland pumpkin! (Photo by Charlotte Ekker Wiggins)

The squared Queensland pumpkin pieces have been individually frozen so I can enjoy a serving later.

My research shows the Queensland pumpkin can also be incorporated into soups, which I enjoy making during winter.

The Illustrated Encyclopedia of American Cooking has several delicious options from professional university Extension experts as well as cooks. Finding recipes online can be unreliable so if you don’t have at least one basic printed cookbook in your kitchen, this one is a good start!

So pretty in the garden and delicious on the table, I may just have to grow some Queensland pumpkin next year. And yes, I saved some seeds!

Charlotte

Pumpkin Cheesecake Recipe

Blueberries and a basil leaf finishing these servings of pumpkin cheesecake. (Photo by Charlotte Ekker Wiggins)

Pumpkin Cheesecake Recipe

Some years, we saved pumpkin pie for the day after Thanksgiving to have with leftovers. Turkey sandwiches are still a personal favorite. But if you want to have pumpkin for desert on Thanksgiving, this is a lovely lighter option.

Now I make pumpkin pie custard as well as pumpkin cheesecake without a pie crust to save on calories.

If you want to use a pie crust, you can try mini graham cracker crust pies so you have individual servings.

Three ingredients - four if you use a pie crust - and 10 minutes to make. (Photo by Charlotte Ekker Wiggins)

To make, you will need

  • 1 15 oz can of pumpkin

  • 2 tablespoons white sugar

  • 2 teaspoons pumpkin pie spice

  • 1 8 oz cream cheese room temperature

  • whipping cream (optional)

  • ground cinnamon (optional)

  • six mini graham cracker pie crusts (optional)

To make:

Combine pumpkin, cream cheese, sugar, and pumpkin pie spice in a large bowl. Whip until fluffy.

Spoon into mini crusts or whatever you plan to use to serve.

Top with whipped cream and a pinch of ground cinnamon.

I like to add fresh fruit so this year it’s fresh blueberries.

You can use a variety of fun containers to serve pumpkin cheesecake. (Photo by Charlotte Ekker Wiggins)

Pumpkin cheesecake is very light, perfect to finish off a heavy meal or to make other times of the year.

Don’t think of pumpkin for other seasons?

The Illustrated Encyclopedia has tried and true recipes. (Photo by Charlotte Ekker Wiggins)

The Illustrated Encyclopedia of American Cooking has several delicious options from professional university Extension experts as well as cooks. Finding recipes online can be unreliable so if you don’t have at least one basic printed cookbook in your kitchen, this one is a good start!

Charlotte

Pumpkin Pie Spice Recipe

IMG_6451.jpeg

Pumpkin Pie Spice Recipe

Autumn is all about pumpkins in the United States; large ones, small ones, different colored ones, maybe ones with stripes. Orange and flowers, especially mums, join pumpkins on door steps to welcome the cooler weather. And what better spice to have handy than pumpkin pie spice.

I started making my own spice mixes when I first made my homemade taco seasoning. I was able to adjust the mixture to my taste and now use taco seasoning in a variety of dishes.

The success of that combination inspired me to try my own pumpkin pie spice recipe.

Homemade spice is the best way to have good flavors. (Photo by Charlotte Ekker Wiggins)

Homemade spice is the best way to have good flavors. (Photo by Charlotte Ekker Wiggins)

The key to this recipe is to use fresh spices. I know, I have a cupboard full of old spices that should have been tossed years ago. And I do that every new year’s, clean out the cupboards of old spices and make a list of ones I need to replace.

This one is easy to make, the key is to try this recipe and adjust it to your taste.

Take your time mixing up the spices, you want the mixture well mixed. (Photo by Charlotte Ekker Wiggins)

Take your time mixing up the spices, you want the mixture well mixed. (Photo by Charlotte Ekker Wiggins)

To make:

Mix in a bowl. Store in air tight containers.

How to use:

Add it to coffee: Mix pumpkin pie spice with your coffee grounds, or sprinkle it on your coffee.

2. Mix it into whipped cream: And then dollop over pies from pumpkin to apple and pecan.

3. Roast vegetables: Use pumpkin pie spice to season sweet vegetables like winter squash, sweet potatoes, and carrots.

6. Season popcorn: Give your popcorn a taste of fall by sprinkling on as you would salt.

7. Stir it into pancake batter: Use about 1/2 teaspoon per cup of batter.

Also toss out your old pumpkin pie spices, we all have them tucked away somewhere. (Photo by Charlotte Ekker Wiggins)

Also toss out your old pumpkin pie spices, we all have them tucked away somewhere. (Photo by Charlotte Ekker Wiggins)

Do you have a favorite way to use pumpkin pie spice?

Charlotte

Pears Anyway

My homemade pear desert with a dollop of whipped cream. (Photo by Charlotte Ekker Wiggins)

My homemade pear desert with a dollop of whipped cream. (Photo by Charlotte Ekker Wiggins)

Pears Anyway

For the past 11 years, a Stark Brother’s semi-dwarf Bartlett pear tree has provided me with fresh pears every fall. Actually that’s how long it took for the fruit tree to grow into the limestone hillside. Paper wasps living in nearby birdhouses did the rest by pollinating the tree so I get pears.

Pears are picked green and allowed to ripen inside with other fruit. (Photo by Charlotte Ekker Wiggins)

Pears are picked green and allowed to ripen inside with other fruit. (Photo by Charlotte Ekker Wiggins)

Unlike the ones you find at the store, these Bartlett pears may have a bad spot so they don’t look perfect or are necessarily ripe when I find the spot.

So after washing them, I cut those spots off, cut up the remaining Bartlett pears into a microwave bowl and microwave them on high for 1-2 minutes.

One option is to dust them with cinnamon before cooking.

Another option is to drizzle fresh honey on them after they were cooked.

And there’s always the topped with whipped cream option when ready to eat.

This is not only a very easy and quick desert to make but this way you are not wasting the fruit. Also works with apples.

Charlotte

Tomato Basil Salad

Fresh tomato basil salad with mozzarella tossed with oil and vinegar. (Photo by Charlotte Ekker Wiggins)

Fresh tomato basil salad with mozzarella tossed with oil and vinegar. (Photo by Charlotte Ekker Wiggins)

Tomato Basil Salad

There are versatile recipes and then there are recipes like mango salsa and tomato basil salad, recipes than can be used in a variety of ways. What I like about Tomato Basil Salad is that I can make it from ingredients I grow.

And if you happen to be out of mozzarella cheese, make it without the cheese, it will still work well as a salsa or side dish.

You will need:

  • Tomatoes, especially ones you are growing so they are fresh. I use whatever is ripe.

  • Onions – A regular onion or shallot will work.

  • Mozzarella cut into pieces.

  • Basil leaves – Use as much or little as you like. Make sure you have fresh basil!

  • Olive oil – Extra virgin works best for salads.

  • Balsamic Vinegar.

  • Salt & pepper – Season to taste.

Most ingredients fresh from my garden, amounts added to taste. (Photo by Charlotte Ekker Wiggins)

Most ingredients fresh from my garden, amounts added to taste. (Photo by Charlotte Ekker Wiggins)

How to make:

  1. Cut the tomatoes into small pieces. I removed the center seeds.

  2. Add the tomatoes, onions, mozzarella pieces and half the basil to a large serving bowl.

  1. Whisk the olive oil, balsamic vinegar, salt, and pepper in a separate small bowl.

  2. Pour the dressing over the salad in the serving bowl. Toss everything well to coat in the dressing.

  3. Sprinkle the remaining basil over the salad and serve.

How to serve:

  1. As a side dish to any protein.

  2. As a salsa on salmon or chicken.

  3. As is!

Charlotte

Lemon Summer Squash Bread Muffins

Lemon summer squash bread muffins with a dab of honey lemon glaze and spearmint sprigs from my garden.  (Photo by Charlotte Ekker Wiggins)

Lemon summer squash bread muffins with a dab of honey lemon glaze and spearmint sprigs from my garden. (Photo by Charlotte Ekker Wiggins)

Lemon Summer Squash Bread Muffins

If you like lemon-flavored breads you will love Lemon Summer Squash Bread courtesy of This Delicious House. I was looking for something to use summer squash besides the usual and this was a nice alternative. A friend had suggested I try using summer squash in baking but misplaced the recipe she gave me so this one counts as hers.

I baked these in muffin tins so I have single servings to enjoy with tea and share with friends. These will be individually frozen so they can easily be popped out and enjoyed.

You Will Need:

  • 1 cup summer squash, grated and squeezed dry

  • 1/2 cup butter, softened

  • 1 cup sugar

  • 2 large eggs

  • 1/2 cup greek yogurt (nonfat works)

  • 1/2 cup milk

  • 1 lemon, zested and juiced (about 1/4 lemon juice)

  • 2 cups flour

  • 2 teaspoons baking powder

  • 1/4 teaspoon salt

  • 1/4 cup candied lemon peel (optional)

    Honey Lemon Glaze Recipe

  • 1 tablespoon lemon juice

  • 1 tablespoon honey

  • 1/2 cup powdered sugar

To Make:

  • Preheat oven to 350 degrees. Coat a 9 x 5 loaf pan with cooking spray and set aside or prepare muffin tins. I used two 12-muffins plan but you can use just one and fill each to the top - this recipe does not rise.

I used a sieve to squeeze the summer squash dry. Also remove seeds before grating. (Photo by Charlotte Ekker Wiggins)

I used a sieve to squeeze the summer squash dry. Also remove seeds before grating. (Photo by Charlotte Ekker Wiggins)

  • Grate the squash using the large holes of a grater. I didn’t first remove seeds and thought twice after it was grated. Picking seeds out can be an exercise in patience so if you don’t like the seeds, remove them first. I didn’t notice the leftover ones in the baked muffin.

  • Squeeze out any moisture. I used a large sieve and pressed the squash with a spoon. There won’t be a lot.

  • In a bowl, cream together the butter and sugar.

  • Beat in the eggs, yogurt, milk, lemon zest and juice until well combined. I didn’t have candied lemon peel so I skipped it.

  • Stir in the flour, baking powder, and salt.

This is a whole grated summer squash, I was sidetracked and forgot to measure, should be close. (Photo by Charlotte Ekker Wiggins)

This is a whole grated summer squash, I was sidetracked and forgot to measure, should be close. (Photo by Charlotte Ekker Wiggins)

Fold in the grated squash. I was listening to a podcast and forgot to measure the grated squash. One medium squash should make about one cup.

You can fill the muffin tins to the top for this recipe. (Photo by Charlotte Ekker Wiggins)

You can fill the muffin tins to the top for this recipe. (Photo by Charlotte Ekker Wiggins)

Pour into loaf pan and bake for 60 minutes, or until toothpick inserted in bread comes out clean. I used muffin tins and filled it only half full. You can fill them up to the top, this batter won’t rise.

Cool on a wire rack. Make sure bread is completely cooled before adding glaze.

  • To make the glaze, whisk together the honey and lemon juice. Whisk in the powdered sugar. Pour overtop of cooled bread.

My glaze came out thick, more like an icing. I made it for a few muffins and will skip it for the remaining muffins. When serving, will just add a dollop of fresh honey!

This is a great recipe to add to your very own cookbook either for yourself or as a gift.

I will make these again, truly hard to believe there was something healthy in these!

Charlotte

Weight Watchers International Cookbook

This is a 1977 edition with introduction by the Weight Watchers founder. (Photo by Charlotte Ekker Wiggins)

This is a 1977 edition with introduction by the Weight Watchers founder. (Photo by Charlotte Ekker Wiggins)

Weight Watchers International Cookbook

Before Keto, Noom and intermittent fasting, way before my Navy days, there was only one US weight loss diet program and that was Weight Watchers. I’m sure there were others but this was the one my mother’s doctor recommended she follow.

The program was a success, according to my doctor, because it emphasized good food in small portions combined with daily exercise. Eat less, move more is the foundation of loosing weight but it’s helpful to have a little delicious help along the way.

I can remember my mother “going on Weight Watchers” in the mid 1970s. I had moved away from home by then but visited as often as I could to spend time with my youngest brother still at home.

Mom had several favorite recipe books including Weight Watchers International Cookbook with an introduction by the founder of Weight Watchers. Mom seemed happy about having that kind of introduction. Now if you asked me what dishes she cooked out of this book, I couldn’t tell you, we had such a wonderfully varied menu growing up because we lived overseas, we would try anything. And we did.

I do remember giving her a little collection of paperback cookbooks featuring international cuisine for one of her birthdays. I now have those in my kitchen as much as a memory of her as cooking inspiration.

Sample recipes from Weight Watchers International Cookbook. (Photo by Charlotte Ekker Wiggins)

Sample recipes from Weight Watchers International Cookbook. (Photo by Charlotte Ekker Wiggins)

Of all of the things we collect, I think cookbooks may have some of the strongest memories. Food, family, sharing a meal - strongly imprint on all of us.

As I hopefully whittle away some weight I would rather not have, I’m going to try to find some favorite recipes made healthier.

Or better yet, I may find some new ones to try!

Charlotte

Blackberry Cobbler Recipe

Homemade blackberry cobbler with homemade vanilla ice cream. Yumm! (Photo by Charlotte Ekker Wiggins)

Homemade blackberry cobbler with homemade vanilla ice cream. Yumm! (Photo by Charlotte Ekker Wiggins)

Blackberry Cobbler

Is there a better example of the flavor of summer than a homemade blackberry cobbler?

A traditional summer treat, cobblers can be made with a variety of fruits from cherries to peaches and strawberries.

The one I remember from my early days living in the US though is the blackberry cobbler, made after wrestling thorn-filled plants to collect the dark berries.

Luckily now there are thornless varieties. There are also enterprising farmers selling picked blackberries at local farmer’s markets so you can skip the wrestling part.

Charlotte’s Blackberry Cobbler Recipe

You will need:

3-4 cups blackberries

1 cup sugar

1 cup boiling water

1 tablespoon corn startch

1 cup flour; you can use white or wheat flour.
1 tablespoon sugar
1 1/2 teaspoon baking powder
1/2 teaspoon salt
3 tablespoon shortening
1/2 cup milk (powdered milk will work fine)

Butter in slices

To make:
Mix two-thirds to 1 cup sugar (use more if blackberries aren’t as sweet) with 1 tablespoon of cornstarch in a saucepan. Add 1 cup boiling water.

Bring to boil. Boil 1 minute while stirring until clear. Let cool five to 10 minutes.


Add 3 to 4 cups of washed and patted dry blackberries
Dot with 1/2 tablespoon butter cut thinly into slivers
Dribble spoonfuls of the following shortcake mix over the berry mixture:


1 cup flour; you can use white or wheat flour.
1 tablespoon sugar
1 1/2 teaspoon baking powder
1/2 teaspoon salt
3 tablespoon shortening
1/2 cup milk (powdered milk will work fine)


Cook at 450 degrees Fahrenheit for 30 minutes. Let cool 10-15 minutes; serve with a side of vanilla ice cream. I like to add a sprig of fresh spearmint.

Freezes nicely, too!

For more classic recipes, try America’s Illustrated Cooking Encyclopedia.

Charlotte

Sourdough Starter Rolls

Maybe a year after getting this sourdough bread starter I finally made these rolls. (Photo by Charlotte Ekker Wiggins)

Maybe a year after getting this sourdough bread starter I finally made these rolls. (Photo by Charlotte Ekker Wiggins)

Sourdough Starter Rolls

One of the favorite COVID 19 2020 lock down past times in the US was making bread. In particular, sourdough bread from a starter. Although I was lucky enough to have a friend share a starter with me, it wasn’t until the end of June 2021 that I found a recipe I wanted to try.

The good news is the starter, kept in the refrigerator and fed once a week, will live on. The starter, also called levain, is a fermented dough filled with natural, wild yeast and a bacteria called lactobacilli. The starter is what makes sourdough bread rise. I had to pour off some of the starter when it got too big for the jar but I was proud to keep it going for so long.

In addition, I read that the older the bread starter the more sour the dough.

So here’s the easy recipe. The hardest part is the waiting.

Sourdough Starter Bread Rolls

You Will Need:

  • ▢3 ½ cups bread flour

  • ▢1 ¼ cups warm, filtered or distilled water

  • ▢½ tsp salt

  • ▢¾ cup sourdough starter

To Make:

Without cling wrap I used a plate to cover the dough overnight. (Photo by Charlotte Ekker Wiggins)

Without cling wrap I used a plate to cover the dough overnight. (Photo by Charlotte Ekker Wiggins)

  • Place all the ingredients in a large bowl or in the bowl of a stand mixer. Mix until a consistent dough forms.

  • Cover with cling wrap or a tight lid and let it stand overnight on the countertop, if warm, or in a cold oven with the light on.

  • In the morning, punch down the dough and shape the dough into 12 equal-sized balls. Use flour on your palms to roll, if the dough feels sticky. Place the rolls 2 inches apart on a parchment-lined baking sheet.

  • Sprinkle some flour on top of the rolls, cover with a kitchen towel, and set aside to rise for 2 hours.

  • Preheat the oven to 425° F.

  • When the rolls have risen, score the top of each roll using a sharp knife. Make the cut fast, to prevent the roll from deflating. Scoring gives the gases that form in the bread escape while baking and helps the rolls rise.

  • Place the rolls in the hot oven and bake 25-28 minutes or until the rolls are a light golden-brown. Remove from the oven and continue cooling on a rack.

Calories: 152kcal | Carbohydrates: 31.8g | Protein: 4.3g | Fat: 0.4g | Potassium: 45mg | Fiber: 1.1g | Sugar: 0.1g | Iron: 2mg

You will find other excellent recipes in the American Cooking Encyclopedia.

Easy to make and even easier to enjoy. I took half of my rolls to the person who gave me the sourdough starter in the first place. She said this must be some new record waiting over a year to use it!

Charlotte

Gooseberry Pie

My first ever gooseberry pie cooling off; even made the pie crust. (Photo by Charlotte Ekker Wiggins)

My first ever gooseberry pie cooling off; even made the pie crust. (Photo by Charlotte Ekker Wiggins)

Gooseberry Pie

Now there is one less thing on my “bucket list.” I didn’t grow up with gooseberry pie but where I live it is a popular - some say highly traditional - mid spring treat when gooseberry shrubs produce fruit.

My first awareness of this berry pie was through my father-in-law-at-the time. Weeks before the gooseberries were ready to be picked, he would wax poetic about gooseberry pie. Interestingly enough, he and his wife never shared a piece in the 14 years I was married to their son but that’s a whole different story.

This year, my neighbor Elaine knew someone selling already-stemmed gooseberries so she treated me to 4 cups, just enough to make one pie.

These green gooseberries are face-twisting tart. (Photo by Charlotte Ekker Wiggins)

These green gooseberries are face-twisting tart. (Photo by Charlotte Ekker Wiggins)

She also said to use half Stevia and half sugar, which I did. One piece made with all granulated sugar is 454 calories so worth trying a sugar substitute.

The pie is supposed to be dusted with sugar but I plan to drizzle with fresh honey.

Gooseberry Pie Recipe

You will need:

  • Pastry for Double-Crust Pie

  • 4 cups fresh or frozen gooseberries

  • 1 tablespoon water

  • 1 ½ cups sugar or 3/4 cup sugar and 3/4 cup Stevia

  • ¼ cup all-purpose flour

  • ¼ teaspoon ground nutmeg

  • 1 tablespoon light cream or milk

  • Sugar (about 2 teaspoons)

To Make:

  • Prepare pie pastry. Roll out half of the pastry to a 12-inch circle. Ease into a 9-inch pie plate. Trim pastry even with rim of pie plate. Set aside.

  • In a medium saucepan, combine berries, and 1 tablespoon water. Cook over medium-low heat until the berries "pop," stirring occasionally.

  • Combine the 1-1/2 cups sugar, the flour, and nutmeg; add to the gooseberries in the saucepan. Cook and stir until mixture just begins to bubble. It will look like mashed potatoes with the gooseberries cooked into mush.

  • Spread mixture in the pastry-lined pie plate. Roll out remaining pastry. Cut slits to allow steam to escape. Place remaining pastry on filling; trim pastry to 1/2 inch beyond edge of pie plate. Fold top pastry under bottom pastry. Crimp edge as desired. Brush top crust with cream or milk; sprinkle with a little sugar.

  • I used strips of pastry to make the top.

Fun to play with pie dough, I used a fork to crimp the edges. (Photo by Charlotte Ekker Wiggins)

Fun to play with pie dough, I used a fork to crimp the edges. (Photo by Charlotte Ekker Wiggins)

  • Cover the edge of the pie with foil.

  • Bake in a 375 degree F oven for 25 minutes. Remove foil.

  • My center was browning nicely when I removed the foil off the edges so I placed the foil over the center to keep it from over baking. Bake about 20 minutes more or until top is golden.

  • Cool. Makes 8 servings.

How does it taste? Definitely still tart but grape-like, would go nicely with vanilla ice cream both drizzled in honey.

What about the honey calories? Oh that, at my house honey calories don’t count!

Charlotte

Basic Pie Crust Recipe

And with a couple of rolls from a rolling pin, there’s a pie crust. (Photo by Charlotte Ekker Wiggins)

And with a couple of rolls from a rolling pin, there’s a pie crust. (Photo by Charlotte Ekker Wiggins)

Not quite sure who started all of the fuss about how hard it is to make pie crust but I found this recipe extremely easy. So easy, in fact, that it sat in my refrigerator for a week before I turned it into a pie crust for a gooseberry pie.

Knowing how to make these basic recipes is helpful, they can be used as a foundation of many other things. The American Encyclopedia of Cooking has a nice collection of basic recipes.

You can buy ready made pie crust in both the refrigerated and frozen food sections. A friend tells me you can also get frozen pie crusts ready for use. Frankly this was a very easy crust to make so with a few minutes your pie will be ready to be filled at a fraction of the cost.

Basic Pie Crust Recipe

For two pie crusts or one double pie crust.

You will need:

2 cups all-purpose flour

  • 1 teaspoon salt

  • ½ cup vegetable shortening

  • ½ cup water

To make:

  • Sift flour and salt together in a bowl.

  • Cut in shortening until it looks like coarse crumbs.

  • Add water until dough forms.

Place in a bowl in refrigerator for one hour.

Roll out on flour board. Should make two 9” pie crusts or a top and bottom for one 9” pie.

I use a cupcake pan to make small pies.

Charlotte

Twelve Yolk Pound Cake

Twelve Yolk Pound Cake is great for a drizzle of local honey. (Photo by Charlotte Ekker Wiggins)

Twelve Yolk Pound Cake is great for a drizzle of local honey. (Photo by Charlotte Ekker Wiggins)

Twelve Yolk Pound Cake

Twelve Yolk Pound Cake is one of those recipes everyone should have in their recipe collection. Not only is it versatile and delicious, it uses up those leftover egg yolks and freezes quite nicely. Not overly sweet, you can add all sorts of favorite flavors from ice cream to homemade raw honey. Better yet, make one as a gift and add to a set of honeybee kitchen towels.

I usually make Twelve Yolk Pound Cake after making an angel food cake. You can use the tube pan for both. This way you also use up both the egg whites for the angel food cake and the yolks for the pound cake.

You will need:

  • 12 large egg yolks room temperature

  • 3 cups all purpose flour

  • 2 and ½ teaspoon baking powder

  • ½ teaspoon salt

  • 2 cups granulated sugar

  • 1 teaspoon vanilla

  • 1 teaspoon lemon extract

  • 1 cup cold water

To make:

  • Prepare a 10-inch tube or bundt pan with non-stick spray.

  • Preheat oven to 350 degrees F.

  • Sift flour, baking power and salt together.

  • In a mixing bowl, beat egg yolks until very fluffy and thick.

  • Gradually beat in sugar and beat 2 minutes on high speed, stopping to scrape the bowl.

  • Reduce speed to low and add vanilla, lemon, and cold water.

  • Gradually, but quickly add sifted flour mixture while beating on low, scrape bowl.

  • Beat only long enough to blend, about 2 minutes.

  • Pour batter into prepared pan.

Pour batter evenly in pan; batter will be thick. (Photo by Charlotte Ekker Wiggins)

Pour batter evenly in pan; batter will be thick. (Photo by Charlotte Ekker Wiggins)

Bake 50 to 60 minutes or until golden brown or when pick inserted in thickest portion of the cake comes out clean or with dry crumbs.

Cool cake for 15 minutes on wire rack before removing from the pan. Loosen sides of cake from pan with a spatula, then remove from pan. Cool completely.

The cooked twelve yolk pound cake will have a crust on the top. (Photo by Charlotte Ekker Wiggins)

The cooked twelve yolk pound cake will have a crust on the top. (Photo by Charlotte Ekker Wiggins)

I cut 16 pieces out of mine, save one to test and freeze the rest. To freeze, place the pieces on a cooling rack in the freezer. Once frozen, I store in a freezer bag. This way I can remove individual pieces as needed.

To use, I microwave for 15 seconds or allow to thaw to room temperature.

Delicious with a hot cup of tea, covered in fresh fruit or local fresh honey, or just as it is.

Charlotte

Mocha Coffee

You probably have what you need to make Mocha Coffee already except for Lucky Charms marshmallows (just for fun) Photo by Charlotte Ekker Wiggins)

You probably have what you need to make Mocha Coffee already except for Lucky Charms marshmallows (just for fun) Photo by Charlotte Ekker Wiggins)

Mocha Coffee

A friend of mine recently mentioned that she sometimes carries hot chocolate packets with her and makes her own mocha coffee. As we continue to work from home, it’s good to know some of these fun hacks to make a special treat instead of leaving our homes and shopping for drinks.

Now this isn’t one of those complicated coffee drinks although I suppose you can have fun trying a number of additives. For this drink I just tried regular home brewed coffee and hot cocoa mix.

Homemade Mocha Coffee

One cup of brewed hot coffee

Hot cocoa mix to taste

Marshmallows optional

Start with a tablespoon of hot cocoa mix, then keep adding to taste. The amount may depend on how strong your coffee is so take your time to find the right combination.

If you don’t have hot cocoa mix, you can make your own; I have the hot cocoa recipe posted in this blog. You can also use unsweetened cocoa power.

Mocha Coffee with Cocoa Powder

One cup hot brewed coffee

  • 1 tablespoon unsweetened cocoa powder

  • 1 tablespoon white sugar

  • 2 tablespoons milk

The Lucky Charms marshmallows are purely optional and a lot of fun.

For other recipes, try the American Illustrated Encyclopedia of Cooking.

Charlotte

Pizza Open Sandwich

This open sandwich starts with cheese, then you add your favorite toppings. Photo by Charlotte Ekker Wiggins)

This open sandwich starts with cheese, then you add your favorite toppings. Photo by Charlotte Ekker Wiggins)

Pizza Open Sandwich

I didn’t realize how exciting some people might get over this until I made one for a recent visitor. As we all settle into doing so much more at home, this is an easy way to get a pizza vibe without all of the calories.

You will need:

Your favorite cheese (this is sharp cheddar; Monterey Jack is also a good choice)

Your favorite multi-grain bread; pick something with substance to hold everything.

Tomatoes

Optional: mushrooms, onions, green peppers, olives, meats, butter

To make:

Toast your bread.

Spread butter on toast (optional) then top with slices of cheese. Make them the same size so they all melt at the same time.

Add your favorite toppings. I tend to favor vegetarian pizzas so the more vegetables the better.

Toast again until cheese melts.

To serve:

Cut in half or quarters.

Enjoy!

Charlotte

Zoodles

Zoodles with diced fresh tomatoes and turkey meat balls, so good! (Photo by Charlotte Ekker Wiggins)

Zoodles with diced fresh tomatoes and turkey meat balls, so good! (Photo by Charlotte Ekker Wiggins)

Zoodles

When we lived in southern Illinois, our farming neighbors would bring my mother their extra zucchini. And for a good reason. My mother made THE best zucchini bread with walnuts. But soon the zucchini bread’s charm would run out and we would freeze the extras to enjoy later during a cold winter weekend.

So what to do with that extra zucchini in the meantime?

Zucchini is actually a versatile fruit that can be used in a variety of ways. (Photo by Charlotte Ekker Wiggins)

Zucchini is actually a versatile fruit that can be used in a variety of ways. (Photo by Charlotte Ekker Wiggins)

We may think of zucchini as a vegetable but on the vine where it grows it’s actually a fruit. It belongs to the same plant family as cucumbers and gourds. It is better categorized as a type of summer squash. It's also totally edible; the skin, seeds, and flesh are all full of phytonutrients. In terms of color, it can range from a dark, emerald green to a yellowish hue.

If you haven’t tried a zucchini, it has a mild flavor. What’s better yet is that it takes on the flavors of what are added. Sautee in olive oil with a little garlic and you’ll taste the garlic. Purée it and add it to muffins, and it becomes a sweet addition to the batter. The summer squash adds to a dish and never overpowers the other flavors. That's why it's such an easy and nutritious addition to so many foods.

One of my favorite ways to enjoy zuchini is to make zoodles, or zucchini noodles. Why yes, I was immediately attracted to this zucchini version because of the name, I mean who doesn’t get a smile just saying zoodles?

Now there all all sorts of little kitchen gadgets you can get to make a variety of zucchini noodles to substitute for the various pasta noodles.

I just used what I had in my kitchen to get a plate of zoodles to taste test.

This plate of zoodles must have taken maybe 5 minutes to make. (Photo by Charlotte Ekker Wiggins)

This plate of zoodles must have taken maybe 5 minutes to make. (Photo by Charlotte Ekker Wiggins)

Depending on how much work you want to do for your meal, you can serve zoodles as is. I enjoyed the zoodles with fresh diced tomatoes and pre-made turkey meat balls.

Baked Zoodles

If you want your zoodles cooked, here’s how to bake them.

Once shredded, spread them out on a baking sheet.

Sprinkle with salt.

Bake at 350F for about 15 minutes to get them al dente as you would pasta.

Stir Fried Zoodles

I also tried zoodles stir fried in olive oil. Don’t recommend it or the zoodles will get mushy.

Before stir frying, place the zoodles in a colander sprinkled with salt and let sit for half an hour.

Wash the zoodles and press with a kitchen towel or paper towel to remove moisture.

Then you can add to a pan with oil, mixing for 3-4 minutes while stirring all of the time.

Since this is a dish for summer consumption, I will probably stick with the basic, uncooked zoodles. Nice to have a quick dish I can throw together with garden produce and not just have garden dreams about it!

Charlotte

Sourdough Bread Recipe

A slice of homemade toasted sourdough bread with a cup of tea. (Photo by Charlotte Ekker Wiggins)

A slice of homemade toasted sourdough bread with a cup of tea. (Photo by Charlotte Ekker Wiggins)

Sourdough Bread Recipe

Sourdough is not a dish often associated with Missouri cooking. No doubt summers spent in San Francisco with relatives as we grew up influenced my choice of breads, and favorite ones at that. If there is one bread I enjoy with a cup of tea in summer it’s a slice of sourdough bread.

During the COVID 19 quarantine I tried to make my own sourdough bread starter with dismal results. Then a friend was kind enough to share her starter and I was in business. This recipe is very simple and easy to make.

Sourdough Bread Recipe

You Will Need:

  • 1 cup sourdough starter

  • 1 ½ cups warm water

  • 1 ½ teaspoons salt

  • ½ cup white sugar 

  • ½ cup corn oil

  • 6 cups bread flour

IMG_2603.jpeg

To Make:

  • Step 1

    Mix sugar, corn oil, salt, water, and 1 cup of sourdough starter together in a large bowl. Sift the flour and add to the mixture. Grease or oil the dough. Place the dough in an oiled bowl, cover, and let rise overnight.

IMG_2607.jpeg
  • Step 2

    The next day, knead the dough for 10 minutes. Divide in half, and place into two greased 4 x 8 inch bread pans. Allow the dough to double in size.

  • Step 3

    Bake at 350 degrees F (175 degrees C) for 40 to 45 minutes, or until bread is golden brown and taps hollow. Turn out to cool on wire racks.

Homemade sourdough bread ready to freeze for later use. (Photo by Charlotte Ekker Wiggins)

Homemade sourdough bread ready to freeze for later use. (Photo by Charlotte Ekker Wiggins)

Toasted sourdough bread is good with a slice of cheese and sun tea. I also enjoy it with a fresh homemade salad.

And the memories. Well, those are yours to make!

Charlotte

Shortbread Sugar Cookie Recipe

Shortbread cookies ready for baking. (Photo by Charlotte Ekker Wiggins)

Shortbread cookies ready for baking. (Photo by Charlotte Ekker Wiggins)

Shortbread Sugar Cookies

I have a friend who has a truck. That means whenever I need to pick up something, or get something moved, I call him. And he’s usually right where I need him.

So when I asked him what kind of sugar cookies he wanted, he used to tell me anything would do. Then we graduated to simple sugar cookies. Chocolate chip cookies went over well but I knew I still didn’t have the favorite recipe. He finally confessed. He likes shortbread cookies.

What’s the difference? Shortbread is a less sweet, more dry cookie, perfect for that late night cup of coffee, or tea.

Shortbread cookies are easy to make and even easier to decorate if you want to get fancy. This is a simple cookie recipe.

Shortbread Sugar Cookie Recipe

You will need:

  • ½ cup butter, softened (1 stick)

  • ½ cup powdered sugar

  • ¼ tsp vanilla extract

  • 1 cup all-purpose flour

  •  Writing icing or decorating gel (optional)

To make:

  1. * Preheat the oven to 350°F (180°C).

Four basic ingredients are the foundation of this cookie. (Photo by Charlotte Ekker Wiggins)

Four basic ingredients are the foundation of this cookie. (Photo by Charlotte Ekker Wiggins)

  1. Add the butter, powdered sugar, and vanilla to a mixing bowl. Stir until well blended. Stir in the flour and mix until a dough forms. You may need to use your hands!

  2. Move the dough to a well-floured surface. Roll dough out until it’s ¼” (6 mm) thick.

  3. Lightly dip the cookie cutter into flour and cut out as many cookies as you can. Move the cookies onto a cookie sheet. Collect the dough scraps and repeat.

  4. * Bake for 10–12 minutes, or until the edges of the cookies are a light golden brown. Remove the cookie sheet from the oven to a cooling rack and cool for 2. Use a turner to move the cookies to a cooling rack.

  5. When the cookies are fully cooled, decorate with icing or gel.

My friend says he doesn’t want icing so I settled for sugar sprinkles.

I may try him out on icing next time.

Charlotte

Baked Chicken Paprika Garlic

Don’t toss the cooked celery and onions, they make a delicious side dish. (Photo by Charlotte ekker wiggins)

Don’t toss the cooked celery and onions, they make a delicious side dish. (Photo by Charlotte ekker wiggins)

Baked Chicken Paprika Garlic Recipe

Several things before I share this recipe:

  1. I am in no way a fancy or accomplished cook. I share my recipes and culinary adventures to encourage the rest of you to get back in the kitchen and make your own food. Not only is it healthier because you know where it came from, but you can make simple delicious recipes and freeze extra for later consumption. And it will give you a nice feeling of accomplishment!

  2. If you start looking at cost, you will see that cooking your own meals is less expensive than buying prepared food. Kids will enjoy “playing” with food by helping you cook and you can have fun experimenting together. And

  3. My Hungarian father believed any dish was better with paprika, lots and lots of paprika.

  4. This dish is even better the second or third day after the paprika and garlic have had a chance to marinate.

  5. Don’t toss the cooked celery, onions and garlic, they make a delicious side dish!

  6. Start with this basic recipe, then add the seasoning you want to try.

Trying out Penzey’s Baked Spanish-Style Paprika on this baked chicken, (Photo by Charlotte Ekker Wiggins)

Trying out Penzey’s Baked Spanish-Style Paprika on this baked chicken, (Photo by Charlotte Ekker Wiggins)

Bake the chicken and vegetables covered in a 325F oven for 45 minutes to 1 hr.

Paprika Garlic Baked Chicken coming out of the oven. (Photo by Charlotte Ekker Wiggins)

Paprika Garlic Baked Chicken coming out of the oven. (Photo by Charlotte Ekker Wiggins)

Baked Chicken Paprika Garlic Recipe

This is for 6 chicken thighs. You can use any other favorite chicken and turkey parts. I like thighs because they are built in portion control, about 3 ounces per thigh without the bone.

You Will Need:

6 chicken thighs

1 large minced onion

6 cut up celery stalks (minimum)

4 teaspoons chicken bouillon

2 teaspoons garlic powder (or one fresh minced garlic)

Paprika sprinkled on both front and back of chicken thighs.

Salt to taste.

To Make:

Remove chicken skin and any attached fat.

Place paprika-dusted thighs in dish. Add onions, garlic powder or fresh garlic, cut up celery and chicken bouillon.

Fill half way with water. Gently mix. Cover with aluminum foil or lid.

Bake at 325F for an hour or until the chicken falls off the bone.

Allow to rest for 10-15 minutes before serving.

Deboned thigh in 1-inch of juice ready for freezing. (Photo by Charlotte Ekker Wiggins)

Deboned thigh in 1-inch of juice ready for freezing. (Photo by Charlotte Ekker Wiggins)

I debone before freezing. I also include about an inch of the juice in the bottom of the container for when it is reheated. The juice helps keep the baked chicken moist.

If you are just starting to cook, pick up a good basic cookbook like the 2007 American Encyclopedia of American Cooking. Learn the basics, then have fun in your kitchen!

Charlotte


Easy Tuna Salad

Ready to enjoy this tuna salad on my sunny deck. (Photo by Charlotte Ekker Wiggins)

Ready to enjoy this tuna salad on my sunny deck. (Photo by Charlotte Ekker Wiggins)

Easy Tuna Salad

When we were growing up quite poor in southern Illinois, this was one of my mother’s “go to” recipes. With a few tweaks, she could go from feeding 2 to feeding 8 without missing a beat. Whenever I see a 2 oz. can of tuna I remember my mother pulling out the Charlie Chip potato chips and eyeing the loaf of bread, just in case.

If she needed to stretch the tuna salad, she would make sandwiches and add potato chips on one side of the bread.

Easy Tuna Salad Recipe

You will need:

2 oz. can of tuna packed in water

Lettuce of choice and garden greens

Finely chopped onions, either red or white

Mayonnaise or light Ranch dressing

Optional:

Fresh blueberries

Fresh strawberries

Letting this sit for a couple of hours to let the onions marinate makes it tastier. (Photo by Charlotte Ekker Wiggins)

Letting this sit for a couple of hours to let the onions marinate makes it tastier. (Photo by Charlotte Ekker Wiggins)

To make:

Drain water out of tuna; give tuna water to a cat for a treat.

Fluff tuna in a bowl. Add torn head of green lettuce.

Toss with mayonnaise or ranch dressing. Start with a couple of tablespoons, then add more to taste.

Add minced onions; toss again. I like to let this sit in the refrigerator for a couple of hours to let the onions marinate.

Right before serving and eating, sprinkle bluebirds or sliced strawberries on top.

To easily extend this dish, you can also add more lettuce.

If you are just starting your culinary adventure, or are looking for a good Mother’s Day gift because Mom is, get her something where she can write down her favorite recipes and write her own cookbook. You can buy this one or make one from a nice loose leaf binder.

It’s hard to beat the good basic favorite recipes!

Charlotte


Whipped Coffee

Dollop of homemade whipped coffee on a muffin, yumm! (Photo by Charlotte Ekker Wiggins)

Dollop of homemade whipped coffee on a muffin, yumm! (Photo by Charlotte Ekker Wiggins)

Whipped Coffee

Many of us are quarantined at home, some rediscovering their kitchens and why they even have one. I have always enjoyed my kitchen, approaching it with a creative bent more than anything else. I sometimes just read recipe books for the sheer inspiration of what else I can combine without exploding. That’s a long story involving my two younger brothers and I experimenting in the kitchen leaving a huge tomato stain on my mother’s kitchen ceiling. So when I heard about the latest fad, whipped coffee or Dalgona coffee,I had to try it.

Now I used to drink coffee. A lot of it. I stopped more than a decade ago at a doctor’s recommendation, with maybe a handful of forays when I was too tired to safely drive, or stay awake at a conference. Or there was a slice of homemade chocolate pie with a good friend and even better conversation!

Whipped coffee is not new to the rest of the world. Dalgona Coffee (Korean Coffee), Frappe Coffee (in Greek) and Beaten Coffee (in India.)

Whipped Coffee Recipe

You will need:

2 tablespoons instant coffee*

(*one of those long skinny packets of instant coffee has 2 tablespoons)

2 tablespoons sugar

2 tablespoons warm water

Using a little deeper bowl will help to keep coffee mixture from going all over. (Photo by Charlotte Ekker Wiggins)

Using a little deeper bowl will help to keep coffee mixture from going all over. (Photo by Charlotte Ekker Wiggins)

To make:

Mix all three together until instant coffee crystals melt.

Whip to stiff peaks. Some claim 3-5 minutes; mine took almost 10 with a beater on my hand mixer and it still wasn’t light and fluffy, more like a glob.

The challenge with whipping this is getting a small enough container to keep ingredients in one enclosed spot for easy whipping. I finally found a small round glass container that would hold the mixture and still allow for the beater.

Now when ready, this is supposed to look like a caramel whipped topping. Mine was more of a dense mixture. Placing it in the refrigerator helps to solidify it.

A little goes a long way, I could easily use this on 4-6 items, such as:

Add to warm or iced milk. Mix. I added my sample to a glass of cold milk. That was surprisingly good!

Also tried it on one of my homemade muffins. Nice little added flavor!

I suspect this would also be delicious on chocolate pudding or chocolate pie. I have that on my list to try next.

What do you think, have you tried and do you like whipped coffee?

Charlotte

P.S. Oh, the greenery on the whipped coffee? A leaf of fresh, homegrown catnip from the stash I am currently drying. I dry them for my homemade cat toys and am going to make tea for me out of them. I don’t use harmful chemicals in my garden so the dried catnip will be safe for both uses.